Recreating A Vintage Hairstyle - Betty Grable | Using Hair Padding
- Posted on 04 August, 2022
- U Part Wig
- By Anonymous
Shop my beauty line -
My IG-
https://www.instagram.com/dafna_barel
Hair padding-
https://store.vintagehairstyling.com/b...
Hair comb-
https://lucilleslocksshop.co.uk/brushe...
My earrings by-
00:00 Intro
04:20 Vintage hairstyling and vintage hair pieces
07:40 Preparing the hair padding
13:30 Updo
22:48 Rolling the curls
24:59 Finishing touches
27:40 Outro
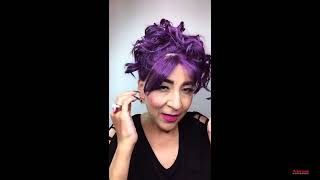
Hello and thank you for joining me today for this video, my name is Dafna, i'm a professional makeup artist and hair stylist, and i mainly do tutorials for vintage and paint of inspired, looks and also i'm an owner of an amazing beauty, brand called Dafna beauty, which Offers a lot of makeup products that can be used to create peanut looks a lot of it. I'M wearing right now, like D, perfect red, which is this liquid, lipstick, the eyeliner, the rose glow, which is the blush and highlighter, but today i'm actually going to be doing a hair tutorial. It'S been a while, so i think it's time in general, it's been a while since my last video, because i've been so busy with the launch of my latest full line of makeup and going to viva las vegas, which is a huge rockabilly festival and ever since Then because i've been in such like a kind of an intense role, i would say in the last months i've kind of experienced like a little burnout feeling and i've been a bit low in energy, and i tried filming a video, but i don't know. I look like i'm so tired and so um empty of energy that i couldn't even um edit it because it's kind of like has a weird vibe, but anyway i decided not to um linger too much on it and just film some hair, tutorials and makeup tutorials. Coming up that, i had in my mind for a while to do so. The tutorial i'm gon na be doing today is kind of a recreation of a vintage style. If you've been following my channel, you know i've done it before so today. The hair we're gon na recreate is the iconic betty, gravel hair on, like the most famous historic pinup photo of all time. I think sorry, if it's not exactly a fact, checked, but i think it's like at least for the second world war that was like the iconic like pin-up photo of the time. So it's this one right here. I think this hair is super cute. I really love it and i think it's a really great style to do with this kind of hair, which has been set in rollers and already brushed out yesterday in like a vintage waves kind of style, i didn't roll it again before going to sleep so today It'S like super tired, but it still has this kind of um shape to it. That is going to be really easy to roll again and curl like without using anything else and no curling iron or anything, and i'm just gon na be like using this. Like old um roll set to do an updo, so i think this is really great if you're like in an event that is like a few days long like a festival or something like that or just in your day to day, if you do tend to wear Your hair in like rollers and brush it out this is a great style to do for, like the second or third day of this set. If you don't know how to roll your hair in rollers. Of course, i have some videos about that as well. So i'll put like a little card for that too. So this is a great style for a few days after rolling your hair and um. I just think it's a really cute hairstyle, because it's like a puddle, but it's really big um. I am i've never tried to recreate it specifically, so also i like to do things that i haven't done before when i'm filming a tutorial. So it's not boring for me and in addition to creating this a specific hairstyle, i'm also gon na show you a little trick and recommend like another small business that i really like, which is vintagehairstyling.com, and they have a lot of like books for vintage hairstyling which Actually, really helped me um start learning how to do so before, like the age of like countless tutorials on youtube, she has really amazing books and she has an online shop where you can get like lots of products. This is not like paid or sponsored or anything. I just met her at viva and she gave me like this little thing. I'M gon na show you and i'm really excited about it. So i wanna show you how i use it. I'M gon na kind of use it to create the hairstyle that i'm gon na be doing anyway. So just so, you know in general, in vintage, hair, styling and um. Also, like improper, like the old days, they would use a lot of like paddings or hair pieces or even wigs in a lot of like the old hollywood movies, you watch, they use wigs and like four hair pieces. So it's not something new. It'S not like new technology, it's something that's been around forever and also, i think, like a lot of people have like this imagination that, like all the hollywood starlets had like the best hair and everything, but it's kind of, i think opposite from the truth. If you kind of hear a lot of stories like jean harlow, which was like the original, a blonde bombshell and she kind of brought in the fashion of like platinum blonde, she would kind of bleach her hair on a weekly basis which, as someone with bleach hair, I can tell you is insane and of course it was in the 30s so like her hairdresser would use like a mix of like um like bleach and oxygen like something really really horrible and toxic, and she would go through this painful process once a week. So that's insane just for reference. I bleach my hair every six weeks and even though um it's six weeks, it's still like suffering and it's barely holding in the pressure of all this bleaching. So bleaching, your roots on a weekly basis is insane. So, as you can imagine, there were consequences and a hair kind of started falling off, which makes sense um a bit before like she died. So this little story is just to let you know like nobody has perfect hair, you don't need like perfect hair and to do vintage, hair styling, and it's totally. Okay, if you feel like your hair, is thin or if it's nothing, but you just wanna use some tricks. If you watched other videos in my channel, you know i've been known to use a lot of like hair pieces and hair donuts and sometimes cut them open and use them for different hairstyles. So i think um. These are like amazing tricks to have, and sometimes it allows you to not over process your hair, like not overtease it over curl. It use too much heat and stuff like that. It can damage the hair. So it's nice to have like lots of tricks up your sleeve, so in history there was this thing that people used called hair rats which sounds horrible, and we have many rats here in the south television so like just hearing the word they read is super triggering For me, but anyway, they just used to like collect hair off of brushes and kind of um. Do it every day until they have like a a bunch of this like falling out hair and then kind of use. It um, as we use like hair, donuts or stuff like that and and kind of use it to fill in hairstyles, so even as a hairstylist who is paid to touch stranger's hair on a daily basis, i still find it kind of creepy. So i guess, as someone who doesn't do, that it sounds even more creepy to you, that's why i think this trick is amazing, so this is actually um what i got from lauren of vintage hairstyling, it's already open. So this is the card it came in and it contains a like two of these braids and two of these hair nets. And yes, it's pink. It'S crazy, like i love that she has this in many many colors, so when she gave it to me, i was like oh, like a hair, braid, okay yeah. I guess i can do something with it, but then i opened it and i saw the instructions - and i was like - oh my god like this - is just genius. So what this is is actually just synthetic hair. It'S just in a bright because that's like how you can just get it and do whatever you want with it, and the hair net is to kind of put all this like synthetic hair that we're gon na tease into like a shape. So, just to show you the other braid that i got with this and i already have been using it's this, so this one i decided to shave in this form because it's like really good for, like um like low updos and or like for a bob hairstyle. You can shape it in whatever form you want, and today we're gon na do like a round um circle kind of shape. So i just wanted to show you how it looks when it's in this shape, but i saved the other ones, so we can do it together. So look at this pink hairnet. This is so useful. I'Ve been using oops i've been using this for a while now and we're gon na take this braid and we're gon na tease it and back on it until it's like a huge um circle shape, because the style we're gon na do today. If you see from the picture, it's like pretty pretty uh big, which is nice on betty grebel, because she's like she looks like she's tiny, but i'm like not a petite person at all, so i'm gon na have like a huge hairstyle and in real life. I'M just gon na be like huge, but i'm okay with it. You know anyway, after you open the braid. It looks like this. You see, one side is like folded and the other one is um, just the ends of the hair and we're gon na tease it. So i'm gon na be using um this comb, i got from a lucille locks and i don't know what to tell you about like the technique. I'M just gon na start and see what happens so. I'M just backcombing it i'm sure, there's like a better technique and there's actually instructions. So i guess it says there how to do it the more like proper way, but i'm just randomly backcombing it until it's like a huge fluffy mess and i'm not scared, because i'm gon na put it in a hairnet anyway. So it doesn't really matter how messy this is. Okay, so we have this horrible mess and i'm just gon na kind of gather it into a ball, and i'm wondering if this is enough yeah. I think it's big enough, but you can see there are parts that aren't really teased like you can totally tease it to be bigger than this, and i would use some hairspray actually just to make it like stay in a ball shape better. Okay, now we're gon na take the hair nets whoops the lighting really changed, so i'm taking this hair net and i'm just putting all of this inside of it. As you can see, we kind of need to close the net, because, right now it's open and um hair is like kind of coming out of it. So i want to lock it using bobby pins, so i'm taking these two sides and i'm gon na lock it with light pink, uh bobby pins that are from lauren's shop as well, and these two sides now don't worry that it's like squished a bit. I'M gon na be rounding it again, so i'm kind of locking it it's not that complicated as i might make it seem, but i'm kind of just locking it in and out of the net and as i mentioned, you can totally make it bigger, but i'm just Going to be using this as a base - and i think this is a really useful um like size in general and there's going to be a lot of hair over it. So i think this is totally enough again just so you see you can make it like round or this shape by the way. If you don't want to spend money on this, you can totally do what i told you that people in the past used to do just collect your hair, and you can slowly um kind of build up into this amount and put it in a hairnet so like. If you don't find it creepy totally go for it. So let's start prepping the hair. So because, as i mentioned, it's like an old set and it looks kind of dry and tired. So i'm just gon na use some shine spray to revive it. A bit. Okay and brush through it sorry, i moved the camera up a bit because most of the action is gon na be in this area, but i'm just brushing the hair. Nothing interesting. Okay and next, i'm gon na be brushing the whole hair up. So i'm gon na be kind of doing this out of frame for a second. So i have my whole hair um brushed up and i'm gon na clean this up and by brushing it and using a hairspray notice how i'm kind of making the most of my hair come to this area because um, the updo is gon na, be here kind Of and not like in the center of the head more like in the front, so i'm bringing my hair towards this area. What i don't like when i do this is that this hair is like like going up, and i want it to go kind of behind and up, as you can see in the reference photo. So what i suggest doing is just taking this part out. You see like a small um kind of area here and do the same on the other side and then continue on to the um to taking of the hair towards in the updo and i'm gon na be using some medium strength. Hairspray. I always get asked what brand this is, but i'm sorry it's just like a local brand, but you can totally just use whatever medium strength. Hairspray you can find. So if i wasn't using this hairpiece, i might have just used like a hairband to tie this area and just styled my whole hair, but because i wan na um put this in the middle, although i still kind of can do it, but i kind of prefer To do it, the not lazy way which is using bobby pins and kind of lock this whole area um up, so i'm kind of creating like stitching kind of like going in one area at a time and locking also the previous bobby pin and i'm gon na Add a few more just in case at this point i can't see this area, but i'm just feeling where i feel some bobby pins might be missing and you see now it's completely locked in place. Let'S use some more hairspray. Okay. Now, let's do the sides. So if i would put this like up as i started to do, there would be like this annoying fold and i wanted to go kind of more to the back and then mix into it from the pictures of the reference we're using. You can see there's actually a picture of the front of this like iconic photo and you can see like this area went kind of like really really big. I feel like it won't be too flattering for me personally, so i'm gon na be back coming just a bit, but i'm not gon na go as big a as in the photo just a little um more subtle, but the backcombing does help it um be more. Even and smooth yeah, i feel this looks really nice, so i'm gon na lock it using a bobby pin or two sorry for randomly using pink and gold bobby pins. I just grab what i find. I hope they're gon na be hidden anyway, so it doesn't matter too much and do the same on the other side. Okay, so we have the whole hair right here and let's insert the padding and just kind of dividing my hair into two groups. So i can place the padding in the middle just in the center of where i want most of the volume to be i'm gon na gently brush all of this. So it's gon na be a bit easier to work. That way - and let's put it aside and this as well - because it's on my face and i'm getting hot okay, so i'm taking this padding and i'm just gon na place it here and secure it using bobby pins, i'm gon na be securing it a bit extra. Well, because i'm gon na be kind of um, adding like rolling the hair and kind of um securing it to these things, so it better be secured to my head. So i have all this um hair right here in my hand, and i'm gon na be kind of folding it up towards this, like padding area and i'm gon na be trying to leave the ends of the hair, be like kind of covering this uh whole thing. So i don't want my hair to be folded like this, but the curls to be like the more a prominent part. So this is a matter of just like um. Some. You know like having a certain touch and some experience and also it might not work on the first time you tried. So do it again until it looks something like this and i'm gon na be taking it back a bit to make sure it's covering everything. I don't want these parts right here, so i'm gon na be taking it out and am taking them up again. I can do it later, so i can just leave the parts i'm not happy with and i'm gon na work on them in a bit. So what i'm gon na be doing is kind of spreading and the hair on this padding and i'm gon na start taking some pins and inserting them i'm using u-shaped pins and it's okay. If some parts are out because i'm gon na be just curling them and one by one to cover the messy parts, so i'm just using u-shaped pins. So i can start getting um more control over all of this and when i'm taking parts up, i'm gon na be rolling them a bit like right here. Just so, you know, if you took a hair net over all of this and just put this in a hairnet, it would look pretty good, but i don't want to use a hair net and also i want to make sure it looks pretty curly like the reference And also, i want to tell you that if this wear fresh walls, i mean not like the day after after i went to sleep without re-rolling and everything. So if the hair would be more curly, this will obviously work more easily and you wouldn't need to carry like the ends of the hair. So much so wherever you can find loose ends kind of take them out, take them apart and re-roll them, because we do want to have a few more defined curls on top of this whole mess. So now the whole hair is up, but i'm not really happy with the overall shape and proportion. So i'm gon na be using a the back of this comb to kind of push things in place where i want them to be and also use some bobby pins to put things more in place. So there's like a dent here, so i'm gon na be using this in metal part of the comb to push things up. Okay, this is starting to look like something anyway. I haven't been using any hairspray until now on this area, so i'm gon na be starting to use some hairspray and hopefully make this make sense more. So i'm not using hairspray and to set everything more to um help me style it, because it's making everything um. You know like stay in place, so i'm um using the hairspray and then kind of um pushing in some things i feel like are um need to be kind of pushed in and making just the curls more in the right shape, and i keep kind of pushing Everything in the shape, i want it to be okay, so i think i'm pretty happy with it. I feel like if i would have gone out with this hairstyle, i might have used a hair net as well. I don't think there is a hair net in the reference, so i'm not going to use one, i'm just going to show you that you can barely see it and it holds everything more tightly together. So that's an option as well and also if this um bobby pins are bothering you just so you know that if you use more hairspray, you can just take them out. I just don't feel like using lots of hairspray right now and because i might take this out a bit later and also of course, you can use some hair flowers. So something like this or um like this would be super cute. There aren't any on in the original a reference, so i'm not gon na add any, but i think this kind of screams for some like hair flowers. So that's it. I really hope you enjoyed this video and, if you'd like to support me and my channel and my tutorials of course, and make sure to subscribe and comment and like and also feel free to check out my website for my beauty, products and the makeup that i Offer everything is super high quality, mega professional vegan cruelty, free and i ship worldwide. So if you need any new, a pin of makeup or just makeup in general, like lipsticks, eyeliner and blush highlighter, eyelashes, anything like that make sure to check out my website thanks again for watching this, video and i'll see you on the next one kisses.


Comments
Глеб Белов: Hello. As always, your hairstyle is amazing! And in combination with your makeup and a charming smile, it makes you watch the video until the very end!
Dr. Anarchy69: I wear wigs precisely because I don’t want to damage my hair but to also rock a lot of different colors.
SH Hubbard: I'll have to get the synthetic hair you used, but I also save my loose hair in a bag to do it the old fashionway. I love your videos and beauty products and your printable goal list!! You're amazing!!
piki piki green pepper: I’m so excited to see you published another video! Your hair is GOREGOUS in this tutorial ✨
Marcia Yshigue: