How To Install Lace Frontal Sew In Weave With No Glue
- Posted on 10 February, 2019
- Lace Closure
- By Anonymous
Hey Loves new video on How to installed Lace Frontal Sew in Weave with no glue
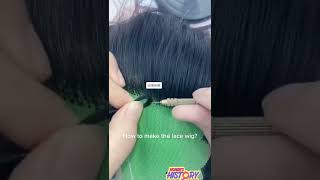
This is spice up faith spice it up yeah. This is beautifully fine, miss gorgeous pea, okay, she wants a lace-front, oh so in today, with some curly hair, she has a frontal and she got three bundles of hair, all right. She bought her own hair, and so I don't know where she got it from, but if she's nice enough - and she showed me where maybe I can find a length put it there for you guys, but I didn't get this hair. She bought her own hair. So hopefully she can show me where she got it from all right, so we're gon na get started with this sewing. Are you guys so starting off with our brilliant pardon? As you can see, her hair is very thick and coarse and it's all natural, so we're gon na try to get rid of all this tick here, okay, starting off with my first braid, you guys know if you are on my channel - and you already know this. Okay, my first braid when I do a sewing always goes around my nip area. This just helped. If my clients wants to do a ponytail or a little updo, they can always be able to achieve that, because I always saw a track on that rate of right. So my first braid always start from the ears and party of making like a u-shape form, and I go across the neck area. Okay, so this is gon na, be a lace frontals so-and-so for the rest of the race. All I do is just bring them straight back all right, so once I add my last breathe, I just get rid of my single tail that I have. I usually tuck it in between the other bridges to get rid of that tail, and this is how my back looks. Okay, I have my one single braid going across my neck and then the rest of the brace is just going all back. Okay for my lace, frontals, so in usually most of the time. This is how I do my breathing pattern. Okay, now we are ready to move on to the next step. Alright, the next step is the bald cap method. The ball cap messages help protect her edges from the lace. It also helps us a scalp underneath the lace okay, so you think I got to be glue spray. I spray all around her front LA and I use the got ta be gel and I get rid of her edges. Okay, i slick them back, making sure I don't have any other edges in the way all right. So once I have all of her edges, pull back and flick back, it's time to put her stockings on. Usually I tried to use a stocking - that's very close to my clients, skin too, so this is the brown stockings that I'm using for her today. Okay, once I put it on her head, I usually position it on her hair and then I go ahead and I um put a hole to the ear tabs inside of the ear so that the stocking lays nicely on the side of her ear. Once after that, using a got to be glue spray, I just used my fingers and I spray the got to be spread on her hairline and rub it in with my fingers just to make sure that the cap is nice and flat after spraying the cap down. I usually go in the middle of the cap and use my thread and needle and sew the cap down, because this is going to be a sewing and I'm going to cut off all the extra cap that I don't need and I'm also going to add weaving Net to the back of her head for her bundles, so I need the stockings to stay in place on the top. So using my thread and needle I'm going to sew from one side of her ear and make my way to the other side of her ears. All right so once I so the middle part down you guys can see now I have the cap is secured on her head, I'm just taking my blow dryer now and blow-drying the front of it just to make sure that got to be spray. I'M dry sand got to be glue dolly for edges with dry also, so I'm using my blow dryer just to make sure that is dry completely all right. So once the stocking is completely dry, it's time to cut off the extra stockings that I don't need all right. So once I cut off all the extra stockings that I donate in the back, I take my weaving net or my weaving net cap. This one is a weaving net cap, I'm just going to put it in the back of the hair. This just help the bundles has something to be soon onto. It also helps your sewing last longer, when you add a weaving net or weaving that cap. Now, I'm just taking my pair of scissors and I'm going around the entire weaving cap just to make sure that is to kill and it's in place. And then I'm just gon na take my pair of scissors and cut off the extra net that I don't need all right, so our lace front chopped base is ready. It'S time for us to start, I was sewing okay. I already went in here and tent my lace and I also tend to the stocking a little bit just to make sure that it matches her skin perfectly. Now I'm measuring the elastic band and the elastic band is what's going to hold the front row in place because we are not using glue for this sewing. This is just gon na be also in with are not using glue, but I need the front row to stay in place, so I have to on position the front row with the elastic band. So to do that, I usually measure the elastic band. Once I have my placement right, I'll cut it then I measured the lace front on the clients hair. Make sure that I have exactly where I need the elastic band to be at once. I sew the elastic band one and after measuring and so in the last event on the front row. This is how it looks now. They'Re elastic band is in place. The front row is ready to be put on. Okay, I usually ask my clients to help me hold the front row. I pour it on and I position a making sure that is covering my full cap that the baby here is over the bald cap that is nicely situated on the hairline and it's perfect around the years before I start my sewing all right once I have the Frontal position, I usually feel on a braid once I have the braid that I wanted to burn either to view. So I take my rat tail come and I make a part right in the middle. Usually is slightly off the middle part, and I party a jester gave me a roll, and then I take my needle and thread, and I starts to sew from the back going towards the front. This is what will keep the lace frontal in place as a sole in that it doesn't shift around or it doesn't move around and as I do this, I usually ask my client to help me: keep the lace frontal in place as I do the sewing now. I'M just gon na do the middle part. Then I'm gon na move on to the size and I'm going to do the both ear part moving on to the next side, just to make sure that my ear tabs are see, kill I'm using my tornado again and I'm sewing the ear tap down, making sure That is nice and flat. Moving on to the SAP heart, okay, I just want to hear a part, the roll again - and I took my thread and needle slowing this pipe down just so you guys can see exactly what I'm doing. I am using my thread and needle and I'm sewing from the back going towards the front and I'm sewing on a break. This white house makes your lace frontals so and stay in place without the glue and they kept it Staci kill. It doesn't shift around with the elastic band attached. Okay, all right! So once I have my front row sewn down nicely it's time to see, kill the back of the front row, and this is how the back looks. Okay, now using my thread and needle I'm gon na start from the middle and I'm gon na work, my way from one side of her head and then I'm gon na come back up and start again from the middle and work. My way to the left side of her head, okay, all right! So once I have my frontal zone down in the back as well, now the frontal is completed to kill and in place. This is how it looks all right all right. So once I have my front osoon down, I usually go ahead and prep my frontal making it ready for styling. The first thing I do is tick off the extra lace in the front, and I usually use my eyebrow razor to cut off the extra lace in the front part. And then I use my scissors and I cut around the ear tabs just to make sure that the frontal is nicely around the ears and is secure around the ear hurt. You find your way back after cutting the Escalade of the front. So next is making baby hair. She didn't want some baby hair, so I did part of the ten layer of baby hair that the frontal came with, I section it off, and then I took my eyebrow razor and shaving comb and I cut off the baby here. A little bit just so that the baby hair look more realistic in the front all right. Now that I have the baby hair all cut in the front, I want to lay the baby hair down with my Nairobi. Fumi wrap I'm just going to place it all over the hairline and then I'm going to make the baby hair slicked them down, and then I'm just going to take my Sendak scripts and wrap it and set her on the the dryer. Now, as I lay the baby hair down on this front, so you guys can see that parts of the frontal is lifting up a little bit, especially around the ear part. That tells you that I have absolutely no glue on this front. Oh, the only thing that's holding it in place is the sole in in the elastic band that helps to lace the lace extremely flat in the front. Now I tell all my clients that do not want glue on there. I'M lace front. Oh, I tell them to help the frontal stay in place. You have to lay your baby hairs down every night and you have to tie it up with a scarf to keep it in place that it does not move and it helps the lace stays flat in the front that you do not need the glue. Once I have the baby hair slicked down with the cynics, I put her under the dryer for about five to ten minutes to let her dry alright. So once I take out off the dryer it's time to put the rest of the hair on okay, I'm starting off with the back. She do have three bundles of hair, so I'm gon na try to squeeze as much hair in as possible. I do start off sewing the tracks on the elastic band on the sides, because I need elastic bands to be see, kill on the sides before I cut them, so I've usually sold the bundles on the elastic band. I saw the entire hair before I cut off the elastic band in the back. This is make sure that the elastic band is to kill before I cut it, that the frontal doesn't can't become loose now applying the bundles, I'm just going from one side of her head to the other side and I'm not cutting her webs, I'm leaving her wife As it is, I'm just doing a flip over method and moving my way to the next side. I'M going to keep sewing a bundle until I get to the top of her head now for the top of her hair. I have this small section left and I do have about half of the Terr bundle left. So I'm just going to soak this and I'm going to go straight across and move my way up till I get to the front all right. So now we add the top a very last end of the soul. In okay, I'm going to take a single wet, a single track, and this is the only space that I have I'm going to sew it as close as possible to the closure. And this will complete my soul. Are you guys so my soul in is finally complete. My lace, frontals sewing is come finally complete. You guys can see how perfect my tracks looks. Okay, my clothing is perfect. Okay, I love love the way my sewing looks. This is how I do most of my servants in my hair salon: okay, love. My end results now we're just gon na finish up this hairstyle, I'm going to finish up with styling it all right. You guys so I'm gon na check off the cynics rap now, and this is the baby hair with the cynics rap all this is how it looks slick down. It looks like I have glue on there, but I do not have any glue i'ma just laying down on her hell on really nice now, but I'm going to come through the baby hair just to make it look nice and relaxed and natural-looking okay. She do have in three bundles of this curl pattern, which is a water wave curve button. It'S a beautiful hair. The curls are gorgeous alright. She have on 118 and 216 with 116 front. Oh all, right now, I'm just gon na finish up. This tally, I'm taking a little bit of water and I'm going to spray it through the hair just to define the curls on the front. Oh then, I'm going to go in with Mike in I'm curling condition and I'm just going to add it to the curls just to make sure that the curls is nice and beautiful and shiny and just gorgeous. Okay, then, I'm going to take my small tooth comb and comb through the baby here to finish up the style. Alright, now that I have the curls all define okay, I'm gon na take my small brush and I'm going to comb through the baby here just to make the baby here look more natural in the front, and you can see how nice is laying down. Even after I brush it out, okay, this just make the front row looks really nice. It makes the frontal looks really really natural in the front. You don't have the baby here glued down, so your fall here. Okay, that doesn't look cute but yeah. This is pretty much it for this video. This is my finished. Look you guys there's so intense out so be absolutely stunning. I love the current part on her. She looks beautiful the hair curls, very beautiful, with water and some condition Adi. It just looks gorgeous gorgeous on her and, like I said this is a gluten so in front so install you can see me pour the lace up and it falls right back down. You can see me scratch the lace and it snapped right back scratch pull and it goes right back down. This is a gluten so in front to install okay, you guys this turned out very beautiful. It looks so natural on her. It looks gorgeous on her. Alright cause she have to do to keep this down. It'S still tied up at night when she goes to sleep right. That is pretty much it for this I'm glued as for sew in weave, if you haven't subscribed to my channel, make sure you subscribe for more videos like this. Thank you so much for watching. As always, I will catch you all in my next video bye. Finish. Luck. Nice, love it! Yes! Yes, you


Comments
Sydney Bean: What a beautiful job, this is exactly what I want! I’m trying to get everything together to get a really good quality sew in and a lot of the frontal videos use glue on their clients to secure the lace and I’d rather not use that if I can help it. I hope I can find a stylist near me that cares and does as lovely as a job as you did!
Melissa Gentry: I absolutely love this! I've been wanting this kind of sew in for ever! But no one seems to know how to do this without using glue/ glue spray. Where are you located?
PickledDickCarrot: I love this, good way to protect the hair while still making it cute and functional. Also, I like that you’re gentle with her, not pulling and pushing. Your model is absolutely stunning, her face is just gorgeous. Thank you for the content!! Very well done, professional and appreciated!!
Simply Apiny: Great Video and explanation I have some clients who request this sew in with no glue or adhesive like gel and I'm so confused on how it will look, finally a video, I instantly subscribed! I would love to see more videos like this especially exactly how you sew the elastic band like where you sew it on the frontal, that install is on point!
ee P: This is the best way to sew in and the model looks comfortable, and is very beautiful. I LOVE IT!!!!
Erika Harrison: Great video sis! Inspired me in my ways to start doing my own hair! ❤️ You did a phenomenal job!
Theresa Rivers: You did a beautiful job! Excellent instructions all the way through.❤
Lady Torres: Im impressed with the amount of skill and work that goes into this !!
Sandra Murphy: I am happy you shared this technique! I hate glue, so messy and itchy. Thanks beautiful work.
Mary Juke: Thank you for teaching this! It's beautiful!
Faith Andrea: What a nicely detailed video. Great job my Liberian sister . For the ears part, you can’t do nothing about it once there’s no glue involved. Basically I tell my clients you need to take care of your hair and learn how to do baby’s hair if you want it glue-less.
angela larkin: Beautiful! You did an awesome job!
genesis garcia: I did my first frontal and I’m so proud I usually never write on the comment but your video was very helpful thank you so much !
Tasha Winfield: Best sew in I've ever seen!! Congrats to you are a professional.
Justina Oyaluna: Wow! No glue at all. I love this method very much, unlike the once have seen so far, i prefer this method. Thanks for sharing.
Toni Miller: Thank you for the very detailed instructional video! Great job!
Felicia Link: Thank you so much for this video. I am on a chemo medication that caused my hair to come out in the front but not in the top and back. This method will work for me. It will protect the hair I have while my front and edges grow back. Thank you so much!!! You don't know how much this means to me.
GiggleGal215: Beautiful work with clear instructions. What more could we ask for? I would like to know how long did it take you to do this install and how long would your client be able to wear this?
Vivian Taylor: This was/ is the most informative video I have seen in a while. Very talented young woman thank you. Will be looking forward to seeing more of your videos.
Cinnamon VSG & Karaoke Diva: That came out so nice minus glue! Love it!!
Sandra Journet: GREAT JOB!!! LOOKS BEAUTIFUL I LOVE THE HAIR
diamondwata: Did a very nice job, looks very nice, love how you explain everything
Krazy Ki: I know this video is old but this is amazing! How long would this last before she needed to get it done again? And when her hair starts to grow in and a couple of weeks have passed, how could it be touched up? I wear a full sew in now and over time the sew loosens and my natural hair is growing in, so you can see it at the top. In order to touch it up, my styling rebraids my baby hair and moves the weave up to sew on the new braided hairline. So I'm wondering how would this sew in style be touched up and how often it would need to be.Would the hairline look bad?
Dianne November Songbird: Beautiful install. Love the hair..it looks gorgeous
Felix A. McNeill: You made this look so easy. Thanks for sharing. I'm about to give myself a raise!!!!!
C B: Extremely unique method! Amazing!
Styled by TeeTee: Thankyou for sharing your gift w us. This is soooo beautiful. I'll be doin my 1st frontal Tue. I feel soooo much more confident after watching your video. Very informative. God bless you
Joanne Collins: Just love the lace front sew in with no glue
TotallyNikaB: Great job!! Step by step details are amazing!
Michelle Vilbrun: I don't usually comment on hair tutorial but this was a nice sew-in this is exactly how I want my frontal to look job well done very professional
Patricia Luckett: Excellent work! The best I've seen so far.
zoelynn69: I love it, it looks so natural.
Renee Brown: She does a great job! Very unique and you can tell she very perfectionate about her work!!!
Kirstie McDonald: This is exactly what I’ve been asking for. No one seems to know how to do this. Would love for you to do my hair please!
Lizzy Love: BEAUTIFULLY DONE!
Cléia Barbosa: Simplesmente maravilhada com o resultado!!!
Adrianne L: Yes ma’am!! Fabulous job!! ❤️
Thelma Baatz: This looks amazing! How long does it last?
Tenisha Morrison: Very informative! I love this video ♥️
Kemi .A.: So informative sis. I can do this on myself now. I was worried the glue type might snag my edges Thank you again
tallsappi Colbert: Absolutely gorgeous, professional at its best. YES!!
Humbling Considerations: They way she does hair promotes hair growth and reduces hair damage. I see that because the braids are not to close or to tightly pulling at the hairline and she uses no glue because she cares. I would love her to do my hair like that. Beautiful work n client.
Verna Clemons: Awesome demonstration of how to do a hair sew in.
Callme Blessed: Wow what a great job. Best I've seen from a start to finish video. Nice work!
June Moore: Awesome never saw it done like that.. Blessing to you, thanks for sharing.
priscilla clark: Excellent Job!!!! It looks fabulous on the lady also!!!
Pat R: BEAUTIFUL! Great work.
Chynadoll Thompson: I love how detailed your video is...Great skills
Kimiah Cargill: I love this video I can see everything that you’re doing and learn so much thank you so much God bless
Lakia Carter: Thanks for your tutorial very informative, I've been hesitant to do one until now
Y M: This is everything, I love that curl pattern
qtbeddecor: Excellent video. This is professionalism at it's best. Great job!!!! xoxoxoxoxoxoxox
Donna Dee Diva: I LOVE how natural this looks! #perfection
D Reid: Wow! You really do great work. So talented! I like the texture of the hair you used. Can you please tell me where you got the closure? Also where did you get the hair? If you can post the link for both I would really appreciate it. Thanks.
Nurse 7Love: Amazing job!!! I want this to be my next install
Blessing Akinyemi: I love your job,very detailed
Glama Girl: Awesome job Thanks for sharing!!!
Ilara Santos: Wow, this is an excellent video. Amazing work.
Maul E.: Beautiful!
Deborah M: So beautiful what a b great job!
Tasia M: Thank you for sharing your expertise. You are a very good instructor.
JoanM Ferguson: Wow, you did a great job. She looks so pretty.
Michelle Walters-Johnson: Absolutely Gorgeous!!!
Nicole Wilson: This video gave me life!! Excellent job!
suzanne quashie: Beautiful!
Mardia G. Menyen: So beautiful ❤️
Rosemary Link: This is what I have been looking for AWSOME JOB
Ke'Shea Johnson: I LOVE this!!!!
Gloria Lourdes: You do such a great job!!!!! I so want you to do my hair.. <3
Sharon Harvey: I would keep this hair in for a long time I love it just wash dry and go lol this can serve forever nice well done
Unique Investor Concepts: Love the technique.. Gorgeous ♥️♥️♥️
Juliet Nwatarali: Finally! A video we all have been waiting for... Thanks for sharing.
QueenXimora: This by far is the BEST I HAVE SEEN. I CANT BELIEVE it could look this good without using horrible GLUES. Where are you located? I'd definitely would have you do my hair
Shapree Mallory: Fabulous!! U did that!!
OkikiWigs: Great job always sis.
Trenetta Brown: Beautiful hair Beautiful model
snip tip: Great work, great explanation
Renatta Isaacs: I really love the way you did everything.
MsRoni: NOTHING LIKE AN AWESOME HAIRDO TO MAKE YOU FEEL LIKE..."THAT GURL"!!...
ogochukwu Aniukwu: This is so nice and beautiful...thank you ...job Weldon
CHANEL D. QUEEN: Beautiful
Rita Isibor: Wow so beautiful, a job well done
Tercarla Davis: Great job I love it
Ann-Marie Duberry-Swaby: Love what you've done
Rika Que: Excellent tutorial!!!
sarah okojie: Great job
C B: very detailed in teaching.... love it girl, nice video
marcelle dupon: Magnifique ! Toujours magnifique la FabbulousC internationale ! Très beaux travail ! Rien à dire ❤️
Sukuoluhle Zikhali: Perfectly done.... I like it
Ericka Colden: OMG I love you just what I been looking for, to learn more ways and products I can use more updated. Love wigs, lacefronts good at putting on. But I needed to no how to lay down without glue thanks for sharing your crafts
Teewhy- Loves Food: This is beautiful...Job well done
Felix A. McNeill: This is beautiful
Beautiful Dreamer: Thanks for the information and detailed video.
Spigzy Boo: I want to know. How long did this whole process take? I’m trying to work in a good timeframe but it always takes hours. What’s a good time to do this? 3 hour?
Joy Davis: Its very pretty, you do a good job.
Charmaine Brown: Lovely great job
Isabela Cabral: Omg ur finishing is perfect!
Truth Makes U Free: Sis, you did a beautiful job. What your video shows is that you care about your client's hair. ❤ Oh and I think I hear some liberian
Zarasha1: She looks so good with that style. The front looks like her own hair. She knows she looks good honey.
Joe Jas: You did a excellent job to her hair she looks gorgeous.