How to part your hair 4 different ways using hair extensions
- Posted on 03 October, 2021
- Hair Knowledge
- By Guest Writer
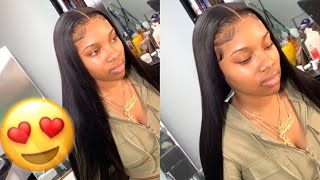
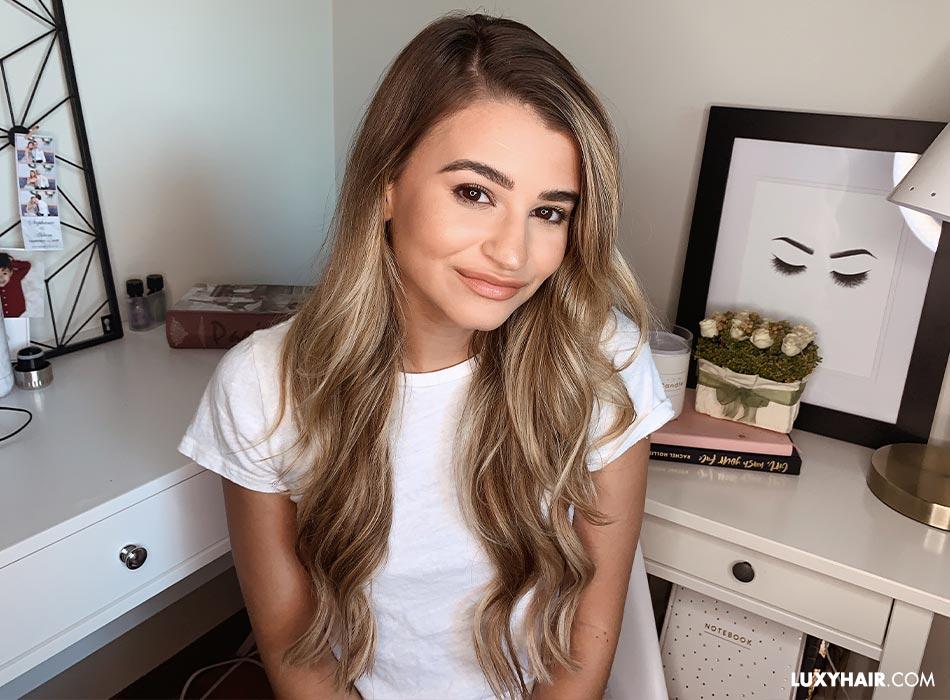
Looking for a simple way to change your hairstyle? Try a change of part.
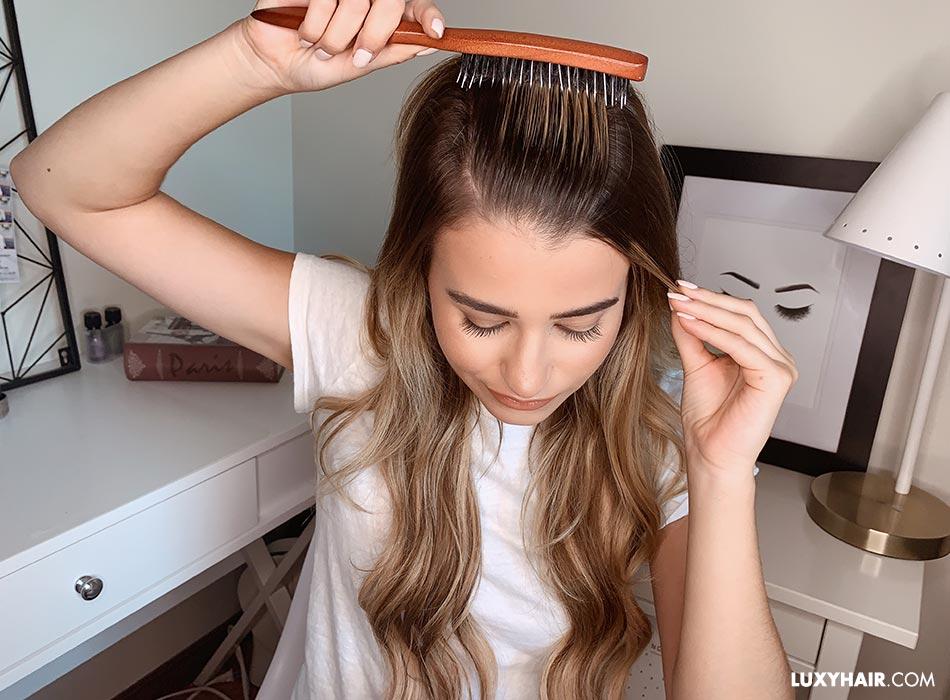
How you part your hair can highlight the shape of your face, as well as give your hairstyle some new life. With hair extensions, it’s just as easy to try out new hair parts as it is to try new lengths, volume, and even color. All you need is a comb, a loop hair brush to detangle and prep your extensions, and a little bit of styling product.
So whether you like your hair parted down the middle, off to the side, or flipped over for a flirty, carefree look, here are some simple steps on how to part your hair 4 different ways with hair extensions. If there is one look you gravitate to on the daily, follow these simple steps to try something new.
1. Middle part
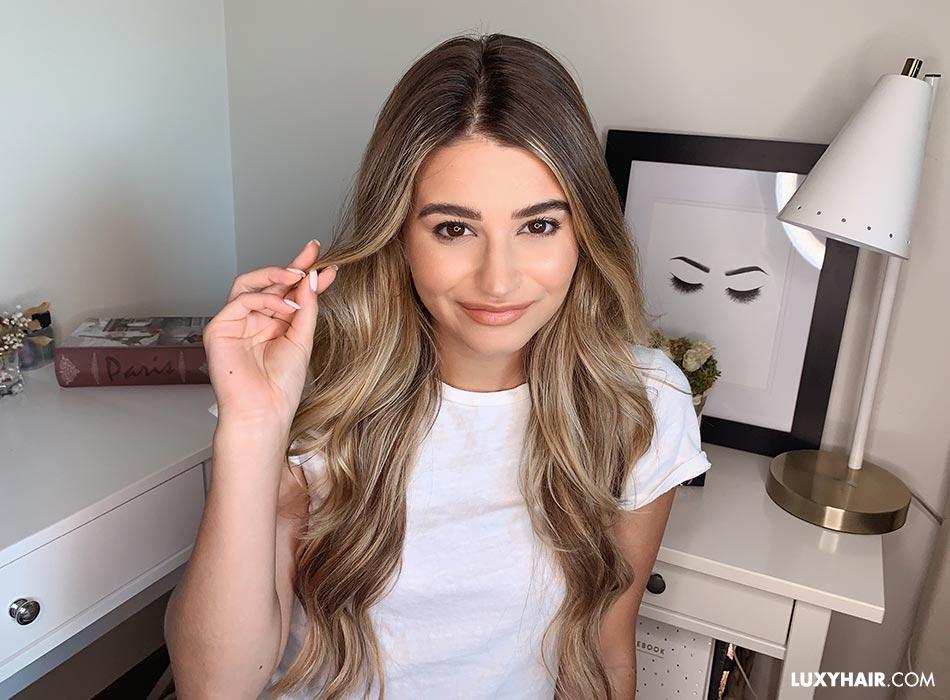
Let’s start with the easy one. The middle part is favored by women with all different types of hair lengths and texture. It’s easy and mostly flattering on all face shapes, but it especially does wonders for women with round faces as that middle split evenly distributes hair around the face, elongating it.
To get the perfect middle part, position your comb in the middle of your brows and split the hair evenly on each side. Use a styling product or dry shampoo to keep baby hairs or flyaways in place for a perfect, even line. A middle part is quick, easy, and versatile. Add waves to your middle part for a bohemian vibe or slick the hair down for a sleek ponytail, or a sharp, pin-straight look.
With a middle part, it’s easy to add extra volume and length with hair extensions to give your hair natural looking volume while easily concealing your hair extensions. Seamless hair extensions are perfect for a middle part, as they have a thin, silicone base that sits flat against your head, making them easy to conceal and blend with your natural hair. Because they feel light and aren’t noticeable through the hair, many women with thin hair prefer this type of extensions.
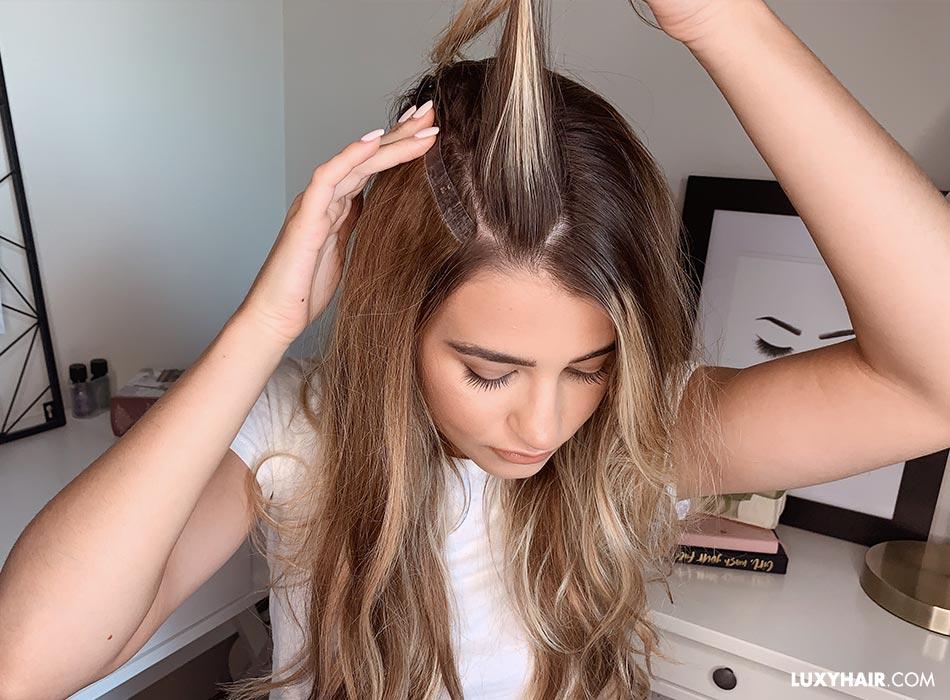
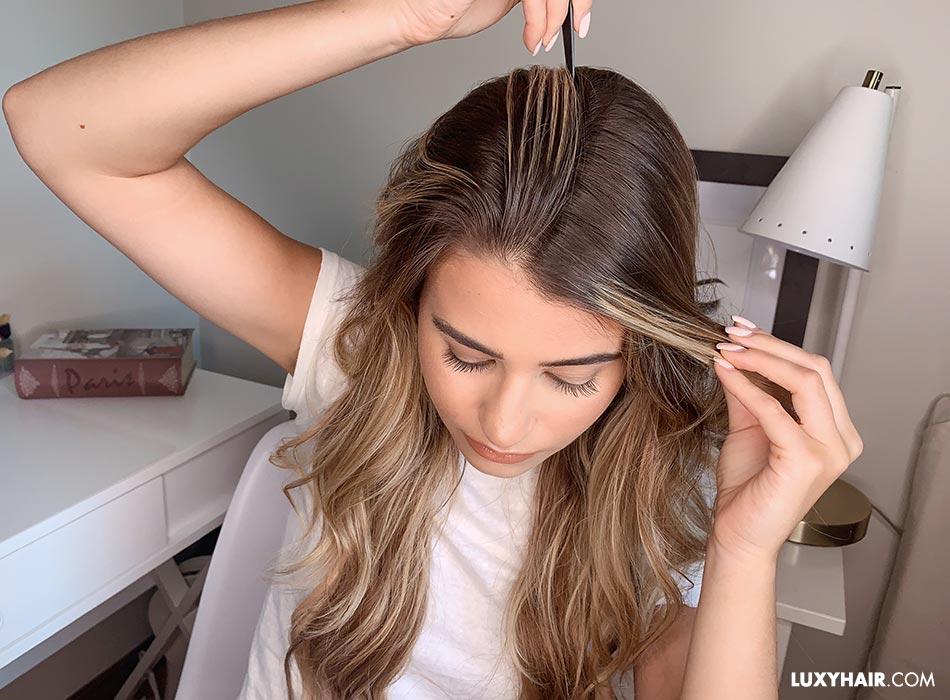
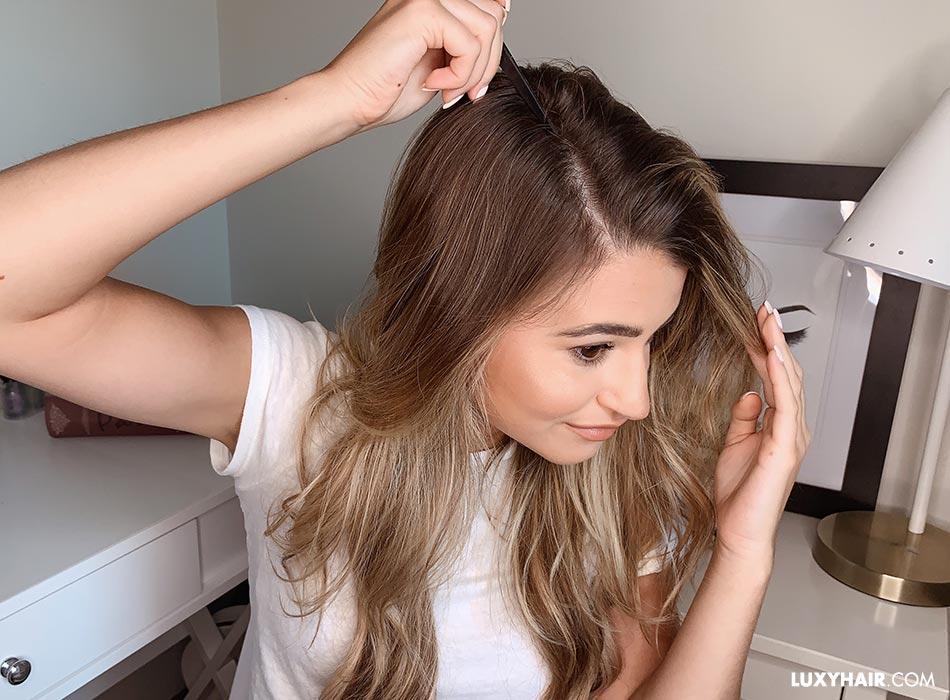
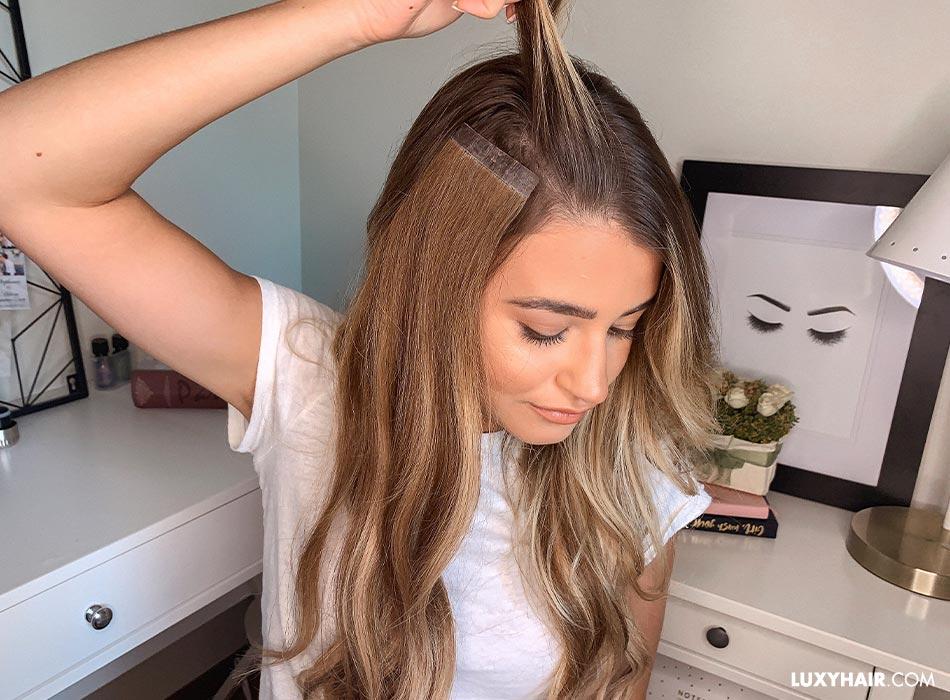
2. How to create a middle part with hair extensions
After parting your hair down the middle with your comb, use the 2-clip wefts for just under your middle part on either side. You can insert the extensions at the same height as your temples or higher, depending on preference and comfort.
Be sure to clip the wefts as close to the roots as possible. Thanks to their thin, silicone base, the wefts will sit flat against your scalp to perfectly blend with your middle part and natural hair.
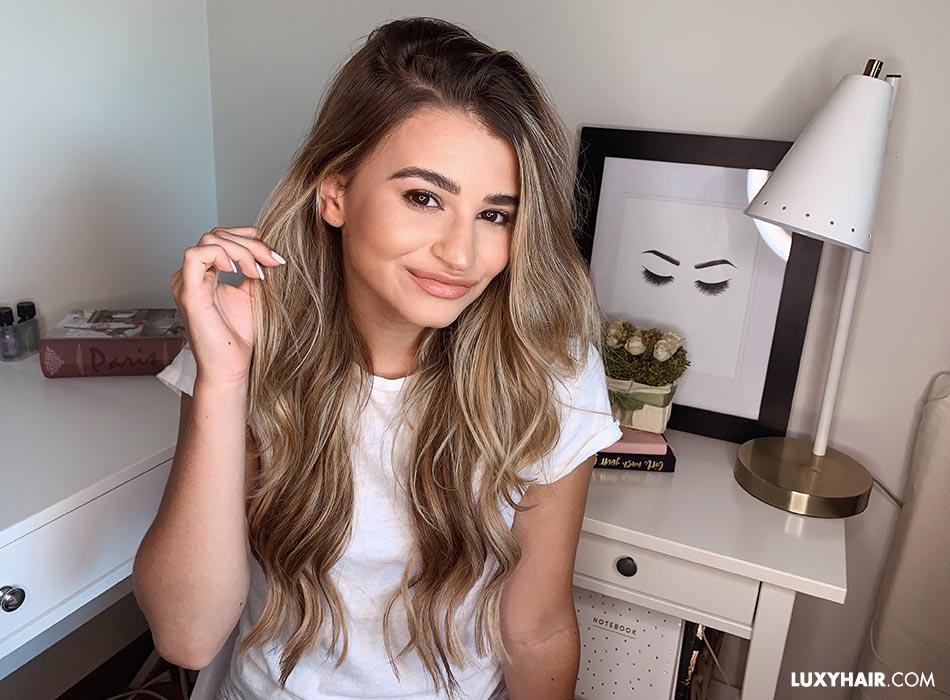
3. Deep side part
For an elevated, sexy look, the deep side part is perfect. Adding voluminous curls or waves with a deep side part is a great look for a special event like a wedding or even a night out with your girls. The deep side part also works well with straight hair. You can play with how much volume your part has, whether it’s blow drying the roots to create some lift or using a curling barrel to create an old Hollywood curl around your face. You can also leave your hair completely straight for a more crisp look.
The deep side part looks great for girls with a round face shape as it helps elongate the face. It also works well for those with heart-shaped faces, as it will soften up the angles of your cheekbones and widen your chin area.
The deep side part also helps show off your favorite accessories, from funky tassel earrings to classic gold hoops, or even the trendy hair clip. It’s all about accentuating your hairstyle with some fun accessories that reflect your personal style!
How to create a deep side part with hair extensions
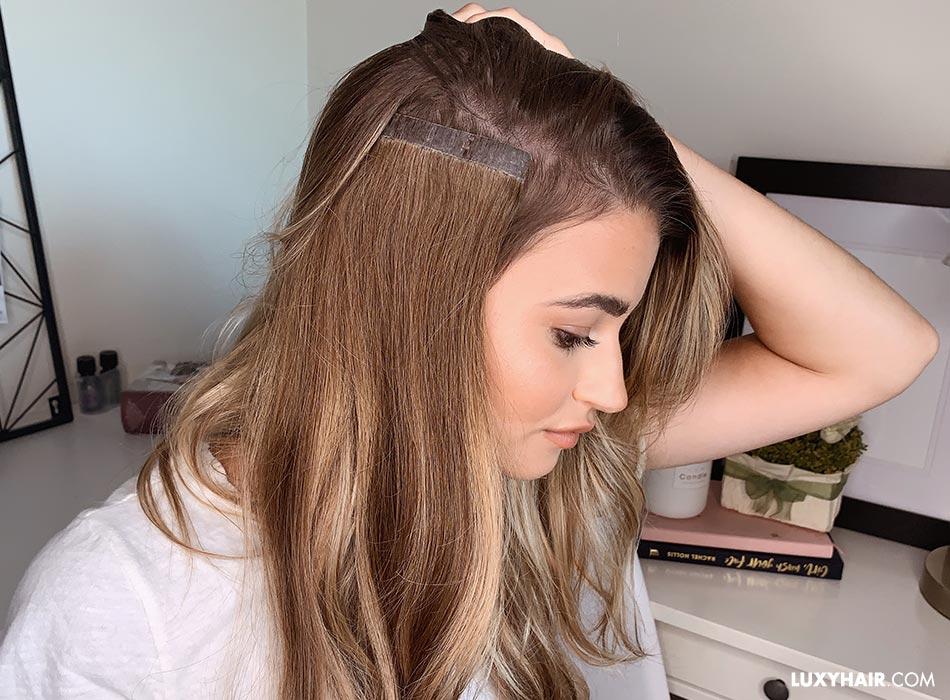
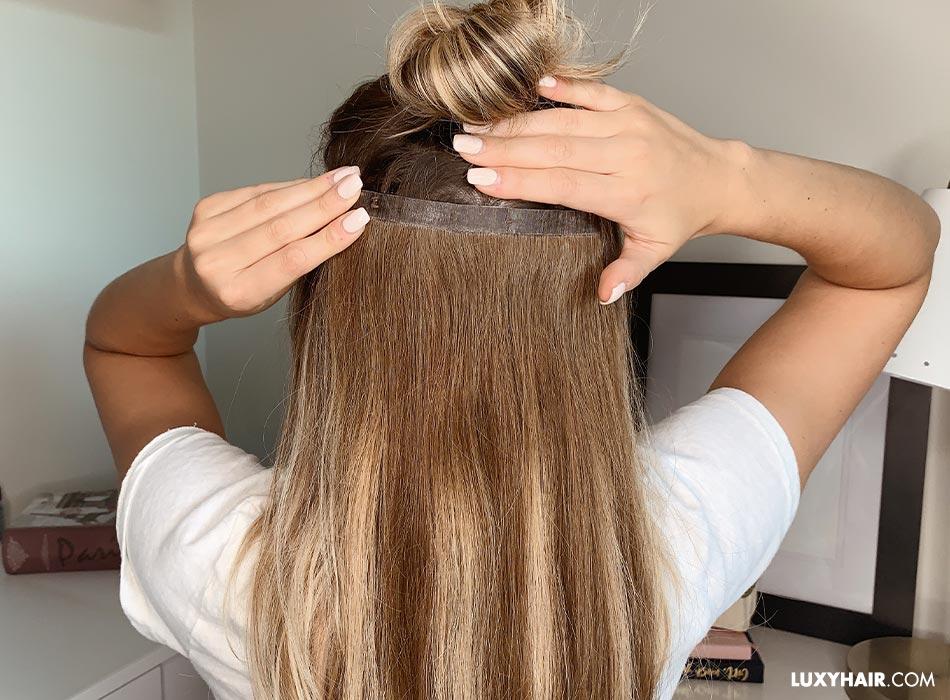
For the deep side part, clip-in your extensions as normal. With Hair extensions, you can start with the 3-clip weft at the base of the scalp and work upward to the 4-clip wefts that sit around the back of the head and just below the crown of your head. Before inserting the last two wefts, usually a 2-clip and 1-clip weft, use a comb to create the deep side part first. Depending on how deep you want to go, measure from the end of your eyebrow and run the comb back.
After you have your part, separate another layer of hair and clip the 2-clip weft underneath. Do this on both sides. Section off another layer of hair near the front of your head and insert the 1-clip weft under it to easily conceal the weft.
You can still use your favorite wand or curling iron on your hair extensions to create a glam look. To add curls or waves to your deep side part, we recommend setting your curling iron to a heat setting of 120 ℃/250 °F or lower. If you store your extensions carefully, the style will hold for days, saving you time the next time you’re getting glammed up. After curling your extensions, roll the curls and pin them before storing them in your box or Hair extensions carrier to help the curls last longer.
4. Flipped part
The filled part is the perfect French girl inspired look. Effortless and tousled, it has cool girl written all over it. It’s an unfessy, messy look that’s perfect if you’re going for a casual, undone vibe.

The flipped part is especially flattering on women with square or diamond-shaped faces as it enhances your angles, giving you a selfie-ready look all the time.
How to create a flipped part with hair extensions
To create a flipped part, place your comb at the middle of your eyebrow and run it back. You can also just use your fingers as the flipped part is not as strict on clean, even lines. Follow the steps mentioned above for the deep side part, however, use the 2-clip weft lower on your head. Bring all your hair down as normal to cover the weft, then casually create a flipped part. Because the weft has been clipped in lower than normal, it shouldn't show. You can also clip the weft in an inch or two toward the back to avoid the weft being shown when you flip your hair.
Beachy waves with a flipped part is a perfect casual look for summer days. The flipped part is flirty, versatile, and ideal for the girl on-the-go.
Slicked back

Though technically it involves no hair part, the slicked back, wet hair look is all the rage on red carpets. Everyone from Kim Kardashian to Rosie Huntington-Whiteley, and Gigi Hadid have been spotted sporting this sleek style. It’s modern, bold, and puts the spotlight on your cheekbones and killer smile.
How to create a slicked back style with Hair extensions
To create the slick back look, brush all of your hair back, away from your face. Apply a mousse or hair spray to ensure the hair stays back. You may also want to back comb the hair at the top, or just below the crown of your head if you’re looking for a more voluminous slicked back ‘do.
Apply your hair extensions as usual, however, do not apply the 2-clip wefts at the side of the head. Instead, concentrate all your extensions to the back for extra length and volume. Your slicked back hair will easily cover the wefts. Give Hair’s Classic Collection a try for this slicked back look as it adds more volume at the roots.
Why you should try all 4 hair parts
While some hair parts will complement specific face shapes, they are not limited to those shapes alone. Hair parts are usually formed by how our hair falls naturally and some women will go years without changing it, but why not? It’s a simple, easy way to refresh your daily look and even give you some extra lift at the roots. Which hair part will you try next?