Start To Finish❗️|Blonde Side Part Lace Closure Quickweave✨|Supernova Hair
- Posted on 06 January, 2020
- Lace Closure
- By Anonymous
●▬▬▬▬▬▬▬▬▬♛Supernova Hair♛▬▬▬▬▬▬▬▬●
Use "IAM" Save $6!!
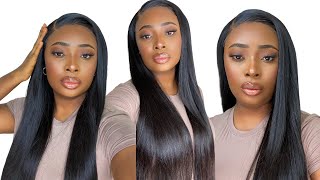
#Supernovahair In The Video: Honey Blonde #27 Color Straight Hair 3 Bundles 24 24 22 inches With 4*4 Lace Closure 20 inches,
Direct link ➤http://bit.ly/2Lvuc4E
Go and find more surprises!Our official Site: http://bit.ly/2P2fN2b
Hot selling!#99Jburgundybodywave lace front wig:http://bit.ly/2rgwON7
New arrival! More light & transparent body wave Ly lace front wig: http://bit.ly/2LAW9YR
Follow our Instagram @SuperNovaHairStore,
Direct link ➤http://bit.ly/2LzWQ4z
Hidden knots body wave #silkbaselacefrontwig:http://bit.ly/33Zstv0
Straight Pre-Made Fake Scalp Wig: http://bit.ly/2qC1Y12
Preplucked #curlylacefrontwig: http://bit.ly/36p91cL
Youtube @SuperNova Hair, http://bit.ly/36fsaxv
Facebook @Supernova Hair, http://bit.ly/36cbmYc
Welcome to IAmBeautifulHustler Channel
Be sure to SUBSCRIBE & TURN ON YOUR ALERTS
CONNECT WITH ME✨
Personal IG: Iambeautifulhustler
Business Instagram:_Beautifulhustler & @thebeautifulhustlerbrand
Twitter:_Beautifulhustl
YouTube: IAmBeautifulHustlerTV
✨SLAY WITH BEAUTIFULHUSTLER✨
TO PURCHASE MY PRODUCTS :
WWW.iBhSlays.com✨
Lace Melt Adhesive,
Melts Belts,
GLAMWAX
and more✨
Hey beauties and welcome back to iron before us, a TV today would be a full detailed tutorial from start to finish, and today's here is sponsored by supernova hair. Now they sent over this blonde color hair and they didn't send I'm 222 and 224 and a twenty lace closure to match. Now, I'm just showing you right now. What'S in the bag, the four bundles and the lace closure - and this is what the hair looks right out of the pack - the hair is very full, and this is a four by four lace closure. But knots are already believed, so you don't have to do any bleaching to it. You can just begin to prep and install your client. Now today I decided to show you guys the braid down, and this is one way I like to break my hair, especially because I am going to be doing a quick, weave, closer closure installation. I want to show you how you can get your braids to be nice and flat, and also how to prevent the bulkiness in the back by doing the connector braids method. Now I always like to start by parting on the person's hair down the center. That way, there is no braid directly in the middle, and I like to do that simply because if the person wants to get a center part, it would be very, very flat and able to lay down close to that. Scalp is possible because the braid is not preventing it, not preventing the part from being laid down. But what I did is went ahead and braided the first two brace and I'm just going to take the connecting piece of the braid is hanging down and added into the braid that I am already doing, and that is how you do the connected braid method. Now, because this is a closure quickly, I didn't have to do the bridge as super small, as I usually would. But if this was to be like a lynx, we install, I definitely would have done the breeze like half the size of these. Just because I really like those weeks to be really really super flat, but because this is going to be a lace, closure and the braids are not big and bulky. It'S still the lay down flat, and I just know that she's tender headed. So I didn't want to do 20 braids, instead of just doing like a normal 8 to 10. Now, once you finish braiding everything down, you should have one hanging piece left and I just like to just put it through all the loops that I picked up. You can sew it down is up to you, but because this is going to be a bond in any way, it's just not necessary to celebrate down, but now I'm that I'm done braiding as well. I'M just going to go ahead and go on, but some 91 % alcohol. I do doesn't even recommend I'm 99, but I actually ran out at this time. So I just went in with my 91 and I'm just want to clean that hairline from ear to ear. Even though this is going to be a closure, I still clean the hairline and now I'm just taking some holding spray and just ran back all of the edges before I apply my stocking cap. So now I'm just gon na go ahead and take my stocking caps and apply both of them. I always use two stocking caps, I'm doing a quick weave simply because, if you just use one that glue was see-through and get on the hair and I've been doing my stocking cap with this. My quick leave, my just like this. Since I've been in the hair game for nine years and I've never got any complaints about anyone having glue on their hair when I use two caps, so some people do use one cap and tissue paper or even two caps and tissue paper, but because I'm not Glue heavy, I just use the two caps and, as I mentioned, they be fine. So now, if you notice I put in one stocking cap up to the edges - and I put one stocking cap past the hairline and basically where I'm putting it past, the hairline is decide where my lace closure is going to lay. So it's like I'm still kind of doing like the ball cap method as far as far as only hairline just on this side of the cap. Only because it's just decide where the closure or lay, and then I was just going with my foundation and apply that foundation on top of that cap area over there and also sew down the cap as well. So now that that's also there I'm just gon na go in with some pump it up Swiss and just spray that all on the cap area, so the tracks can stick, and you know I do use 30-second pro salon Pro bonding glue and that glue dries pretty Quickly, but using that pump it up as well will also make it dry faster or you can even go in with your blow dryer and blow dryer track-by-track. If you want, or after you you know bonding a few trucks, you can blow dried as well, but it's just up to you and what you like to do and what you feel more comfortable with, but I'm just gon na go ahead and start bonding in these Bundles and usually, if you are a beginner, I would recommend, sewing the lace closure on first simply because you might not know how to eyeball like how much space you would need to leave out to put your closure in. But if you think that you can, you know, do it the same way, I can't just go ahead and begin to start bonding in your tracks and when you start get a little bit higher to the top of your quick weave, you can, you know just go Ahead and attach your lace closure, but I am going to bond up for a little while before I actually place the closure. What I also forgot to mention this will not be like a deep side, part closure and start to create the side part. It would just be like a regular side part so, instead of you placing the closure all the way down by the ear, I actually glue some tracks on the other side, coming up to the hairline as well, but I'm still going to leave space to place that Closure on there, so you will not be able to wear it behind your ear if, because it's not a deep side, part closure installation. So this would just pretty much to be a regular side part, so you are only being able to wear it as a regular side. Part closure. Now I'm gon na go ahead and take that lace, closure and cut off the big pieces on the side of that closure. You don't want to kind of come cut it completely off, but just enough to where it would be seamless at that. You know if you wanted to create baby hairs. You won't have that big piece in the way, but I am NOT doing any baby hair today. This would just be a simple side. Part and just you know bust down the side straight, and you know simple. So I'm just going to take that same foundation. I applied on the stocking cap and put it on the inside of that lace, closure and on top of that lace, closure area as well and then place it in that spot right there and it will fill in perfectly and all I'll have to do is just Go ahead and sew it down, I'm have her hold it and then just sew it down all around the side, and then I will continue to bond in the rest of the tracks and then begin to apply my actual lace closure as far as gluing it down. So now that all the trucks are glued and I'm just gon na go ahead and begin to apply my lace closure, but first I'm just gon na take that foundation again and apply it on top of the lace just to make sure it's spread it. When they're nice and even to give me a nice natural melt down and then I'm gon na take my lace, mate lace, mother, he said, would you can now purchase on my website and just apply my layers of that lace, glue and spread it out and once I play all of my layers. I will go ahead and begin to pull my lace down and to that glue blow drying it and doing my whole melt down process. Now I'm just gon na go ahead and cut off the extra lace and using the blow dryer on the heat setting. I'M just gon na take my fingers and push that lace into the glue some more and begin to do. My whole styling of the side part and I'm I am gon na - do a curved part, not just a regular straight part. So I will create AC part parting on this link, closure and begin to hot comb and press everything out to get a super smooth and flat using my Glen wax stick and a hot comb and my hot comb and just really get everything. Nice sleek and you know just pressed out foundation color and now just makes the part bolder and really give it that natural effect. So I'm gon na go in with my angle, brush and clean that part up with that foundation, concealer, and that would pretty much sum up like this whole tutorial. As I mentioned, this was just like a simple, quick style and I didn't want to do too much because the color was already like. You know very, very bold and honestly, don't really like baby hairs with colored hair. So that's. Why also there's no baby here install, so let me know what you guys think down in the comments below and thank you guys for tuning in to iron beautiful hustle TV


Comments
SlayedBy Jordan: This color with her skin tone , yes ma’am
LightSkin Island: Yesssssss i LOVEE these FULL DETAILED VIDEO'S.. I DONT MIND WATCHING IT'S ENTIRELY
Erika B: I love it, it's something different of course for the people who don't like baby hair. Awesome job as usual
Miata’s Touch: Yessss momma hustler ...... you never disappoint me.... I appreciate you and your quality work sista..... you give me the inspiration to start my channel..
Lashays Worlld: Omgggg you are the truth! This just gave me so much inspiration for my channel! Don’t stop with videos love you GIRRL!!!
Akia Foster: I love your outfit❤ my mouth literally dropped when I seen all the glue fall on it
Supernova Hair: Such a wonderful job!!
Sandra Conway: Omg I love everything about this tutorial and your voice instructions is clear to follow, I have one question, do you recommend this hair?
Lady So Well: It came out really nice! She looks pretty.
Prettty Pj: always slaying hair
Big lala: I love your video I have been doing hair for 4 years and as soon as I seen your outfit I said she brave because hair glue never comes out of clothes I always have to wear all black
CiMi Mink Extensions: This color is so cute on your mom!
Niasia’s Chronicles: What kind of spray were you using on the cap to hold it ?
Kersha Beaver: I like it. I love your outfit
Anaya Dennis: Beautiful
DamnPamComeOn: Your mom’s natural hair is sooooo pretty
deseraymiles87:
Ri Ri: That's beautiful on her
Robert Lindsey: Thank you for sharing this helpful video, I got the wonderful one from newigstyle..com last month
Marylin Charles: My first time commenting,,,ur videos r so awesome , I watch u everyday , I'm from the caribbean ST.VINCENT, god bless ur hands hun❤️❤️❤️❤️❤️❤️
Malijah Serenity: Mama slayedd
Liam Fields: Thank you for sharing this amazing video, I purchased the best quality one from newigstyle..com last month
Jada Mariee: New subscribe
Juicy fruit 🍇🍓🍒: Hey momma