Bea Hairs Hd Closure Quick Review | 6X6 Hd Lace Closure | Cassandra Olivia
- Posted on 21 July, 2021
- Lace Closure
- By Anonymous
Bea Hairs HD Closure Quick Review | 6x6 HD Lace Closure | Cassandra Olivia
Cassandra's Instagram: https://www.instagram.com/_cassandraol...
Large stocks now for HD closures and frontals!!
HD closure link:https://www.beahairs.com/hair-extensio...
HD frontal link:https://www.beahairs.com/cheap-silk-ba...
HD wigs link:https://www.beahairs.com/63-hd-lace-wi...
Website:https://www.beahairs.com/
Whatsapp:+86 15954895922
FLAT IRONS: http://www.cassandraolivia.com
DISCOUNT CODE: YTCASS10
✔ BUSINESS INQUIRIES: EMAIL
#beahairsclosure #hdclosure #hdlaceclosure
Cassandra's Instagram: https://www.instagram.com/_cassandraol...
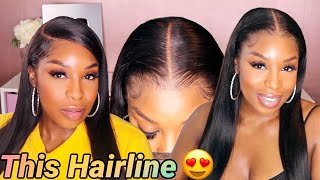
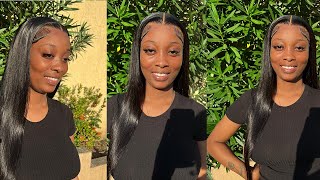
Hello and welcome back everyone. It is your girl, cassandra, olivia and today i am back with a quick hair review on a closure that, via hairs, has sent me so in the package. I just got a closure. It is a big closure, i'm not sure if it's a six by six or five by five, but i will link the information down below. So this is a hd closure and i'm just showing you how it looks on my skin straight out of the packaging. So what i'm gon na do here is take this old wig, since it does have a big frontal on it. I'M just going to cut the frontal off and then sew the closure on then press it and style it and install it. This is a super, quick lazy, girl method. You guys know i don't like taking forever doing um my units and i was not getting ready to make a wig, so that was out of the question. So i'm going ahead and just putting on this closure and measuring it to my liking and now i'm just going ahead and micro stitching all along the hairline um, where i cut that closure out the first part. So i'm just going to go in and sew this down, making sure everything is nice and secure, and i did secure it with some hair pins just to make sure that it will not shift during me sewing this in. So you just want to make sure that whenever you're stitching your units that you are not sewing into the mannequin head - and you also want to make sure that you are taking your time and making sure that the stitches are nice and close together, you don't want Any gaps in your closure connecting to your wig unit because then it'll be bulky and have lumps in it and it'll like buckle up in some spots, causing like bubbles, and you don't want that. You want it to be as flat as possible. So i'm just sewing it down on this side and then, when i'm done, i'm just going to add on a tiny bit of nairobi foam wrap. I opted to do a side part. You guys know. I love side parts, i'm very biased and i actually switched it. So, instead of doing a left part going to the right, i just did a part going from the right to the left and i'm just going to go in with some nairobi. Foam wrap set everything into place. Where i want it to be, and then i will be tying this down with a scarf, i'm saying this now only because i have to get ready to go in a couple minutes, but i did have this unit sit with the scarf on it. For about 25 minutes, while i did my quick makeup look and then after that i did go ahead, press the unit hot comb it and then i also pressed it hot combed it once it was back on my head. So once i'm finished, stitching you'll see the next part that i'm talking about. So this is how she looks she is all done. It is all stitched on and, as you can see, it is super precise now, i'm just going in with a comb and doing my side part putting it to where i want it to preset the hair. So that way, once i do mold it with the foam wrap, all i have to do is pop this on and do little touches to it. I opted not to bleach the knots for this unit because it is a transparent lace um, which is like a super super thin swiss lace, and i did not want to compromise the integrity of the lace or make the knots fall out or be more fragile. So i decided to not bleach the knots this time, but i am going to go in with a little bit of my shade of foundation just to blend the part out, but you are completely free to do that. If i were to bleach this unit, i wouldn't go in with a 30 volume. I would probably go in with the 20 volume again, because the hair is so delicate. So now that's wrapped. It was set for about 25 minutes. While i did my makeup now, i'm just going to pop the unit on and start to adjust the straps in the back and then cut my lease. So now that the lace is cut, i'm just going to show you guys how the part looks before i apply any foundation to it, and now i'm just going in with my shade of foundation with the tiny brush and just going to dab that along my part. Just to make it a little bit more defined, so that's to my liking and i did wipe off some excess foundation that was on my hair and now i'm just going back in with some foam wrap just trying to tame those little fly, aways that are at The top of this closure, just so that way everything can lay nice and flat. So i'm going to let this sit for a couple minutes. Of course i sped this up and i cut a lot of seams out because i didn't want this to be a long. Video, but once that was dry, i just went in with my flat iron again in my hot comb and just pressed everything out making sure that it was nice and smooth. So i hope you guys enjoy this look shout out to be a hairs. Once again, i've worked with them several times in the past comment down below. If you have tried their swiss um, transparent lace - and let me know if you guys, like this video down below again. Thank you guys so much for watching. I'M just gon na finish out. This video - and i hope everybody has a wonderful and productive week, and i will see you guys in my next video. This is literally the quickest review. I'Ve ever done and i'm getting ready to head out to pick up my children. So everybody have a wonderful day and i will see you guys in the next video bye


Comments
Jada: first of all, that is so smart to sew the closure on! i would’ve never thought of that. second, it was giving everything it was supposed to gave
angela mcdavid: Nice work!! Looks very natural on you..You make it look so easy!!.Not sure mine would come out right if I tried it Love the video!❤❤
CammyjOfficial: You literally slay everything!!! Final look was very nice and pretty .
Ivy Merritt: Wow! I'm the first person to comment! Yay, me!!! The finished wig looked gorgeous! I would have loved to see what it looked like if it was curled!
anna Lewis:
Eurydice Hamilton: Cute