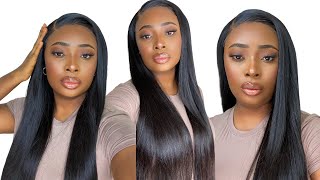
Best Lace Closure Point Blank Period! | Lace Closure Wig Tutorial
- Posted on 05 February, 2017
- Lace Closure
- By Anonymous
Hair From http://www.MrsRutters.com
Facebook http://www.facebook.com/MrsRutters
Business Email [email protected]
________________________________________
Check Out My Other Tutorials!
Lace Closure Sew in NO LEAVE OUT!
Invisible Sew In NO GLUE NO LEAVE OUT NO CLOSURE!
How To: Rope Cornrow Braids FOR BEGINNERS! (Step By Step)
Tree Braids Cornrows FOR BEGINNERS!!!
How To: BOX BRAIDS For Beginners!
________________________________________
The Best Lace Closure Sew In Tutorials On YouTube!
Detailed: How to do sew-in with a closure/HJ Weave Beauty https://www.youtube.com/watch?v=cthbGJ...
Prettyhairboss How To Do Lace Closure Sew In https://www.youtube.com/watch?v=f6Jyyo...
LACE CLOSURE SEW-IN | ELASTIC BAND METHOD FT KLAIYI HAIR BRAZILIAN CURLY https://www.youtube.com/watch?v=1PZVQC...
SEAMLESS LACE CLOSURE METHOD| The Avé Lure Collection https://www.youtube.com/watch?v=zp9G3D...
Detailed:how to do a side part lace closure sew in with bombshell curls| Hairbyerickaj.com https://www.youtube.com/watch?v=cxPrj3...
________________________________________
DISCLAIMER: All suggestions, tips, techniques and advice given are for informational purposes only and should be used at your discretion and best judgment. I highly recommend conducting strand tests when trying or using new products, hair appliances and product mixes. I am not responsible or liable for adverse or undesirable effects including hair loss, hair breakage or other hair/scalp/skin/body damage as a direct or indirect result of the suggestions, tips, techniques and/or advice given.
________________________________________
FTC: I am not representing, being paid by, or endorsing any of the product brands in this video & I purchased everything with my own money - UNLESS OTHERWISE STATED in video/blog content. There are links to products that might be helpful based on the content of this video/blog. Each of your purchases via our Amazons affiliation links supports our cause at no additional cost to you.
Hello, ladies, this is Brianna from Miss rudders comm and in this tutorial I cannot wait to show you exactly how I achieve this beautiful gorgeous. Look using mrs. rutter's, hair extensions from Miss letters. Comm. You will need three bundles of the luxury body wave as well as one luxury body, wave, lace, closure and the length of 16 inches. These are the materials you will need to bleach and color your hair now you're going to need one scoop of your quick, blue, lightning, bleach per bundle. Add it to your mixing bowl begin, adding your 40 volume cream developer and completely cover your powder. Now use your coloring brush to mix these two ingredients together until you reach a very smooth consistency now continue adding more developer, because we want the consistency of this mixture to resemble cake batter, and this is exactly how it should look first thing. First, we must delete our closure part in very thin sections when doing so. As you can see, my ends are brown, but the closure does not come like this. I decided to lighten my ends for different, looks, but I'm bleaching it once again, so you can see that the quality still remains intact. Now with the small brush, you want to do the feathering technique to break up that line of demarcation. Then you're going to begin bleaching, your first bundle of hair form a straight line and bring the pods all the way down to the end. Now it's time for the feathering technique make sure your lightly pressing into the hair to achieve a very solid result for our second bubble. We are going to create some lovely highlights so easier comb in and out of your hair, so separate the sections of hair. You actually want to bleach check your small brush and make sure that you thoroughly cover the ends of your hair with the bleach. This is so important because we do not want black ends. We want blood in it, so a beautifully saturate the ends. You can then continue working your products up the length of the hair save a little bit of room at the top. So that way you can do the feathering technique now fold your foil, to allow the hair to further process after processing. You should achieve this dark blond color, and this is how your box color, should look now we're actually going to recolor our hair with our permanent box color. The reason I say that is because you initially felishj to your hair to remove the natural color from your hair extensions and when you do that it doesn't remove everything. That'S why it is so easy, hi, orange and red Piketty. So, in order to cancel that out and give a different shade of blond hair, we're going to use this box color to do so, make sure, when you're near the top to do the feathering technique as well. And now our hair has only processed for just a little bit of time and, as you can see, this color is literally transforming into something. So beautiful now apply your box color to your first bundle of bleached hair as well, and you're. Also going to do this. To your actual highlights, make sure you're picking up as much blonde pieces as possible and when you do this, there may be some black pieces in there and that's perfectly okay. You just don't want to leave behind any blonde. Do the feathering technique at the top, as well after we finish, processing our hair? Look at this beauty. The wave pattern is still intact, and this is how our first bundle of hair looks after its process and, as you can see, that feathering technique makes a blending. So flawless - and this here is our highlighted bundles now, it's time to actually start creating eyelid closure. We always slow down your lace. Closure first before sewing down your extensions now after putting the needles through the edge you're going to go through the edge on the wig cap as well, and then you're going to do this again now, when you pull your needle through make sure it's close to the Opening of the thread so that it can create a knot on its own now, do this again, two or three times at the very beginning. Before you begin, creating additional, not against the length of your closure, make sure you're not are spaced about a centimeter to two apart and make sure you sew up about it. Introduce two inches on this side. Now you're going to go on the other side and do the same exact thing and you're going to continue working back and forth until you reach the back. This keeps the tension very even on the closure, so that it's not shifted, as you're finishing at the very back, make sure to secure the last knot with two supreme nuts before you cut off your thread now to sew your extensions go to your weft and then Go through the dome cap of the very edge go underneath your web to the opening of your thread and then wrap the needle around the thread, pull straight up to create your knot. Now, I'm going to show you a second way, which is effectively the same thing because, with both actions, you're wrapping the thread around the needle right so continue doing these same knotting techniques throughout the entire process, to sew down your bundles. Now, ladies, look at how cool one bundle looks - and this is the second bundle which is our highlights, and now here is our third bundle and we are almost done creating our lead. Now, when creating your wig, what I want you to do is to continue doing this fold over method throughout the entire process. The fold-over method is going to prevent you from cutting 3:11. So, on the slight curvature near the edge of your wig cap and then fold the extension back in the opposite direction, as you can see, this technique is through for easy now. The reason why I suggest this is because you want to get as many uses out of your bundles as possible. So if you cut your extension, you're going to lose and have so many little pieces of hair to prevent that do this method, and also this prevents your extensions from shedding any areas that you may cut, because if you may or may not know when you cut To your web, that can cost shedding to happen to put the finishing touches on this wig. Remove that last to the left and then continue to fish down the last point of your bundle with two Greenock. You are going to always always suited at the beginning and in a bundle and at the beginning of end of sewing down your closure. Now, as you can see, you're able to create such a beautiful wig with my technique, and it will allow the way to last. For a very long time now start removing the excess cap from underneath your leg make sure to cut very close to the knot, but not too close, because if you cut the knot on accident, it will cause your closure to unravel now begin removing the excess lace From your actual closure, because we don't need it and then go in a second time a little bit closer, so it really tailored the lights to the hairline of the closure. So it looks very natural against your hairline. Here is the infamous technique of the elastics and method. This method is crucial and keeping that wig in place, because when the wind blows you don't want to defy off make sure the length of the band is 1/3 of the circumference of your head and length and then as you're, creating not on yours and make the Knots very close together so that the band is not unravel over time. As you can see, this bin is super strong, but very flexible. When you're wearing your wig. I promise you is not going to go anywhere. It'S going to stay right in place now. I went ahead and straighten out the hair on the wig so that you can see the color. This color is so creamy, it's the perfect dirty blonde. Look. I wanted blue cheese, and now this is how the wig looks once on solid. As you can see, a bundle in the back is black because we did not bleach or color one bundle and now, in order to create this distinct look to our style. We are going to create some juicy layers, so I want you to keep the size of your hair sectioned a way from the back, because we're only adding layers to the left and right by the way, grab a section in front to create a face frame trim. This step is very important in allowing the hair to fall very graciously against your face when you're wearing. Your look now include new hair with the previous cut section and blend those sections together with your shears. Now it's time to create some layers. I want you to always comb your hair out at a 45 degree angle from the mannequin head and when you're actually cutting through your hair cut down at an angle. So that way you can blend the lid to be out. There always include new hair with the previous section. It only start cutting when all of the layers of hair has dropped, so you can effectively blend the layers together, as you can see what my techniques that I'm showing you it's going to make cutting your hair. So easy, and also when you're cutting through your hair, you will notice that the hair is literally so soft that the shears glide through like butter as you can see. This is how it should look once you finish, adding your land. Now I'm going to move the hair just a little bit to show you that your layers are actually ending at different points, because that's the effect you want to create with this place do the same thing on the other side as well, but cut your face frame. Trim a lot higher so that you're creating veins near the top. Now. This is a braid pattern that I like to wear when I'm wearing my lace, closure, wig and braids you're, how hot ever you like, just as long as the braids are going away from you apart, use your favorite heat protection to protect the health of your hair. With this particular look, I wanted some of my natural hair left out and when you're doing this, especially when using heat heat protection will prevent you from experiencing breakage and thinning, now use your favorite hair straightener to straighten scent sections of your hair and make sure that Your temperature is set appropriately for your hair, for my hair. I can achieve my straightest result on 350 degrees. For you, it may be a little different, so start at a low temperature and then increase the temperature so you're going to get your straightest results. Now, after I put my wig on I'm going to show you this little tip you can do which is completely optional. I would suggest that you do this if you happen to be a lot lighter or darker than the lace color. What you want to do is use literally the lightest application of makeup powder, so just dab a little bit on the lace in. Ladies, as you can see, this closure is already amazing. We didn't have to plus game. You have to bleach it since it do anything crazy, because the closure is already beautiful, and now, once I put the wig on my head, look at how enormous it looks. Oh, my god, this hair is to die for and now I've already curled most of my hair and I'm not just a few sections just to show you how to do it. Now, at this section here on the left side of our head, you're, going to part it exactly like this right, a section and then comb the product through for distribution. Now, once it dries you're going to make sure you're curling me hair going any way from your face in any backward direction. This is going to make your layers pop. Like crazy. You hear me your layers are going to be on fire. I'M telling you you're going to be playing and playing it's hair like nobody's business. Now, after holding for a couple of seconds, we then want to use a dust filter to allow it to cool increase and then do the same thing with the section here, making sure you're, including your leave up with your section for that way, you're effectively. Curling, your weave well as you're real here now at the back you're gon na part, your hair, exactly like this meaning you're going to part vertical party and you're also going to prepare your hair the same way now when you're curling your hair, also make sure that It'S going back and away from your face now on this side of our head. This is the way you have to part your section. Make sure that when you're Springer here is first drying, because if not, if it's not dry, your hair will actually stick to your curly and then after it dries just go ahead and begin curling it away from your face now. Ladies look at this isn't just all gorgeous, but of course we are not going to leave it like this start, releasing your duckbill clips. So that way you can begin brushing out your curls with your wig brush. Now make sure you position your curls exactly how you like and then use hairspray to hold it in this light now you're going to do the same thing to the other side as well, make sure to use your fingers to break up the curl and then brush Your hair in place to give you that desired shape that you would like now when brushing your hair just take your time and if you need to brush this section multiple times, that's perfectly fine, because this hair isn't going anywhere. This hair doesn't drop. Sorry, nothing! I'M telling you this hair will stay, put it badly, how you put it and then, after you put your hair in place, you're going to spray hairspray to hold it in position now, it's time for some edge control, use your calm to help assist you in this Process, while using the back and the peeps to help you promote your edges, exactly how you want them to lay now that we've done inside time start working on the other side and you're going to do the same exact thing. One tip that I want you to keep in mind is that with this look I want you to bring it all the way through the roots of your hair, without actually bringing the product down the length of your lead out. Now don't forget to get in there and get your whole entire hairline, because when our wind is blowing and catching them pearls, you still want some edges to look. Lady, ladies, as you can see, this hair looks so fabulous and I can't stop touching it because it is so soft and beautiful and, as you can see, this culture is gorgeous. It is literally perfection and voila. Ladies, the finished results has arrived as you can see. This hairstyle is gorgeous and, if you want to achieve fabulous, looks like this be sure to purchase your hair from Miss Rutter, calm.


Comments
HowToBlackHair: YouTube hasn't been showing you my new videos lately??? Make sure to SUBSCRIBE & CLICK THE BELL ICON to get a notification when I post new tutorials! ❤
13th House: Your application is very neat!!! I love the deliberation of your application....attention to detail.
Prettypinks3000: The color and everything just went together nicely!
kidablue: love it!!
Stacy: The best wig video I've seen on youtube!!!
Bubblegum Princess: Firsttttt... This wig just changes your whole face and makes you look younger
Doreen BM: love it,u go gal
Lex Go Financial: I made a wig, and it was too small. I tried not to sew the closure on the band of the dome cap, but I thought it would look weird if I didn't...
Tiphane Hamilton: I love u you are my fav hair YouTube