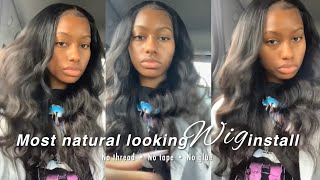
The Prettiest Loose Wave Wig !! Easy Glueless Closure Wig Install Ft Wiggins Hair
- Posted on 02 April, 2022
- Lace Closure
- By Anonymous
Hello my beautiful subscribers (and non subs) ☺️
Wig sales page - @CAwigss
Personal instagram- @holaa_caro
EMAIL- [email protected]
Hair details: 28 inches loose deep wave 5*5 closure wig 250%density
Direct Link➤https://bit.ly/3icv65V
#WigginsHair Official Store:➤https://bit.ly/3LB5mNn
More coupons!Join In Facebook Group➤https://bit.ly/3pzwi8e
You may also like:
1. Skin Melt HD Lace Wig➤https://bit.ly/35YlBFf
2. Top Selling Lace Frontal wig➤https://bit.ly/3u3p3Gy
3. NEW V part wig! More Natural➤https://bit.ly/3IhmV31
#wigginsloosedeepwave #wigginshdlacewig #wigginshairreviews
Follow Wiggins Hair On Social Medias:
Instagram @wigginshair ➤https://bit.ly/3ILWwdL
Tiktok @wigginshairbest ➤https://bit.ly/38krOfq
Facebook @wigginshair:➤https://bit.ly/3IQd84f
Wholesale WhatsApp: +86 18339906150 Email: [email protected]
Hey guys, what's good, what's poppin in today's video, i'm going to take you guys through how i installed this loose deep wig from wiggins hair, so i'm just going to kind of run through all the prep. I did because i want to show you guys that the hair did not come like this out of the box. Most of my wigs, i do have to do some work to get it to look. You know slayed and laid, but here's a quick unboxing for you guys it was a 28 inch, wig 250 density and i did get this in a large cap size. I did find this wig to be big head friendly, i mean grant. I did get a large cap, but it fit my head pretty well and i did have some room. I could have gotten away with getting a medium average cap size because with closures i feel like the cap really fits a lot better and like an average cap, size will do for a closure frontals, it's more, but you know different and for reference i do have A 22.5 circumference head so she's a little big, a little bit big, but here's a look at how the hairline and the hair was looking like right out of the box. The hair was giving very much wave loose wave as you can see, and the hairline was slightly pre-plucked, but it was not bleached. So next thing we're going to do is bleach the knots and get into the plucking after that, so to prep my knots. What i've been doing these days is, i use a 20 volume developer. First, i apply this just a developer straight onto the lace. This just kind of helps soften up the knots a bit, so it can take the bleach a lot better. So you find like your wigs, do not lift all the way try doing this first to kind of help soften them. So i let the developers sit for about 30 minutes and then i go ahead and rinse it out and bring the wig back to actually get the knots bleached. Sorry. This is a bit like fast guys. It'S not really much of a detailed tutorial. I just kind of walk kind of walk. You guys quickly through what i did as prep. So you understand, you know how much work goes into getting your wigs to look like scalp, because most of these wigs do not come perfect and install ready out of the box. Some do, and i always mention which ones are. But this is not one of those wigs anyways, so once i've let the hair um pre-bleach, i guess i'll call it. I watched the developer and i'm going in with a blue bleaching powder and i'm just spreading that with a popsicle stick all across the lace. If you do want like a detailed tutorial, i have lots of them. I have one that's literally like almost an hour long, where i'm taking my time non fast forwarded just showing you guys exactly what i do so go ahead and check that out anyways. So once i made sure the hair was nice and saturated with the bleach, i went in with some foil paper and kind of just let that sit on the hair for about another 30 ish minutes but, like i always say, make sure you send like a 10. A 10 minute timer and you check the lace, every 10 minutes or five minutes you do not want to over bleach. Your knots. Okay, not have been perfectly bleached you can see, has like a bit of that orange yellowy tone. That'S how i know she is ready to be washed, so i'm just going here and just washing out the bleach and i'm using this time, i'm using a purple conditioner, not a purple shampoo. I was out of purple shampoo. I got this from my beauty supply store. I didn't know they had purple conditioner, but honestly it works just fine. Some of you guys have asked me: can you skip using purple shampoo? You can and i have, but i find like the roots. The roots really be shouting whenever you skip this step like it looks quite orange, so you can, you can get away with it and maybe use some concealer to kind of help tone it down, but i just kind of just use a purple shampoo just to help It anyways here i am just kind of showing you guys quickly that i did have to also pluck the wig. It did come slightly pre-plucked, but it was just a little bit on the thicker side, but i'm guessing that's because of the higher density. So i did have to do a little bit of plucking to get it to. You know, look more natural on my hairline and i use my hot comb to help press the hairline back. One thing i've noticed is that whenever i use my hot comb before installing the wig to press back the hairline, it just makes installing a lot easier and it makes everything look so much more neat. And now the wig is ready to be placed on my head. So under my head, as you see in the beginning, clip when i'm saying hello, i just have on a standard black, a wig cap. I don't do bald cap method or any of that. I just make sure i have a wig cap to help protect my braids from getting caught onto the wig clips, and i used some pressed powder press powder foundation to help me tint, my lace. So what you saw me doing earlier - and here i'm just using my scissors to cut off the little ear tabs, like not the ear tabs but the little thick white part that is at the end of your closure. This part is meant to be cut off because it will not stick and it's just going to ruin your install so for laying down on my lace, i'm using my evan wonder, lace, you know, love her use her all the time. Bestie and one thing i've been saying a lot in my videos to help you guys with your application of this product is when you spray it make sure you're spraying mainly on the lace and less on the hair and you're, using your finger to kind of just Help spread that product around to help get a nice thin layer. So you don't have like you know, all that cakey buildup and residue to help dry everything up and make the lace nice and stuck i'm using my blow dryer on a cool setting and a comb and right here you can see i'm also like combing the hair Through this kind of just helps make sure the hair is not getting really hard and crunchy later, whenever i'm trying to do my baby hairs once my lace is dry. This time, i'm using scissors instead of my normal um eyebrow razor to cut off my lace. But as you can see, even though i'm using scissors, i'm trying to make sure i'm cutting in a up and down motion to kind of give that jagged look, which is what the reason why i use razors anyways. So if you're gon na use scissors make sure you're not cutting straight across and you're cutting up and down to create a jagged look on the lace, because this kind of just lays a lot more. Naturally, on your head, i like to pull out what is going to be used for my baby hairs before i go ahead and add my elastic band, i like to pull this out first, so that way it can kind of just stick with the ebb and lace Spray, whatever residue is left on there, so that my the hairs i'm going to use for baby hairs are going to be nice and pushed down and lay flat. So once i've pulled them out, i go ahead and use my elastic band and lay that on my lace and kind of just let this sit for about another 10 minutes to make sure everything is nice and dry is to swoop my baby hairs, i'm using my Bestie, which is the eco styler gel i like using this gel over any other product that i've tried because it does offer some hold without it being too crunchy like you, can still easily brush out the baby hairs and get the nice light. Feathery look at the same time. It also can be give that stuck down. Look with what you like, so i like it. I just like it's very versatile and easy to use, and i use got to be - and i feel like got to be sometimes gets so sticky and tacky and can be super messy is is is now that our baby hairs are done and they're laying under our Elastic band, let's get into the detangling and defining of these waves, so i i keep it very simple. You already know. If you don't know, i just have a big old spray bottle filled with water. This time, no conditioner is really just straight water, and the key to this is getting the hair drenched like when i say drenched you got ta be soaked, there should be no dry patches right. So once i make sure the hair is properly soaked and drenched with water, i use my paddle brush and i keep brushing and brushing you got ta brush with intention. Okay, brush till you start to see those curls and ringlet form, even though this is wavy hair, it still was able to form into a little bit of a ringlet as i'll show you right now. You see those little like ringlets how the hair is clumping together. Yes, beautiful, that's what we're going for once i get the hair to clump together, like that. I also scrunch to also help promote. You know the clumping together because you want it to stay like this and once it dries fully, it will look just like this, but you know dry, which is how i get that very defined like i get for all of my hair, so i went ahead and Just repeat this process all over the head working in sections, especially since it's really big hair kind of helps to make sure i'm getting everything properly wet and i'm you know brushing out every piece i could be brushed out is is one thing: i've been doing differently For my wavy and curly wigs is, i actually like to add a bit of this nairobi. Styling mousse, this kind of helps just keep the waves to keep, helps the curls slash waves hold their shape longer, so like kind of help prevent frizz throughout the day. So i do a few pumps of that and i just you know: scrunch the hair to help everything form and i'm just going to show you guys one side on camera and, like i always say, make sure you leave this to dry. So i went ahead and just finished the other side off camera left it to air dry. For about an hour, i'm going to come back and show you guys. The air dried results here is the final result of the hair you can see. The hair is much more defined and looks so pretty like this, like i loved this hairstyle so much, i wanted to show you guys the full hair, so i had to use my phone because my lens doesn't ever capture the full length of the hair. So here is the hair and it's all its glory in beauty, and it was just honestly, one of my favorite looks very vacation spring break beachy, vibes friendly. I hope you guys enjoyed this video, that's all i have for you guys hope to see another one. Like comment and subscribe and peace out girl scouts goodbye,


Comments
Caroline Brown: It's only right I subscribe to you because you're Caroline A. & I'm Caroline B.
-Mis Understood-: I honestly love your hair videos you’re always informative and communicative. Btw you’re really pretty
Moe Okoye: It's the slaaaaayage every single time for me! ✨
JuicyCurls: I haven’t seen someone bleach knots & pluck in forever I’m glad you showed your routine.
Jackie Davis: I came across your hair videos last night Love your Consistency !! & You're easy going personality So I Decided to subscribe to your channel so glad I did .
Bruna Oliver: Amei muito
Cherry Adeyinka: Always on point very pretty
Kreamy: Can you pleaseeee do an in depth tutorial on baby hairs only because I’m still struggling after 2+ years of laces I love your page btw
Katelyn M.: Gooorl! You DID that!
niita.baeè: Always slayin
TONIANNAW: Great video once again! The description says 13x4 but is this the HD 5X5 and what length please?
DaKarai Alise: this is so cute
Jennifer Brown: Son unos LIKESEX.Uno de los mejores conciertos ❤️ Son unos de los mejores conciertos, no puede ir pero de tan solo verlos desde pantalla 5, se que estuvow sorprendente...
Diana Koffi: Please can you do a video on how to cut the lace for those people who have their hairline starting higher up? I noticed that I need to install my wigs VERY close to my hairline because if I do install it a bit lower, it just sits weird and doesn't look good on me. It minimises my forehead and looks "wiggy". I caught the trick but I might need a bit of guidance on how to cut the lace properly :) I don't think bold cap method works for me neither
lovmusehair: I sincerely invite you to do a hair review for us. Look at your email, I've been messaging you, please tell me what you think
Gen T: Can you please link the wig stand & head?
RexcelleInChrist: Where did you get your blue top babe
R D: per usuuu
Life Of KiTheArtist: This is transparent lace correct?
The Don: Did u have to wash the hair
Nikki Harrison: #perusual
The realest J: Ok I loking for a good hair company to buy a closure from.Who would you recommend personally