Easy Quick Weave 7*7 Lace Closure Install Yyong Hair
- Posted on 27 August, 2019
- Lace Closure
- By Anonymous
hey loves new video this Easy Quick Weave 7*7 Lace Closure Install hair from Yyong Hair
▬▬▬▬▬▬▬▬▬Yyonghair▬▬▬▬▬▬▬▬❤
➤Same hair in the video: straight hair 24 26 26 with 20 7*7 closure
Hair link : http://bit.ly/2zmuDI1
➤Yyonghair store home link : http://bit.ly/2LDZzuA
➤Get $$$ OFF on Yyong Hair official website: http://bit.ly/2XroZTE
➤Related product:
Straight hair 3 bundles with 5*5 closure: http://bit.ly/2Mdxxr1
Straight hair 3 bundles with 6*6 closure: http://bit.ly/324lT5O
Straight hair 3 bundles with 7*7 closure: http://bit.ly/2zmuDI1
For 4*4 closure:
Straight hair 3 bundles with closure : http://bit.ly/2Yy1dlp
Straight hair 4 bundles with closure: http://bit.ly/2RTHFFm
Straight hair 3 bundles with frontal: http://bit.ly/2NyKeyk
Straight hair 4 bundles with frontal: http://bit.ly/2XRMrIO
➤Top Selling product link: http://bit.ly/2xrPQPY
➤10$ coupon=follow store&IG&facebook&twitter offical account : @yyonghair
➤E-mail : [email protected]
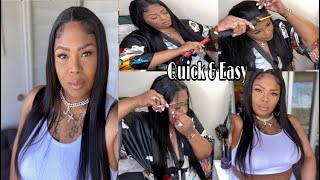
Hey all right: Caroline, I'm back with a new video okay, this is going to be a quick weave, seven times, seven lace closure how I install it using doing a quick weave glue in alright, so the hair we're using today is from why young hair, if I'm Saying the name wrong that me will be listed in the description box for you guys to check out okay. But this is why young hair - they send me three bundles of hair. They send me a 26 or 26 in or 24 with a 20 lace closure. But this is not your typical lace. Closure is like your big lace closure. This is your 7 times. 7 lace closure. So this is the Brazilian spray hair. They sent me three bundles of their screen here. West looks ok, I didn't have no too much of beer about the experts a little bit of sharing, but not too much with this hair. The closure is actually really really really big. It'S not your typical for town. Foreclosures is your 7 times 7 closures and a dick Humphrey plot. But if you don't want to do with the hassle of doing your lace frontals, you can definitely get away with your setting some setting closure. It will still give you that nice hair mind that you're looking for that in front to give you without you dealing with the whole ear to ear at least front. Oh ok, so they just get started alright, so starting off with our stocking cap, this is gon na, be all glue quickly. Okay put on my stocking cap, I am using my scissors to put holes in the ear just so that ear taps can leave flat and then I'm using the Robert diamond bound protective shoe, I'm using a clear one and I'm using a black one. I'M going to use the black in the back and then I'm going to use the clear one in the front. This will just help the stockings to stay put. It will also help my hair to be protected from the glue so that the glue will not damage. My hair or stick onto my hair, all right once I apply the diamond bound protected shoe all over my head, I'm if you are doing this on yourself, you can definitely use your hand dryer. It will take some time so get it dry, but I just wanted to show you that you can use your hand dryer to get it dry. It will take you some time, but I did went in here and sit on a my hair dryer that I use for my clients. I start under it for about 15 minutes to get the entire rubber shubao dry completely. You do need this protector shoe to dry completely in order to start the process of applying the glue once the protect issue was dry completely. I took my pair of scissors and cut off all the extra stockings in the front that I did not need once our wore protective shoe is completely dry. It'S time to apply our settings on setting lace closure. Okay, this is the closure I did when I here and I bleach the knots just a little bit, just as you guys can see the effect of doing a quick weave and not being bleaching. All of that. Okay, I don't usually bleach my nuts, but this one. I did bleach the knot, so I do go ahead and try the front so on, and I try to measure where I need the glue to start at in the front. I'M am going to be using. My goes by include so I need to know where the poo is going to start in there front. Ok, and you can see that the stacking is covering my entire hair. So this is going to be non damaging to my hair and I did put a protective shoe over. So it's all good, no damage using this glue, quick weave process. So the first thing I'm doing, I'm taking my foundation powder and I'm tensing the stockings a little picture so that the stockings matches my skin tone, so it blends seamlessly. Okay, all right! Once I had my stockings ten touch of my skintone. It'S time for me to apply my ghost bar on glue. This is the only clue I've been using. Okay, I do have like three layers of the ghost bar glue to my hairline. I apply the first layer once it's dry clear. Then I apply the second layer once it's dry clear, then I blended earlier before it's time to apply the closure. After applying the ghost Bank loots three layers to my hairline next, using the cilantro hair glue in my spritz, I'm going to start to apply the glue to my seven times. Seven lace, closure and I'm going to apply the glue directly on the line at the edge of the closure and then once I apply the glue, I'm going to take my spritz and spray the edge of the closure. This just helps give extra hold all right. So a quick weave glue is very simple. Once I put the glue on, I just went and put the hairline on the ghost Bank glue and then I just flip it back, and I position the hairline just to get it to melt into the glue. First, I make sure that the hairline is he killed and placed onto my goes back Lou, first and Meltzer before I went into the back to secure the back with the hair glue once the front part of the closure is secured down, I go in a back And make sure to stick the hair glue part down off the closure and stick it on to the stocking cap. After that, I take my blow dryer and I blow dry around the closure, just to make sure that the closure is secure and the closure is in place all right. So once I have my closure see, kill both in front in the back at this point. If you want our baby here and stuff, you can definitely add your baby here. I don't care for baby here much okay, so I'm going to go in here and start to apply my bundles in the back. This is very simple. This is very quick. This will take you less than an hour to complete okay, so I'm just applying the glue chilled tracks and I'm sticking it down, I'm going from ear to ear, and I'm sticking it down on my stocking cap so to apply the tracks. I measure the tracks and then I cut off my measurements and then apply the glue and then apply it to the stockings, and I used my boot dryer and I blow-dry it. This is as simple as it get to get your quick weave done in less than a hour. Okay, all right! So we add the end of this quick we've installed. This is my last piece I did put the UM superb uncouth on it and I am going to stick it and attach it right near the closure piece and then I'm just taking my blow dryer and I'm just going to blow dry. The entire piece - and this is pretty much it for this quick we've installed - okay, I'm going to move on to styling now quick. We are very simple to do they're easier to do. You just got a few and touch apply the glue and apply so you're here, but make sure you are securing your own hair, making sure that the glue is not going to damage your own hair so make sure you are your protective shield. Make sure you add your stockings before applying the glue to your hair line to your hair, all right so moving on to Stalin, I did one of my center part, so I did went ahead and took my rat tail comb and clear out my part a little Bit more, then, I went in with my hot comb to slick down my closure, a little bit more, so it's nice and sleek all right. So after her combing the entire closure. Okay for the rest of the year, I did take some heat protector and spray. The entire year before I took my flat iron and flat iron, the entire hair sleek, okay and after firing the entire head. This is pretty much it for this quick. We seven times seven closure. This is very easy to do. Okay, you can achieve this in an hour, maybe adding styling time and flat iron. Another thirty minutes, but you can do this on yourself. It just takes time a little bit of patience and you can complete this. You don't have to braid your hair. You don't have to go through any type of stress with sewing with needle and thread you can do your quick weave. This is pretty much the finished. Look for this install okay. I will leave all of y-young hair links in the description box. If you want to check out this beautiful seven times, seven closure with their Craig Brazilian bundles, okay, I will leave all the information in the description box for you guys as always. Thank you so much for watching. I love you and I will catch you all in my next video bye.


Comments
Angel Luv: You made that look so easy. I'm scared that if I try, I will mesa it up lol.. I've never worn a frontal
Rita Osasere Isibor: I love the closure, nice one
Diamond Sparkle: WOW!!! Super easy
GMarie: Beautiful as always.
LaydeeNae: This came out so cute
Kersha Beaver: Beautiful as always
MrsLina 313: First this came out beautiful
chizii obi: The closure is bae ❤❤
Marcelle Dupont: Qui dit mieux !!! FabbulousC ma chaîne préférée ! ♥️♥️♥️♥️♥️♥️♥️♥️♥️♥️ Comme d’habitude FabbulousC !!! Avec vos doigts de fée, vous avez magnifiquement réussi ! ♥️♥️
Vanessa Trotter: ✨✨✨✨✨✨✨✨✨
Smilin Prophet: Yaaaasssssss a Liberian Beauty and Hair Slayer
Saddik Laaraiche: ❎❎✌my ex wife's forever paradise