How I Make My Lace Closure Wigs (Sewn) Ft Unice Hair
- Posted on 20 July, 2017
- Lace Closure
- By Anonymous
I did make customized wigs. Only with lace closures currently. If interested email me!
[email protected] (you provide the hair )
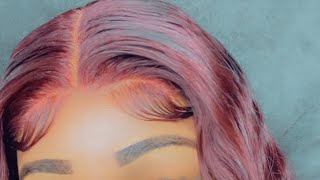
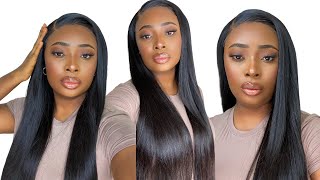
Hey y'all, so I was in the middle of making a wig for someone, and then I noticed like why won't over do a tutorial or record how I make wig. So that's why I already started and I'm gon na go ahead and show you guys what I do alright guys so um I just when I sold the first bundle and I put it at the very very edge of it, because when you want to put it In a ponytail, you don't want all that excess black bands showing and you want it to look nice and neat, and you want it to kind of droop, just tap it over the black bands. If y'all get my drift. So when I'm sewing on the part where there's like a band, I do not sew inside of that band sewing inside of it will not will make the band not stretch, and we want the band and the wig cap to stretch. So if you see me flipping it, you see no thread whatsoever because I do not sew inside of it. I just tuck it a little bit and so on top of it, if you guys can kind of see, I'm not sewing inside the band, don't don't don't don't so inside of the band also, once I'm sewing in that closure, I do not cut my WIPs. I don't want them to share, I do flip them, but when I flip them, I make sure I make a knot and secure it at the end so that it's not bulky believe me guys securing the ends of it. When you flip, it will make it lay flat. I promise you all it'll make it lay flat okay and then I'm just gon na sew. The remaining of this bundle in and show you guys how I do it. Okay after I sew down that first bundle. I'M going to go ahead and move to the top, which is the fun part. I'M sewing down the closure. So when I sew down the closure, I'm also doing it the same way as I saw in the bundles when it comes up to the Bands part we're not sewing inside or through the band. We are sewing on top of it. So just pull it a little bit the needle, so we can just get the top of that bin and we're sewing the closure down. Also with the closure. I do sew down the sides. First, I feel like it just gives me a little bit more room or just a little bit. It just makes it easier to make sure the closure lays down flat instead of doing the whole thing, because then it's gon na start getting like all crunched up and you're gon na have a whole bunch of heels and all this kind of stuff. You do not want on your closure, so yeah. I sew down the ends first and then I am going to sew down the back, also to keep that closure in place and make sure it does not go anywhere. I do insert a tee pin at the beginning. If you guys can see it a little bit to hold down the closure wise sew it down to make sure it doesn't go anywhere and yeah. So watch me sew down the closure. Okay, so after I've sewn in the rest of the bundles, I am going to sew in the slash track for the closure, pretty much just me showing y'all what the wave looks like so far with the back of the way once you pull the tracks apart. I'M sorry, I'm over here looking to miss I'm back round all dirty trying to get this a wig mannequin right, but I'm pretty much just going to show you guys how I'm going to sew the last track, and once I saw it, I usually make sure that I put the track that's close to or on the closure, as I can without like disturbing it just so that it's super flat, and you know you don't want that see. How has that gap? You don't want to stop there and just leave that gap, because once you start putting a closure that gap, it's going to be pretty much noticeable. So you want it to look as natural as possible and get that track in there as close on that closure. As you can to fill up that extra space, all right so after we sell the closure down sewn in all the bundles, now we are going to sew that black band through that under the lace part. Of course, we do not want our lace to look like it's black, underneath, of course that is not the color of our scalps, so yeah. I am pretty much going to cut that late, that lace, that bands off when you're cutting it. You want to make sure that you flip it inside out just so, you can make sure you are not putting the thread and losing out on all that hard work we just put in so when you cut it flip it inside out cut it against the thread. Just give it a little bit of room to where you're not cutting exactly where that thread is because you don't want it to eventually unravel, and you know, come off so just leave a little bit of band room under it on there. Just to increase the longevity of it is that how you say it I don't know I probably sound dumb, but it's okay, so go ahead, cut that off y'all, alright y'all, so um. This part, I just put the wig back in finish: cutting off the exit span. I did so in subway clips. I thought I recorded this part where I sew on the rig clips. I guess I did not. I am definitely sorry about that. Definitely make sure to make another video to let you guys know or if you guys want to know how I put on the wig clips on a wig, but I'm so sorry about that. I don't know what happened to it, but um yeah. Now, at this point, um we are going to make err part. Now this wig, let's put the hair, was provided it's unit here. It was provided to me by my coworker on making this wig for her um. If you guys wondering about the color she's going to dyed it on her own she's, going to continue dying it on her own, she didn't finish, but I made the wig anyway, so she's gon na die after I'm, making the wig. He just notes in about the color now, in order for me to lay a flat. I do also use mousse, but my secret weapon is a pressing home. I cannot stress this um love how pressing combs lay closure it's so flat. I promise you guys so I'm already made my part now, I'm I am just going to press this down just to make sure it's laying flat. It'S not bulky. The mousse helps it lay flat, but this pressing home is going to be the key to get it flat. I promise going to be the key to get a flat off all right, so now it's time for the pledging so um. That was the natural part that I had in there before and now I'm just going to widen it a little bit by starting to pluck it um. While I was the middle of this, my camera died y'all, so I recorded like I had to record the final look, my iPhone 7 plus. So if anytime, if you guys see, the quality is different, it is because of that so um yeah. I hope y'all enjoyed this video of me, making a Lois lace, wig so enclosure thanks for watching y'all


Comments
Jhakeia Nixon: How many bundles did you use?
Jennifer Clarke: Love it what wig cap do used to make the wig thank
Katie Arthur: Hey girl, I wanted to get in contact with you about your prices for a wig!
Khawanna Kelley: I need one of these aunty baby... How much?