The Perfect Daily Wig! No Glue Used! Make Your Lace Closure Wig Look Like A Frontal│Asteria Hair
- Posted on 07 January, 2020
- Lace Closure
- By Anonymous
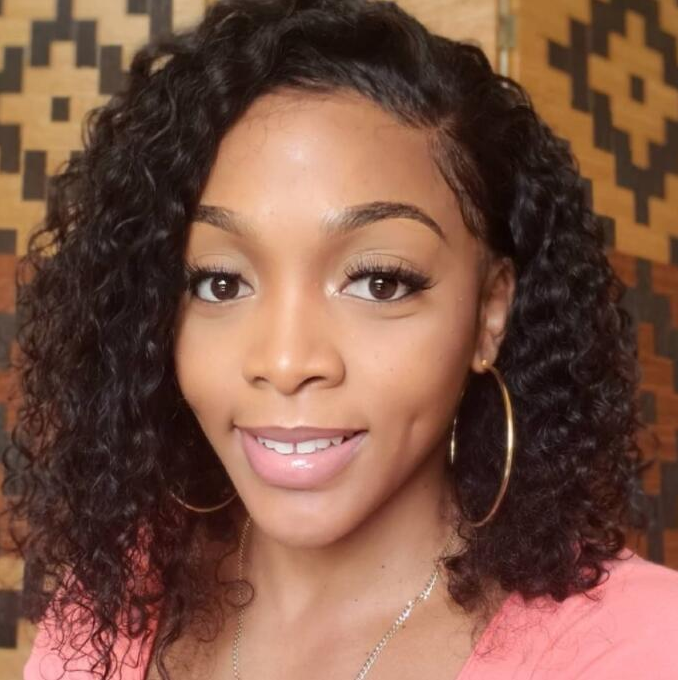
These gorgeous curls are perfect for Summer or Winter! This super easy wig tutorial is beginner friendly and a huge help to those who struggle to melt lace frontals. Closures are the answer for quick, easy and daily wig wear. Wear this wig with or without adhesive. All my secrets are shared for that flawless melted hairline lace look. LINKS BELOW!
Hair:DeepWave 6*6 closure wig 26'' 180% density Brown Lace
Direct Link: http://bit.ly/2PTpD6F
Same Wig in 10''-24'' http://bit.ly/34WiGpI
DeepWave Hair with 6*6 closure http://bit.ly/2PV1pJy
More 6*6 Closure Wigs http://bit.ly/34SI4gm
#AsteriaHair WEBSITE ON SALE http://bit.ly/2PTpEHL
WHOLESALE! WhatsApp +86 15136424039
Follow Asteria Hair Instagram http://bit.ly/34W1iBu
#asteriawig #deepwaveasteriahair #wigasteriahair
Subscribe Asteria Hair YouTube http://bit.ly/34W1iS0
-----------------------------
Hey loves! ♥ Become a Beige-ian by SUBSCRIBING here ▼
https://www.youtube.com/user/Mahoghany...
NEW VIDEOS POSTED EVERY WEEK!
TURN ON POST NOTIFICATIONS
HAIR STYLING PRODUCT:
- THE DOUX MOUSSE DEF STYLING FOAM: https://amzn.to/2uvPyt6
**I do not own the rights to any of the background music being played in this video. The background music is for entertainment purposes only. Here's the music playlist, check out the amazing Artists below ▼
1.) Ryan Little - Take It Easy - https://thmatc.co/?l=5B804D53
2.) RYAN LITTLE - THINK ABOUT YOU - https://thmatc.co/?l=9E7F24CA
Thanks for Watching!
Contact me: ▼
https://beigemedia.wixsite.com/beigeoj...
L E T S B E F R I E N D S: ▼
INSTAGRAM: BEIGE OJAI
TWITTER: BEIGE OJAI
FACEBOOK: BEIGE OJAI
SNAPCHAT: BEIGE OJAI
BEIGE OJAI
P.O. BOX 520
LANHAM, MARYLAND 20703
#curlywig#meltlaceclosure#hairstylistsecrets
Hey guys welcome back to my channel. My name is beige. If you are new here, welcome today, we'll be working with this wig that was sent to me from Asteria hair I'll have all of their information, promo codes and direct links down below in the description box. So when I opened up my package, of course, I received my wig. I also received a wig storage bag, an elastic band, a wig cap as well as a head scarf band. The wig that we will be working with today is a 26 inch deep wave wig. This wig was created using a 6x6 lace closure. That means that there is six inches of parting space from your forehead on backwards, as well as six inches of lace across your forehead okay. So I'm going to get started by bleaching the knots I'm grabbing. My quick blue powder Lightner by lore'l, as well as a 20 volume developer. I do want to mention that I did order this wig in a medium brown, color lace, but transparent lace is also available on their website after washing and conditioning the hair. This is how it looks I am obsessed with this wave pattern is so pretty the next thing that I'm going to do is pluck some hairs from the hairline to create a more natural appearance, of course, I'll be using my beige method to do this. My base method of zigzagging - I do have a full, in-depth tutorial on this process, if you're interested in seeing the full tutorial I'll have the link somewhere below or somewhere on the screen for you guys to click on so now that we're finished plucking the hairline. I am going to use my custom lace tent to make this the same complexion of my scalp. I did create this lace tent on my own. You can do that as well from products that I got from Dollar General. I have a full video posted on my channel if you are interested in knowing how I did create this lace tent I'll. Have that post it somewhere below or somewhere on the screen. But the point of me doing this is so that I can have a base that looks as natural as possible and I don't want to use the Balt method to make this look. Like my scalp, I want the wigs already look like that. Once it's placed on my head, so I do not wear wig caps with my wigs anymore. Now that I do this full method of the beige method, I don't have to worry about using wig caps or you know doing too much, because the wigs already looks super natural before installing and for a better visual. This is the color of the lace. After applying that lace, chance - and this is how the lace used to look as you can see, is a huge difference, and I want to show you how the parting space is looking after applying that lace. Hence I think it looks flawless okay, so let's jump right into styling I'll, be using the do mousse death, texture, foam. What I love about this product is that it conditions, shines and defines the curls in one easy step: sectioning off the hair, I'm first going to spray it with water. Then I'm going to detangle a it with my detangling comb. After that I'll grab the product and rake that product through the hair. Next, I'm going to grab my Denman brush and further to find the curls when I'm working with curly or wavy hair. I love to finish it off with this hair polisher for a wet look finish. Next, I'm going to grab my diffuser and diffuse through the hair. This is going to add more volume and fullness to this wig. Okay, so now that the wig is fully prepped, it's time to install it, I am going to position the wig to where I want it to be. So I want the part to be centered in the middle I'm going to line up the combs in the back and on the sides just so that I make sure it's in the proper placement so we'll be using gel today to install this wig I'll, be using This yellow tube got to be ultra glute gel. So I'm just going to put some of that on my hairline using the end of my comb, and I'm just want to smooth it really flat to get a thin layer of that and then I'm going to blow-dry. It with my blow-dryer until it's tacky, I am going to do another layer of that Ultra glued gel, and I am going to just put that over where I put the gel initially, because of course this is gel, you can put it directly on your hair and You don't have to worry about it, ripping your edges out, because it's not glue now, I'm just gon na grab the wig pull it forwards, and then I am going to press it into that gel. Now you want to make sure that you're not pressing it too much, because you don't want the gel to come through the lace and get on to the hairs and then cause like a big chunky. Clunky mess there. So I did do take my time and I use my comb to do that now, I'm putting on my headscarf and I am going to allow it to set for about ten minutes. Ten minutes later we are ready to take V headscarf off. She looks great. She looks flawless now. The only thing we have to do is cut the lace in the middle, so that it'll be easier for us to use this eyebrow razor to cut away any extra lace. I am obsessed with how flawless the lace melted into my skin. I love the results of this wig. However, my forehead is looking big, so I had to add some baby hairs there just so it wouldn't look that huge. So here we are here's. The final look. Thank you so much for watching. If you have any questions, don't forget to leave them down below in the comment section I'll have all of the information, promo codes and direct links to this wig. I think you should give this week a try. It is a closure wig, not a frontal. So you don't have to worry about gelling it down every day. You don't have to worry about. You know using any adhesive, because you can use an elastic band on it for more security, and I think that closure wicks are the perfect everyday daily wig. So let me know down below in the comments section if you would be giving this wig a try, don't forget to check down below for more information, and I can't wait to see you all in my next video bye, guys Bezos AG yeah. That'S my is basil.


Comments
Beige Ojai: **The wig worn in this video is for sale, email if interested: [email protected]
Raven Charnè: -Sooo beautiful, and natural looking.. You can slay any wig girly
Model C: Beige you make me want to buy every unit you review, you slay
Helena Morrison: You can slay any style... I love this look on u ❤
Alexis Brokenberry: Slay like always ♥️
Kimberley Foster: One word... Beautiful
ThePoeticOne: That lace tint is everything
Chemberli Jai: Hey gurl hey.....damn what can't you do?Queen you are the bomb "WIG WHISPERER " did it again loved this unit.#BLESSEDHANDS
A Dose of MiMi: Can we get some make up videos cause you stay with the looks
vay laine: come on queen of consistency!!!
sonja Blossom: Super cute But of course you always Do a very Good job.xoxo
Kiki Highgrade: I love love the curl pattern... you don’t use the wet gel anymore on your curly wigs? Love this look on you BTW
Rae Renea: Gorgeous
Model C: Awesome Beige, i think I’m your biggest fan
Kersha Beaver: The curl patten is everything
Alicia Cadet: How do you not get makeup on your foundation when doing that with a white shirt? This whole look came out beautifully
Annie Love: Yess I love it and baybeee that make up ✨
TANIKKA PADGATTE:
Helen: What’s the title of the video that you made your lace tint?
Nakieta_Nakole: where is the link to the video about making the spray you used on the lace
Jennifer S: Looks good
Kimberly Kyles: Cute unit
Frankela Blizzard: Can you do some makeup tutorials...?