Diy Lace Closure + Revamping My 2 Years Old Red Kanekalon Braiding Hair Crochet Wig
- Posted on 09 February, 2022
- Lace Closure
- By Anonymous
DIY LACE CLOSURE + REVAMPING MY 2 YEARS OLD RED Kanekalon Braiding Hair Crochet Wig
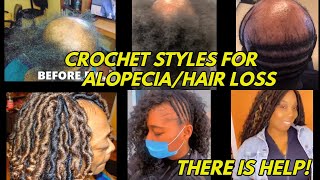
Crochet wigs are the most convenient and inexpensive hair to make in our time and has been in existence for a very long time now
But still relivant in 2022.
In today's tutorial i will be showing you how i revived my old crochet wig
I have had this red crochet wig for a long time and i finally decided to revamp it and bring it back to life
SUBSCRIBE to my channel for new videos twice every week https://youtube.com/c/MaameAbena
Watch original video
DIY || How To Do Red Crochet Wig ||$2 Kanekalon Braiding hair
❤️Other videos you may like to watch :
D.I.Y NO CLOSURE CORNROW BRAIDED WIG USING HOT GLUE GUN || VERY DETAILED and BEGINNER FRIENDLY
HOW TO CORNROW YOUR OWN HAIR FOR BEGINNERS || BEGINNER STEP BY STEP CORNROW BRAIDING TUTORIAL
HOW TO MAKE HEADBAND WIG BY YOURSELF USING MY OLD CLIP INS HAIR || EASY HEADBAND WIG TUTORIAL
DIY HOW TO DO GODDESS FAUX LOCS WIG CAP || EASY BEGINNER TUTORIAL
How To Refresh Old Knotless Braids to Zig-Zag Braids || WATCH THIS BEFORE YOU REMOVE YOUR OLD BRAIDS
❤️products used in the video:
Braiding hair https://amzn.to/34whmja
Shine and jam https://amzn.to/35jJ6rH
Mesh dome cap https://amzn.to/3ogs3gw
Latch hook https://amzn.to/3uexVed
Canvas head https://amzn.to/3GVvK2q
All links are affiliate links which means I make a small percentage off the sale, but it
does not cost you anything.
_________________________________________
❤️Places to find me:
Instagram: www.instagram.com/maameabena_cc
Tiktok: www.tiktok.com/maameabena
_________________________________________
Exclusive coupon codes for you :
#crochethair #crochetwig #revampcrochetwig
Hey beauties welcome back to my channel. It is your girl, mommy abner, and i'm back again with another hair tutorial in this video. I am going to revamp my old red crochet that i made about two years ago. If you haven't watched it, i'm going to leave the link in my description, make sure you check it out to see the original video before this one. So i've had this hair for quite some number of time. Now and after the video i haven't been able to wear it out, i don't know why and it was just lying down and, as you saw in the beginning of the video it looked messy, so i decided to recreate it and make a new closure for it, Because the closure that i did initially wasn't proper, so i went ahead to do closure for it and i treated it, and that is what you saw at the beginning of the video, the one i was wearing. So if you want to see how i was able to do that, please please please keep watching this. Video is self-explanatory. I don't need to talk too much so yeah, i'm using this closure net from my mesh cap. I just cut it from that side and then i started doing my closure and i started by picking two strands of hair. As you can see here and then, when i got to the front side, i decided to crochet it just once to make it more natural. This little closure guys took me a week to get to the side, but i was so excited because i knew at this point. I was almost done with the whole. Revamping i wanted to do so. I was so excited. I started off with this particular crochet needle and then i moved on to use the ventilating pain. I am still learning. I am not a pro. That is why i started with this one, because i moved a bit faster with this particular type of latch hook than the ventilation pane. I am still learning, as i said, so i don't want to start with that. One and i'll make a mistake along the way. So at the front i wanted it to look more realistic, so i switched to use the ventilation pin and, as you can see, i really took my time because using this pain is not a joke guys, it's not a joke, it's really difficult as a beginner, so I had to take my time and do it little little by little. This is how the closure looked like once i was done, so i'm now going to attach it to my red hair. This is how the hair looks like guys, and that is the closure. I did initially so i'm just going to use my powder brush to brush it to detangle, let's get rid of all the nuts and all the tangleness from it, and then i'm going to go ahead to remove that tiny closure off before. I then put on the new closure that we made on tell how beautiful this wig is coming together. So now that i've gotten to this stage, i am going to use my blade to shape the front side a little bit to give it an illusion that is coming from our scalp. So the scalp is darker and then the hair looks um reddish. So i'm just using my blade to shape it all in and then once i'm done, i'm going to dip it in hot water for the treatment lately. This is my go-to heat protectant that i've been using for so long. I really love it. So i'm just going to put a little bit in my palms and rub it in the hair. Before i straighten it and because of how the hair is and how old the wig is, i had a little bit of flower with at the end, so i went off to trim it all in and then i use my straightener to bulb the ends and that's It for this video - oh my goodness, this hair came out pretty well than i expected guys. If you haven't watched the original video, please guys do go to check my description for the link and yeah until next week. Stay five stay beautiful and be awesome. Bye guys! You


Comments
Agnes Nyamekye Acquah: Great
Hetty The Entrepreneur: You a really talented with this!
BARBARA ANSAH:
Laynah Hammond: Ah mon bébé ! ❤️❤️❤️❤️
LoveleeTV💞: Fatuhor mami❤️❤️