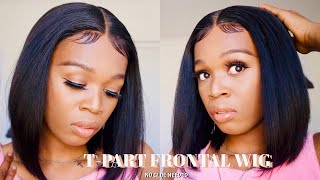
How To Make A Braided Wig With A Lace Frontal
- Posted on 21 June, 2021
- Lace Closure
- By Anonymous
Watch in HD!!! PLEASE READ IMPORTANT INFO DOWN BELOW!!
Hey Everybody,
This is a braided wig with a frontal please see info below enjoy thank you for sharing!
Vids mentioned in video:
How to make a braided wig
How to make a Braided wig with cornrow:
How to bleach a frontal/closure (washing process):
Products Mentioned in video:
Application Brush from sallys
Mixing Bowl
Gloves:
redd Gold Corrector
Salon care Quik WhiteBleach (Sorry could only find the packet at sallys , they may have the bucket inside stores)
Mesh Dome Cap (BSS)
Crochet Needle (Amazon)
Canvas Block Head (Amazon)
Needles(BSS)
Thread (BSS)
Aluminum Foil
Blow Dryer
Frontal from Hairsisters.com
https://www.hairsisters.com/Product/SA...
***Some Links may be affiliated Links***
Disclaimer: I purchased this product with my own money, this is my honest opinion on this product i am not getting paid for this review
Sign up for EBATES here it is free, get cash back while shopping its pretty cool! check out the link below!
https://www.ebates.com/r/MARQUI1425?ee...
My Hair's Characteristics:
My Hair is currently Loc'd now on 1/8/18 started a new journey if you want to check that out check the link here for my natural hair update: https://youtu.be/XITX2UPxiJQ
Hairs Porosity: High
Hair Density: Nape(low), Crown (high) Edges(low)
Hair Type: I dont hair type
Hair texture: Kinky Coily Texture
Last texturizer/Relaxer: October 28, 2011
BC date: July 1, 2012
Transitioned for 8 months
Camera Used: Canon T5i
Lighting: Limo Studio Umbrella lights from amazon
Editing Software Used: Windows Movie maker/ Sony Vegas Movie Studio 11.0 HD
Backdrop: Amazon
Want to catch me In Between vids? Look below to see how
IG: charmain7
Periscope: marquita1970
Twitter: marquita_83
FB like pg: marquita83
Snapchat: marquita1970
Check out my new blog!! Im starting post things there as well: https://wordpress.com/stats/insights/m...
Email me for business inquiries if you want me to review any products and if you would like to collab :) @ [email protected]
I also make wigs Lacefronts with closures and 360 frontals with virgin hair if you interested please visit my etsy shop thank you! https://www.etsy.com/shop/kinkzcurledu...
Music by: http://www.epidemicsound.com/
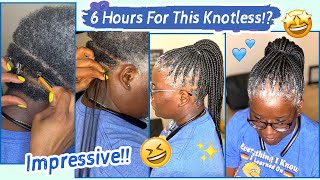
Hello, everybody. So this is a wig tutorial. We'Re going to start off with some pre-threaded needles and you'll need pre-threaded knee needles because it makes the process go faster, with the wig, making. Okay and then you're going to need some t-pins to hold down the mesh dome cap or whatever cap that you're using. And this is the mesh dome cap that i'm using along with the canvas block head that i'm using okay - and this is the small crochet needle that i will be using as you guys could see here, to pull the hair through the mesh dome cap. And this is the hair that i'll be using in the back part to braid the hair is synthetic hair, 82 inches expressions, and i purchased this from my beauty supply store. So before we get started, we're going to bleach the frontal now you guys will see the frontal, so i'm showing you the process of it. So these are the items that i will be using. You know gloves and the brush - and this is the the bleach - and you know, and things of that sort: okay and the foil to process the hair. Okay - and here is the frontal. I did purchase this from hair sisters and this was basically kind of a last minute purchase and i am going to also use the color corrector. I believe i also purchased this from sally's the salon care bleached from sally's. The gloves are from sally's um, the bowls from sally's the mixing bowl and the brushes from sally's, okay, all right. So this is how much bleach that i will be using if you guys don't know how i do these bleaching, the knots of the frontal. I did do a video on that as well. You guys can see that um at the top. I will link it at the top and i will link it down below. I will not show you guys the washing process, so, if you want to know the washing process definitely go check that out, i'm just showing you how i apply the bleach onto the hair and i'm not showing the bleach. I'M sorry i'm not showing the washing process, because i did do a video on that, so you could definitely go check that out and i will link that down below and probably in the i card above i do not measure anything. I just you know eyeball it make sure that you have a nice ventilating, i'm sorry, a nice area that is well ventilated, i'm sorry and because this can be very strong, so make sure you want to wear a mask. If you, your nose, cannot handle it or make sure that you have windows open, because this is very strong. Okay, the more you use the more it's going to be strong. I use a 30 developer. I could use 40, but i didn't want it to process as fast, and i didn't want to process. You know to go through onto the hair strands, because that can happen and you can over process. So, in order to be on the safe side, use a 30 developer, i'm amazed it's going to take longer, but it is safer, especially if you are new to this, and if you want to use 40 developer, then go ahead. If you want it to be quicker but make sure that you are eyeballing it and making sure that you are looking at the hair strands, because the bleach can definitely move up to the root of the hair, so you don't want that to happen and then you're Gon na have to you know, do a whole other process which you don't have to do, and you're kind of basically ruin the unit unless you are going to you know, but anyway, so yeah. So i'm using a few drops of this, so it won't be like brassy and stuff like that. So i use like three three drops or what have you. This is just to help with the processing of the bleaching of the knots and not to make it look. Brassy and things of that sort, okay and again the washing process i will link down below. I do not show it on here and you want it to look like this. You don't want it to be soupy, you want it to be kind of like a nice paste like a cake, batter paste. So when you apply it on there, you don't want the bleach to seep through onto the hair you're just bleaching the knots. So you just want it to be a nice thick cake batter type deal, because if you have it loose, then it's going to get onto the hair strands and you will have bleached hair as well. So you don't want to do that, especially if you're not bleaching. The the you know the roots of the hair or the hair itself. Now, if you're bleaching, the hair, that's a different story, you can make it as loose as you want to, but also you don't want it to be messy. Okay, so, as you guys can see here, i um have some clips on the back of the hair, because i'm basically you know holding the hair down, because i don't want any hair getting bleached. Okay, because this you, your any hair, could get bleached. So you want to make sure that none of the hair is getting bleached you're, just bleaching the knots you're solely bleaching, the knots and that's what i'm doing here. So this is just self-explanatory, i'm just putting placing it on there and things that i sort and after this i'm going to move on to the braiding part and the washing process, i did not show. But you guys can see that washing process of another unit in the description bar be low. Okay, so definitely check that out if you're interested in the washing process, all right. So here we go all right. This is what it's looking like after it's freshly washed and as you guys saw prior to, i did use aluminum foil to help it. You know process, and so this is what it's looking like now. I could have left it on there a little bit longer, but it looks pretty decent to me. So this is what it's looking like and i'm going to blow dry it. Usually i let it air dry, but i was definitely kind of in a rush because this was for a client. So i'm definitely showing you guys the hair here - and i did do a video like this before and i will link that down below. So if you guys want to see that process as well um, this is just like a quick update or like a quick, you know, video of how i do it. So i definitely did a video like this before. So if you guys want to check that video out as well, i will definitely link it down below and it's the same style wig that i did um show um so that i'm showing right now so yeah. So if you guys want to see that alright, so here we go all right, so this is the braiding part, i'm braiding the back. This is the synthetic hair, as you guys can see, i'm using a thinner piece of hair to crochet the hair through the mesh dome cap, as you guys could see here. Okay, so i'm putting in a slow motion. So you guys can see what's going on here and i'm hooking it through and i'm putting it through the mesh dome cap. Okay, all right! So now i'm pulling the hair through and then i'm making a loop as you guys can see. There'S a loop and i'm going to pull one piece of hair through, as you guys can see here all right, and now we crochet it through now i'm going to take the other piece of hair, as you guys will see in a few all right, just crocheted As you guys can see here, okay, now i'm going to take another piece of hair, and this is where i tie this into a knot to secure the piece of hair here. Okay, as you guys can see, and i'm tying it multiple times, you could probably tie it once if you like, but just to secure it. So it don't slide. It does slide a little bit, but once you braid, it is definitely secured all right. So now i'm about to braid the hair, as you guys can see here and as i'm braiding it i'm bringing it nice and tight to make sure that the hair is not loose and to make sure everything is good. So this is just basic braiding. If you guys don't know how to braid, then i guess you know this is not a braiding tutorial, but i'm just showing you how i braid everyone braids differently, so yeah. But again, this is not a braiding tutorial, i'm just showing you the little process that i'm doing here, as you guys can see here, and i'm also going to show you how i burn the ends as well and again. This is a quick tutorial showing you how to do it, because i already did a video like this so yeah all right, so i'm going to burn the hair, real, quick and then i'm going to show you guys how i do it. I braid all the way down and then i just burn it and then pull the hair from it. Now some people could just cut it and then burn it in and then use their hand like their fingers to, like you know, pinch it, but uh yeah. My fingers not set up like that, so i have to use like a a damp cloth to do that and then pinch it after and that's what i usually do and there you go, the ends are burnt and a lot of people don't burn ends because it's Old school but yeah, but anyway, so yeah. So this is the frontal part okay, so i already have my hair separated, and this is how it is and i'm going to take this hair and i'm going to separate it into two and, as you guys will see, i'm going to place the hair in between The part that i made and that's how it's going to be well and secure, so it won't slip out okay, and i showed you guys this in the video as well. I think i showed you in another video how to do it another way as well, but i learned this from a young lady here on youtube. I forgot her name, but when you see that video i will mention her name, so i give the credit to her and that's where i got it from and so now. This is how i do it when i use a frontal, so i can make sure the hair stays, because sometimes you may probably get some type of slippage. So in order not to get that slippage, you definitely should do it this way, as opposed to doing it. The other way - and i believe i showed the other way on my other video, but this is one of the most secure ways to do it and that's it. So i hope you guys enjoyed and yeah and everything of the case all the ends were burnt and everything and again this was for our clients. So i hope you guys enjoyed again if you want to see another um video on the similar hair that i've done on a similar wig that i've done. You could definitely check out the video down below in the description bar and i also put in the icard above, and you can see a really full detail of it as well. Okay - and that's just basically it about that so yeah. So i had it long in the front and short in the back, like a bob. That'S how that's how it was uh presented on etsy. Okay, all right! You guys i am done so. Thank you guys for watching. I hope you guys have um. If you have guys have any questions, i'm sorry definitely ask me, and i am done if you want more week, videos like this, please let me know. I know i've been slacking but um here i am here. I am okay, all right, so i'm out of here you guys. Thank you so much, i'm sorry for the noise. In the background, it's my ac because it is hot in here so yeah all right, so i'm out of here and i'm sure it took more. But i should have took better pictures, i'm sorry than i did, or what have you, but this is. This is which i get okay, all right, because again, i was kind of in a rush but yeah all right so next time it won't be as in a rush. Okay, all right i'll talk to you guys later have a wonderful birthday, but someone watching this. Thank you so much for watching. So you

Comments
marquita83: Hey everybody hope yall enjoy the vid! Thumbs up for more! I know the number one question will be how many packs I believe I used 6 to 8 packs of hair, thank you for your continued support!
Avanti Wingate: Looks natural love it
Come Get This Commentary: I love this!! And the style to I love a bob-like style. I can't braid good but I can braid. I would try this, but I would wear one!
Nizzy Mac: Okay! You snapped sis I wish I could braid cuz this is too cute!
jennifer: can you do a video of doing feed in braids on a frontal ?
247cmb: I enjoyed the video. idk how they burn hair and pinch it together ,tried to help a friend and hair stuck to my fingers won't be doing that again.
Dee Provost: Okay boo! I see you are dope asf!
1 and Only ThickandMeaty: Heyyy Boo