Watch Me Slay My Deep Wave Hd Lace Frontal Wig || High Ponytail Style Ft Celie Hair
- Posted on 15 March, 2022
- Lace Frontal
- By Anonymous
●▬▬▬▬▬▬▬▬▬ #CelieHair ▬▬▬▬▬▬▬▬▬●
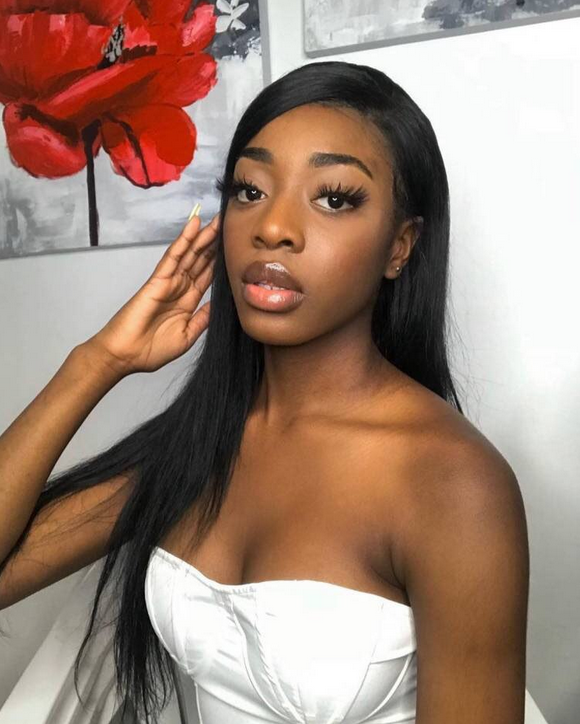
Hair info: 13x4 HD Deep Wave Lace Front Wig 24inch
Direct Hair Link ➤https://bit.ly/2Zgsfmw
Coupon code: ”wig10” save extra 10% off
Celie Official Store:https://www.celiehair.com/
HD Lace Wig➤https://bit.ly/2ZbqjeT
Hot Sale 13x4 Lace Front Wig➤https://bit.ly/2XAi2AG
13x6 Deep Parting Lace Front Wig ➤https://bit.ly/3C74mfr
Colored Wig ➤https://bit.ly/3E4TJdS
●▬▬▬▬▬▬▬▬▬ ★Contact Us ★▬▬▬▬▬▬▬▬▬●
Whatsapp/imessage:+86 17537405382
Order Service Email: [email protected]
Follow US Get Newest Hairstyle Trend
Instagram:https://www.instagram.com/celiehair/
Facebook:https://www.facebook.com/celiehair
Youtube:https://www.youtube.com/@celiehair
Music: Salty People
Musician: Summer Soul
Music: Barefoot
Musician: Summer Soul
Music: Swimming
Musician: Summer Soul
Music: 잊고 살았던 것들
Musician: Summer Soul
Music: I'm Your Puppy
Musician: Summer Soul
Music: Kill Your Darling (with Charming Lips)
Musician: Summer Soul
Hey guys welcome back to my channel today's hair was provided by celine hair and we'll be working with this hair. Today, the packaging was really awesome, nice and purple very cute. Color hair is 13x4 hd deep waves and also it's 24 inches 200 intensity. Everything will definitely be in the description box below and all the details. Of course, the packaging also kindly came with a binary, an elastic bed, an adjustable, strap and also we have lashes, which is awesome. So this is a quick sneak peek about the hair, absolutely beautiful um. The curls are really nice and firm. I like the pattern. The lace is beautiful and there's a good amount of lace as well on the inside. You can see there is the back glaze. We. Finally, have a built-in wig comb which can be located in each side front, back, left and right. First thing i will do is put on a wig cap and, of course, that's the base when it comes to wigs and i'm going to put it all the way up to my nose. Of course, i can breathe because i got my mouth, which i will open in a second and i'm gon na poke holes for my eyes. So guys, of course, be careful when you're doing things like this, because it can be dangerous, so poke a little hole in both of the eyes and then you can adjust that in your own way. This is how i'm gon na do this. Of course, if this is your first time doing, that watch me do it first and i've got lashes on so it's quite annoying so of course, um lift the wig cap and then poke a little hole to avoid um hurting your eyes or poking for your eyes, Which would not be very nice, it would hurt. So i'm doing this in both of the eyes, of course, guys when you're doing this be sure to breathe in with your mouth um. I look like i'm not breathing, but i promise you. I can definitely breathe, or else i wouldn't be here once you're done. We got the got to be free spray, we're going to go ahead and spray on the hairline um, all around the hairline, of course, because we do want the weekend to stay and not move, especially when we go ahead and cut the wig cap, because when it Moves it's gon na cause a mess and a disaster, and then we're gon na have to start all over again or try and adjust this, which is gon na. Take a lot longer and we don't wan na do that. So just put a good amount of glue, not too much not too little just a medium amount, just good enough to hold your hair firm and still next thing, i'm going to be doing these poke holes for my ears. Of course, safety precautions should be taken out when you're doing that, just make sure you lift the wig cap and then you go ahead and poke a hole in the middle and then once you put the hole in the middle, you can kind of adjust it with The scissors - oh it just breaks apart, while you poke your own ears for that, which is what i'm going to be doing right now so and then go ahead and blow dry. The hair, of course, on the cool setting the best setting, because if you put it on the warm or hot setting, it would not be very good for your scalp. It would be too hot and also it doesn't dry as fast as the cool setting. So this is why it's better, if you place on a goal setting plus it's nice and cold and refreshing, which is what we want so now we're going to go ahead and cut the wig cap. Of course, now our eyes can breathe, like this felt like a mask like it was so comfortable so again same as the precursors i'm gon na keep saying that um then cut all the way until you reach the part where you glued your hair. So then you could literally remove any excess wig cap. We don't need too much recap just as much as possible, because remember wig caps are supposed to be a scalp, so this was my little move very unnecessary, but anyways. Let'S go back to the wig cap like i said before: try and cut as much as possible, don't cut too much, don't cut too little and cut all around, of course, and yeah. Now i'm going to move on to use my spray tan. This actually matches my skin tone. You guys can use a foundation spray tan, anything that can dye the wig cap and use a beauty blender to blend the foundation or the spray tan. Okay. So now this is what the lace looks like. Of course, we need to dye the lace, the color that matches the skin, so i'm still going to use the same foundation. I mean a spray tan. You guys can use a foundation of your choice or spray tan as long as it matches your color skin, and you know this is to get this realistic. Look while you wear the wig, so we're gon na go ahead and glue on the wig. Of course, we need to put some glue uh below the wig cap, of course put the glue all around, and then you can go ahead and smooth it out with the back of a comb, which is what i usually do um. I know some people use their hands, but i don't want to get my hands all sticky, so i do use the back of her comb. It'S like smarter to do so, so this is like me doing it. This is how i do it i like to do in the upwards motion: uh double two down: don't go too up just as long as is underneath the wig cap. This is where you want it, because this is where the wig is going to be placed. It'S time to blow dry once again, again, i'm going to say again and again and again cool setting it's going to dry quicker, and you know when it's dried, because you're going to use your finger and you're going to touch it and if it bounces back, then You know that the glue is dried now you're gon na go ahead and apply the wig see i'm gon na show you guys exactly where i apply my wig um. I did mention my previous videos. I like to use my free finger tip rule, which is where i place my three fingers underneath the wig cap and then that's exactly where the scalp goes like the very edge of the wig goes, and, of course you don't put the wig all the way to The back or all the way to the front nobody wants to do that to the wigs, because it's going to look really fake and it's not going to turn out as nice as you want it to now. I'M going to get my trusty comb and comb the hair back, because you don't want the excess hair to distract you, especially when you're trying to glue the hair or remove the excess um lace. Because it's going to be very annoying and you don't want that. You don't want to accidentally cut the hair as well like, especially if you're trying to form baby hairs. If you want to form baby hairs yeah, you need to push the hair back. It'S going to do you justice now it's time to cut the lace. When i cut my lace, i like to start from the middle and go from side by side, it's like part it into three sections and then that's when we work with that, because it's easier to cut and yeah okay. Now i'm gon na use a razor to cut the lace because it's gon na be so much easier compared to using a scissor or something because scissors is just very annoying they're. So big, you can't even see what you're doing, but razors are easier. So this is what it looks like after donald the work better nice and easy. It was nice and quick. Of course, we still have the sidebar to do because it needs to fit. My ears like i do want to show my ears when i'm wearing this wig. So you're going to have to cut the excess hair, which is this part on the side, with the excess, um lace. So i'm gon na cut with scissors, because it's easier i mean it's not that big of a deal so so you're gon na have to just part it with a comb. It'S not too much, but it's just a little bit. I don't need it. So i'm just gon na cut it just straight up chop. This is the big chop, okay, so this is what the hair looks like i'm going to give you a quick 180 um. I did um cut both of the excess hair from both sides. So i'm just going to go ahead and wet the hair with straight up h2o, nothing too special and i'm going to pluck the hair uh. It did come pre-plucked, but it wasn't as plucked as i wanted it to be. It did give the same energy that i wanted it to give. So i just went ahead and plucked it just a little bit more, not so much just a little bit just on the um edges, because i'm not going to do baby hairs and i need those edges to give it what it's supposed to give. So now we have the hot comb right, so we're just going to comb that back all the way back um. I know what hairstyle i'm going to do. I'M going to do a half up, half down uh hairstyle. I know i don't style my hair that much. I usually do like middle parts, side parts which is kind of basic. So now that i don't have a 5x5 lace, i know what i'm going to do to this hair, i'm going to be doing half up half down per i'm low-key kind of nervous, because i don't style my hair so much when it comes to wigs. I do that to my natural hair, and i know it takes quite a long time and it's like hard work and it's like a workout, because you do need your hands up like a lot, and that is uh. That is a word cap now, it's time to form the baby hairs, aka, edges, um, you're ridiculous, so i'm gon na use this comb and then i'm gon na part a little bit just a little bit. I'M not gon na do like edges all around just two on the side, so i'm gon na part just a little bit of my hair. It is gon na be slightly thicker than usual. I'M not gon na go for the um natural um hair. Look i'm just gon na go for the uh, i'm popping look, so i'm just gon na part a little bit of hair and i'm gon na use my razor to cut it's not gon na be too long. The edges are not gon na go all around like it's not gon na, be, like you know the classical soup when he touches your hair. No, it's gon na be like a oh. My baby hairs are kind of short, so they couldn't reach to the end of the rose. This is what this is gon na, look like so they're gon na be quite short and thick just a little bit thick, not too thick just a little bit. So today, i'm going to be using my eco styling gel i'm going to be using my cantu um cantu, very good, very good gel. So this is exactly what i'm gon na use to lay my edges and, to be honest, these baby hairs gave what it's supposed to be given like it serves what it's supposed to be serving, and i'm here for it like are y'all here for this um. I did realize that um one side of the baby hair was longer than the other side like is it just me, and the right side was longer than the left side: um yeah? No, but it's okay. It kind of did look similar. Now i'm going to go ahead and tie my hair because we do need those edges laid and just wet the hair. While the edges are trying to recover, i'm gon na go ahead and spray the hair with h2o pure water, nothing special again! So i'm just gon na use my spray bottle, which is filled with water and just spray, my hair uh. This is because we need the curls to loosen up, and i did notice that this wig has the best curl pattern. I don't know if it's because it survived the journey, but the curl patterns are on fleek. So now i'm just gon na add curling cream. If you guys want to know what brand i'm using everything will be linked in the description box um, you can use curling use as well. There'S a lot. You can use a lot of products when it comes to curly hair and i'm just going to brush it with a hair brush, and you can comb it too. You can comb it with a big coat, but i'm just going to brush it with that hair brush because it kind of does the same thing. Okay, so the hairstyle i'm gon na go for, like i mentioned before, was the half up and half down um. So just enjoy me attempting this hairstyle okay. So now i think i know this. This actually came out better way much better than i expected. I love the look definitely go check out, celie hair for the beautiful hair. I love the quality of the hair. Everything about the hair is amazing and, of course, everything will be in the description box below guys. I am so impressed with the way this hairstyle look came out so much better than i expected, and thank you guys so much for watching, be sure to like comment and subscribe and i'm out peace. You

Comments
life is everything for fun Ishmail: Beautiful hair❤️
XxSafariPandaxX PANDA: Omg I was surprised at a young age you could do this
روان الدويش: Love it
T&N: Cute hairstyles
Vidash Kitchen: Nice hair
Fatouma Drameh: Vanessa looks just like sasher