Lace Frontal Wig Install Tutorial | Wig Vendor Review | I See Hair
- Posted on 01 April, 2022
- Lace Frontal
- By Anonymous
Hi Loves, here is a step by step tutorial on how to install your wigs at home. Free wig vendor that I personally use and a review of the company. Hope you enjoy, thanks for watching. Let me know what you think in the comments and what you want to see next. See you in the next video!
Follow Me:
Instagram: @StylistTraceyShenise
TikTok: @StylistTraceyShenise
Arlington, Tx
For salon appointments or to contact me:
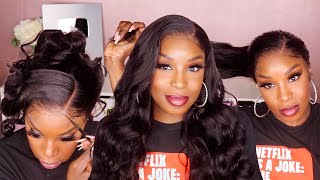
Hi, you guys so today we're going to do a wig install from i see, hair, which is the online wig vendor that i use, and so in your box. Um they give you your wig and then they come. It comes with this. Wig bag also comes with a pair of eyelashes they're lithium. It also comes with a wig band you can attach. It also comes with the pamphlet to show you how to care for your hair in a wig cap, two wig caps - and this is the inside of the box. So this is the peruvian collection straight 30 inches. This is the inside of the lace. The lace is a full lace; it comes with all those combs. I remove them because they do irritate the scalp and cause balding. So if you have like a redness or soreness that'll be why, and so this is a wig, it's pretty silky, pretty full 200 density. This is the lace, it is uh transparent. It'S a little white, i use demi permanent to root shadow, and this is the color that i use. This is a solution, so let's jump into it, so i'm using a wig cap that they included in the box, and you can see it is not my skin color but we'll fix that so you're going to cut it out around your ears. I actually braided half of my hair down, got lazy and put the rest in a ponytail. So, that's why it looks a little big on one side and this is holding spray and so you're going to spray where your hairline is to go ahead and get it dry. I use kenra, i love their products, so i actually sprayed it around my entire hairline front back and sides and so you're going to go ahead and let that dry so that you don't have any lifting in your cap when we're cutting it off, and so i Grabbed some foundation, i grabbed my foundation, so it is my actual skin color and we're going to rub that across the full hairline and wherever pretty much the lace is going to lay so that when you part it, you don't see a blonde cap. But you see what looks like skin, and so i did go ahead and cut the excess of the cap off and i went back in with the foundation and went ahead and just blended it more and i'm putting the camera the holding spray on my finger. Do not spray it across your hairline, because the cap will lift so i just spray it on my finger to lay the cap down and the areas that it needs to be laying down. I actually go across my full hairline with it, so i just keep spraying until it's completely down. I use my foundation to tint my lace on the inside and the outside, and so here i am rubbing it across my hairline of the front of the lace and that helps to give it this scalp effect. So i put the wig on - and here i am just going across the hairline with the holding spray brushing it back, because i am going to cut the lace off before i apply, and so that just keeps the hairs out of the way. So after i've done that go ahead and cut the lace off, i actually have to take my wig off and i use a razor. I prefer to use the razor to cut the lace off it gives it a rigid look to it. So you can't see the lace cut straight across and it just helps it to blend better. The wig has already been plucked so once i cut the lace off i'll, go ahead and match it to my hairline now i know that i don't cut much lace off, but if i was doing this on a client, i would have kept the lace on and Matched it to their hairline, because sometimes the sides come down further and you may have to pluck more out of the wig. And so the only thing that i really have to do is carve it around my ears, because it's longer being that it's a 13 by 4 and the average hairline is 11 and a half. So i know that i'm gon na have to carve it around my ears. You want to be careful while cutting this off, because if you cut too much lace off around your ears, you won't be able to put it up in a ponytail once you glue it down, because you'll see the size of your hair, and so, if you have To keep taking it off then measuring it and cutting it go ahead and do so so once you have matched your hairline to the wig hairline, you can go ahead and roll it back. I don't like taking it off because it's already in place and while i'm putting the glue on and i might have to um - try to match it back up and it's just unnecessary to work being that i'm not going to keep this online. I really didn't clean. My hairline, but please please, please make sure that you clean your hairline before applying the glue and use a skin protectant that will also help it to last way longer on mine. I think i use maybe two to three coats on my clients. I actually use four. Sometimes, five make sure that you are using something flat to smooth it down and do not put a lot of glue across your hairline at one time it should be drying, as you are moving side to side. If it's not, you use too much glue, you shouldn't need a blow dryer to dry the glue, as you are smoothing it out, and then you can go ahead and put it right in place right on top of the glue and it's kind of shiny. So you can kind of see where it is that helps you to put it right into the glue. Once you have put your lace down onto the glue, go ahead and press it down long as it is not white, because that will become sticky. You can go ahead and um try to pull it back up and then there you will see where you need to place any extra glue. Now i have a big forehead, so i actually pull my wig forwards on. So, that's why you see me actually lifting the whole wig up to put more glue on, and if you do this part right in the beginning, you won't have to do this much lifting and adding, but you still want to make sure that the glue dries completely Before you not completely, but you want to make sure it isn't white before you press the glue back down, and so i just take the tips of that with the teeth of the comb and kind of press it into the glue and rub it down that helps It to actually um bond into the glue and last a little longer and i'm showing you the hairline, how it looks once i put the lace down into the glue once it is completely down i'll, go ahead and take that same sponge, no extra makeup and just Go ahead and go across the hairline with any leftover product just to give it a more seamless, look: okay, you see the scalp and then go ahead and take your holding spray go back across the hairline. Remember to not spray the hairline, but rub it on your finger and go across the hairline. It will lift if you just spray it across your hairline camera dries really fast. So you won't see me use a blow dryer right here once i have put the whole spray on the ends, but if you are using got to be, you do want to be sure to use a blow dryer, i got a little hot. I did part my hair out. I wanted to do one of those hard parts, and so that was my first time. It was hard. So now i am um parting out my baby hairs. You can so some people, they actually part them out and put the band around them to just lay it flat uh. Sometimes i do that for my clients, but for me i wasn't trying to wait so i applied some makeup in it. I put the holding spray right there and just went ahead and laid it down, go ahead and get the excess hair at your way that you do not need and pin it down, so i'm cutting off the excess hair. But this is not how long my baby hairs will be. I just needed to cut the majority of it, so i can curl it and i just curl it. Whichever which way it's gon na all lay just make sure you get a good curl close to the roots and because i will have a swoop on that side, i won't do all those baby hairs. It'S just unnecessary, so i'm molding, my siberians down, cutting it off and i'm going to go ahead and curl it curling. It helps to give it the form, so you can go ahead and just lay it down and i am old school okay. I use the old school marcel wigs and i just put it on the baby: hairs go ahead and cook what you are not going to use off or what you pretty much think you're not going to use off. That is some mousse. I love foam, wrap and you see how it has a curl. So i go ahead and just lay down i like to apply the mousse piece by piece as i go, so that it's not drying as i go and then also, if you put, if you just spray the mousse on your hair, then it could possibly make your Uh lace lift if you're not moving fast enough, and that's actually one of the reasons why i do love bow hold because with other glues it will once it lift from any type of liquid it's over with that glue is done, but with bohol it's i use The um active, so it's like a sweatproof or waterproof so once liquid hits that glue, it activates the glue, and so it gets tacky again and if you put a band on it or you blow dry it back down, it will still stick and hold. So i use this um velcro wig band. It is from the diy brand, it's like a green and black package. It comes with two and i found it at my local beauty supply and you see me add a little marcel wax to my hair. So it can just give it that little shine and silkiness. When i'm flattering it, you only want to use a little bit if you use any type of wax or anything, because it is thick and don't rub it directly on your hair, smooth it into your hands and so here's the finished. Look after i finish flat. Ironing it and you'll see me just smooth everything out use my spray. I actually form my soup before i spray anything on it. Camera is not a hard holding spray, so you can comb it out and spray as much as you need. So once i formed my scoop, i went ahead and just secured it in place with a bobby pin and there you have it now, i'm taking some more wigs and getting that wig flat as possible by going in between and parting my hair and hot combing. That hair down, because it naturally sticks up and then flows down. Okay, i was loving this 30 inch. I was feeling myself - i just kept sitting on it, but there you have it. So this is the final look from the icy hair. I have used this company a few times, so obviously i like them. I switch my wigs a lot um. The only con i can say about the company or the hair is there. It does shed. Now it's not shedding right now. Let me just say that it's not shedding right now, it's still silky, it's not shedding right off top, but after a few months of wearing it, it will start to shed. So just keep that in mind. If you like to um, wear your wigs for a long time yeah, it will start to shed so other than that it's silky. This is the 30 inch 200 density, it's pretty full! When i dyed my roots, i use a daily permanent to dye my hair because it doesn't really fade um. I made the mistake of buying chocolate red, so my roots are like chocolate, but it has a little red in it. I am going to take that out with some toner. So if you make the same mistake, you can use toner to fix it. Whatever color coincides or cancels out that color you have, you can just use that toner. So i'm going to use some green toner to take out the red and it'll leave it just brown. So let me see if you guys can see it yeah, i'm 5'2 and it stops like a little bit under my butt. So that's pretty long. I'Ve never had 30 inch hair before um. I do like to wear my wigs glue is so wearing your wigs glue. Choosing to wear your wigs glue is you will help the longevity of your wig, because when you put that bonnet on at night, it's gon na crease up you're gon na have to wake up flat iron it and that's just not good to keep putting on any Hair but especially colored hair, because it's going to break, i switch my wigs a lot, so i probably will have another wig on in about three weeks, so it doesn't bother me that it doesn't. It can last a year if you take care of it um. The best way to take care of it is to wear a glueless. If you have to continuously put heat on it, put stress on the hair. Put tension on the hair is going to mess up the hair and that's with any hair, comparing it to a lot of other companies. It doesn't shed right off hand, so it takes a while for that um. This is maybe a middle company. For so, if there is anything else, you guys would like to see um. If you want me to do more in-depth tutorials. I know it's a little hard to see me doing myself. I'M kind of new at this recording thing. So if there is anything else you guys want to see, or you want to see a more in-depth tutorial, maybe applying it to a client's head. Just let me know down below in the comments and i'll, be sure to make the video and remember to like share and subscribe, and thank you guys for watching bye.


Comments
Sakle Smiles: I like thisss very cute I'm going to check this wig company out for sure