Coloring Hair Extensions | Match Your Hair Extensions To Your Hair Color
- Posted on 23 October, 2021
- 6D Hair Extensions
- By Anonymous
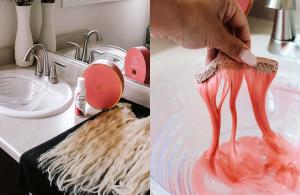
How to color your hair extensions tutorial. Hair extensions don’t always match your hair color. In this video, I show you how to match your hair extension color to your hair color. If you have hair extensions that are real hair, you can color it like normal hair. The process is a little different since the color on them is from the manufacturer. I walk you through how to color hair extensions. I show you how to weave color into your hair extensions. If you want to match your hair color and your hair extension color, this will show you everything you need to accomplish that.
#colorhairextensions
✃Subscribe for more hair tips and education ✃ https://www.youtube.com/thehairloungeb...
Share this video with a friend: https://youtu.be/rilB5KtxmsI
Connect with Me
Instagram – https://www.instagram.com/TheAngeSchof...
TikTok – https://www.tiktok.com/@TheAngeSchofie...
Facebook– https://www.facebook.com/TheHairLounge...
️ Want these lashes!? Order some below! ️
Stand Out Insta-Lashes - https://globallee.com/angelinaschofiel...
Need collagen to help your hair? Order some below!
TAKA Glo Collagen Drink - https://globallee.com/angelinaschofiel...
Amazon Affiliate Disclosure: “As an Amazon Associate, I earn from qualifying purchases.”
Products in This Video
(Paul Mitchell Only Sells to Licensed Stylists, here are other options below)
Wella Color Charm Permanent Hair Color 5A - https://amzn.to/2XJCmjm
Wella Color Charm Permanent Hair Color 5N - https://amzn.to/3Eb1CP2
Salon Care 10 Developer – https://amzn.to/2Zorp7p
Stackable Double Color Tint Bowl - https://amzn.to/2TCsIcW
Soft 'N Style 3 Piece Tint Brush Set - https://amzn.to/2Mat7iR
Framar Magenta Pop Up Aluminum Foil Sheets - https://amzn.to/2TCFqZo
Weaving Comb - https://amzn.to/3BoGAv4
Framar Gloves - https://amzn.to/2XCSQJS
Butterfly Clips - https://amzn.to/3ByyYWU
Hair Works Hair Extension Holder - https://amzn.to/30WDpO3
Halo Hair Extension (In Video) - https://amzn.to/3uOOSu1
Halo Hair Extension (Other Recommendations):
• https://www.glamseamless.com/collectio...
• https://www.zalahair.com/hair-extensio...
• https://hiddencrownhair.com/collection...
Equipment I Use for Recording:
Canon EOS M6 Mark II 2 Mirrorless Digital Camera with 15-45mm f/3.5-6.3 is STM Lens - https://amzn.to/3dexFRb
Fovitech Portable 2-Light 600 LED Daylight Panel Kit - https://amzn.to/2A2OoYN
Deco Gear Universal Mini Shotgun Microphone - https://amzn.to/2A7uiN0
Selfie Stick Tripod, 52" Extendable Tripod - https://amzn.to/3egsm3C
Blue Yeti USB Microphone (Only for Voice Overs) - https://amzn.to/3elCLLA
Thank you so much for taking time to watch my video. I hope you learned how to color your hair extensions to match your hair color. If you did enjoy the video hit the thumbs up button!! Also feel free to leave a comment below if you have suggestions on topics for future videos or if you need help with products for your hair type. Don’t forget to subscribe!
Intro/Outro Music
Last Summer by Ikson: http://www.soundcloud.com/ikson
Music promoted by Audio Library https://youtu.be/n2oTA5JSk80
Background Music
Track: Gladsome — Vishmak & JayJen [Audio Library Release] Music provided by Audio Library Plus Watch: https://youtu.be/HSu0zJV-KPY Free Download / Stream: https://alplus.io/gladsome
Hello, my beautiful hair, lounge community, welcome back to the hair lounge. Have you ever purchased hair extensions online and then you get them delivered and you go oh, no. They are not the right color well. Today. I want to teach you how to color hair extensions to get the perfect match for your own hair stay tuned and we'll get right into it. You may watch my previous video on halo hair extensions if you haven't caught that video, yet click this link up here and i'll. Take you to that video, don't mind baxter. He wants to know all about hair extensions, but if you noticed in that video, i am super warm on the very top half of this extension and then, if you look towards the bottom, it is very. Very cool. Hair extensions are a different beast when it comes to coloring and i always suggest if you are going to buy hair extensions online a lot of times. They say it's real human hair and it might not be so. You want to be very careful, make sure you're buying from a reputable site. Again, i will link those sites down below that way. You know you're getting real human hair. Again i bought these on amazon. They said real human hair, i'm not 100 sure, but i'm going to show you how to color these again, like i said this root area is super super warm, it does have highlights on the actual hair weft, but i want to do a little bit of a Shadow root, it almost looks like that's what they tried to attempt, but we're going to shadow root this, so it blends in with my hair, as you can see the color difference, i'm not red, so we're gon na shadow. This up and deepen the roots shadow root is super important. Most people, if you have highlights on your hair, naturally you're not blonde, as you can see, i'm not blonde either, but we like to pretend so if you do a shadow route, it really blends in those extensions into your natural hair. That way, it looks very seamless and very very blended, don't forget if you are liking. What you see now is a great time before we get into the hair coloring of the extensions to hit that red subscribe button. Do it now baxter's waiting? Also, if you end up liking this video don't forget to give this video a thumbs up. It really helps with the youtube algorithm and i greatly appreciate it all right. Let'S get the colors that we need to mix for these hair extensions, the hair extensions, since they are more on the warm side, i'm going to use more of a neutral ash tone that way it is going to get rid of that god awful red brown tone. So naturally, i'm probably close to a level five and that's where i want to take these extensions. So i'm going to mix up a 5n with a tiny bit of 5a and 20 volume. As always, i'm going to link everything down below if you need any help whatsoever on how you should do your own hair extensions always leave me a comment in the comment box below and i will try to guide you on what you should mix for those and With the hair extensions, i am not going to be lifting them. Obviously, i'm going to be depositing so we're just going to use 10 volume. Another tip i like to give a lot of my clients when they're buying hair extensions hair extensions. They are processed, so the manufacturing company, whoever ends up selling you the hair extensions they treat the hair very very few times have. I ever been able to put bleach on hair extensions and it lift correctly. They do not lift very well. They have some chemicals on them and you do not get a really pretty blonde, so i always suggest go lighter if you're confused, about which color you should get always go lighter and you can always tone it or always dye it. A darker color or use a darker low light in it, and that will help. You cannot really put bleach on hair extensions. It just really dries them out and you never get a really pretty color. So choose a lighter color. So that way you can go a little bit darker. So let's get to mixing here is the 5a, like, i said, we're not going to do a ton of 5a just enough to cut through that red we're going to do about a half an ounce and then again we are going to use straight 5n. I always use paul mitchell color, and this one we are going to do closer to three quarters of an ounce again 10 volume, because we are not lifting at all we're just going to deposit that color again, that's gon na be equal parts so about an ounce And a quarter and stir it up also you'll need foils, a weaving comb gloves if you get it on your hands, a clip and i'm going to show you this really cool thing. I bought to help with extensions and this hair works. Hair extension holder is a must you put the hair extensions in there, it holds onto it and it has suction cup, so you're able to put it on a flat surface, and it holds your extension, so i also suggest purchasing one of these again. I will link everything down in the description box, so it's super easy for you to find all right guys. So this is a really cool thing that i told you that holds my extension. It holds it up, so it doesn't move around a whole lot. You can also use a pant, hanger um and have that hold it too, but it has this these magnetics and then i just took that elastic from the halo and just i'm wrapping it around those teeth on the extension and that's just going to hold it in Place for me so again we have 5a and 5n in my mixing bowl and we are just going to go through and tap that in through that extension again. The bottom of this extension does have a weft kind of cloth in there with clips on it. So you're not going to want to go all the way through. If you have clip in extensions or any different type of extension, you will want to smush it and make sure it goes all the way through, but we're just going to start by tapping this into the root again. This has kind of that thread up on the top, so i'm not going to worry about getting it up on that threaded part, but we're just gon na really make sure we get the roots really good. They try to go down fairly far, so it is gon na be a little bit more of a pull down all through the rest of this extension further than i probably would normally go with a root melt, but that's okay! I'M going to show you how i'm going to kind of blend that in again like i said this is where you may want to wear gloves so you're not going to get it on your hands, but i like to live on the wild side. Okay! So now that i got that kind of smushed down into the rest of that hair, i'm going to kind of lift up the hair to make sure we're getting it all the way through because, as you can see, there's another weft underneath there and you're going to Want to make sure that you are getting everything, since this is a halo piece, you don't have to worry about really smooshing it in you're just kind of more worried about this top section of the halo. If you have clip-ins, you will want to make sure you're saturating all the way through so making sure you're getting all inside all those little hairs and covering it completely all the way through, like i said, with the halo extension, it's not super important important. It'S just the top layer so um, because that's the only thing you're really going to potentially see, if say the wind blows or anything like that. So it's not super important to get all the way through. Obviously you can, but since it's one thick weft, it's not it's not a huge deal. If you don't get it all the way through now. This is where i'm gon na take my weaving comb. You can also do like a blending brush and i am just gon na comb this down. This is going to ensure blending of that color. It kind of takes the leftover color that you have up to the top and kind of blends it down into the rest of those highlights or low lights that you have on the extension just like that now. This is where i'm going to start actually using my weaving comb to weave through, so i'm going to lift up that very top section of that weft and i'm going to go through and i'm going to kind of follow the weave pattern that they had. I am going to break it up a little bit, so i'm going to grab on this right side, but still grab that dark piece that you see right there just to really blend it down into the rest of this extension. If you can see kind of through here, they take their root smudge super far down, and that's what i'm going to blend in again, using a foil, we're gon na just pop that right all the way up to the root and we're gon na go through go Where we already applied color and then we're gon na turn, our brush sideways and we're going to kind of tap in where that kind of reddish tone is to kind of get rid of it, and then we're just going to feather it down into the rest of Those blonde pieces, i'm not touching the dark as much i'm just really kind of taking it into the blonde pieces just to kind of blur in that line. When you hold your brush at an angle, it kind of feathers it into the rest, and i'm going to pull that hair to the side and just fold that oil up on itself and we're just going to do that. All the way across the top of this weft same thing grabbing a section as wide as my foil, combing it nice and straight, and then we're going to grab most of just that dark section and kind of break up some of those blondes and taking it in. Where i already applied the color smushing a little bit more of that color in and then turning my brush sideways, pushing it down through that kind of leftover red stuff and then feathering it down into the blonde pieces again, you don't have to worry too much about The dark, because those dark pieces are pretty cool, so you don't have to worry about getting rid of the red and just folding it up on itself. Now what i like to do is i am going to lift all these foils up and clip them on to my little contraption and we're going to just continue on in through the rest of this weft to get really blur all the rest of that line. That you can see on there and i will also take so this is my part that i have weaved. I do not want to touch that and i'm going to clip that up so right now, i'm just kind of painting on that ashier color on those pieces that i did not get when i was when i was going through and applying the original root shade go. Okay, here's our last little row just gon na feather in a little bit more of that dark now that that hair is clipped up just to blend it in just a tiny bit more on this bottom section like i said it doesn't have to be perfect because A lot of this hair will be hidden because of all the hair laying up on top, and we are just trying to kind of get rid of that super warm reddish tone. Once we get this applied, we're going to let it sit, you want to let your colors sit on at least 25 30 minutes, so it can actually process and really cancel out those super warm tones, and then we will shampoo it when you are shampooing extensions, you Want to be really careful of not tangling them make sure all the color is really rinsed out, use shampoo and conditioner, and then we are going to use a blow dryer on it. So we will be back in about 25 minutes all right. My friends here she is, i did just rough dry hair and surprisingly, she had wavy hair, but you can see i really ashed out that root. So it's not red and we have a lot more of a shadow root compared to what it was before and just very, very natural kind of all the way throughout the hair. So it's going to blend with my hair a lot better, a lot easier to do whenever you have this fun little tool. I also dried her on this, so if you've ever had issues with drying your hair extensions, it really honestly helps so. Hopefully, you guys can see that on camera and see the difference of doing a root melt on hair extensions. Okay, you guys, hopefully that really helped you to know how to add low lights or add a shadow root to your hair extensions. Just in case you receive them in the mail and you absolutely hate it as always get extensions that are lighter. So then you can always add dark back into it. Try to match it as close as you can to your hair color, but if you are confused or worried at all always go lighter, because you cannot lift hair extensions, it really damages them, but so much easier looks so much better and it matches my hair. A lot better closer to my natural hair color, and we got rid of that god-awful red line at the very root of those hair extensions. As always, if you guys have any questions whatsoever, don't hesitate to leave those in the comment box below and as always, i appreciate the support, if you haven't done so yet hit that red subscribe button. So you don't miss out on any of my new and up and coming videos. As always, i appreciate the support hit that thumbs up button. If you enjoyed this content and we'll see you guys all next time, bye,
Comments
The Hair Lounge By Angelina Schofield: Let me know if you have any questions about how to color your hair extensions down below! Thanks for watching <3
jillian cordoza: Ok, how are you not saturating your mirror in hair color? What am I missing??? I can see a huge mess on the mirror and floor.