How To Make A Hat Wig With Detachable Hair Extension | How To Make Hair Bundle With Expression Braid
- Posted on 20 April, 2022
- Clip-in Hair Extensions
- By Anonymous
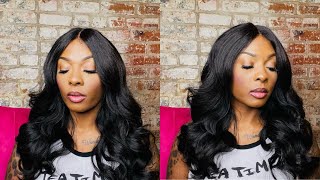
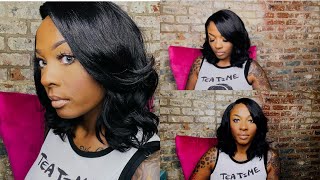
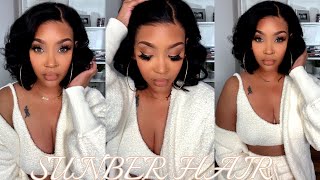
Hello guys welcome back to my channel my name is Stella Simbi and in today's video I'm going to show you how to make a Hat wig with Detachable extensions and also how to make hair bundles using expression braids color #2
For my conditioner mixture l mixed 90 ml water and 3 drops of Revlon conditioner and shake until it's mixed perfectly
Music: With You In The Morning
Musician: Carl Storm
Watch my other videos
How to make a kids softdread wig |Detaild tutorial | Beginner friendly
DO's and Don'ts on how to ventilate hair
How to make a closure using curly hair /How to achieve the curls back after ventilating
How to make a twist wig without closure |Beginner friendly
How to make a crotchet headband wig using one pack of expression braids
How to diy crochet braids using ombre braiding extensions / Easy way to do crotchet braids
How to make a 19" afro wig
How to make Passion Twist using kanekalon fibre | Beginner friendly |Detailed tutorials
DIY/ how to make a blunt cut 8×5 frontal wig
Please kindly SUBSCRIBE LIKE COMMENT and SHARE
#hatwig #diyhairbundles
Thank you for WATCHING GOODBYE
Hello guys welcome back to my channel. My name is stella simbi and if you're new here you're welcome and please subscribe and if you're already subscribed, but thank you so much for coming back. So i haven't been posting recently. I lost my videos, my phone just froze, but everything is okay. Now i will be posting so in today's video i'm going to be showing you how i made this set wig with detachable extension. I used expression brace to make my extensions and, if you're interested in seeing how i made my bundles, how i killed them, how i defined the kills, keep watching guys. Look at those curls look at those skills. I made them with expression, braids just look how they look and if you want to see how i made this, keep watching yeah so i'll be using this thread to make my bundles, i tied it from side to side, and i cut my extension once i cut It once uh, because i wanted it to be long and it's going to be curly, so i just cut once and i'm just going to pull my hair and i'm going to brush it um. Then we can continue. So i'm going to separate the hair, i'm going to do like tiny, tiny, tiny! That'S how i'm going to tie it. So i'm going to put it under the thread and open a loop. Then i'm going to pass my hair through the loop like that pass. All of it then pull it from side to side to tie a knot, and this is how i did it. So i'm going to show you again just take your hair, make sure it's like really really thin. Don'T do big ones. It won't look natural, like a hair bundle, so just pass your way through the loop and pull it out, then pull side to side to tie a knot, and this is how i did it. So i made my bundle. It was 30 inch long and i wanted to double it, so i'm going to do 15 inches and there are going to be two bundles. So i'm just going to use my flat iron uh to iron, the top of the band so that it won't unravel it will be secured like that yeah. So i, if, before you make your bundles, you should measure your head from side to side going all the way to your back. Then you can see how many inches you are going to need. That'S how long you are going to make your bundle. So i wanted to dab with the bundle. That'S why i separated them into two. So i'm going to be using this flexi rod to curl my hair, i'm just going to brush my hair to detangle. It make sure it's smooth, smooth, smooth, yeah, so just brush your hair like that to to the ends yum and then uh after brushing you can take your flexi rod and put it under your hair like that and start uh twisting and turning your hair like that, Then you can bend uh your flexi roll to secure at the beginning, like that yeah it will be secured. It won't move right there, so just continue twisting and turning twisting and turning twisting and turning yeah. Until you have like um four inches of hair left, then you can brush it and then you can start uh twisting not twisting you can start laying it flat on your face on a flex rod. Oh, my god, on your flexi rod like that, so that the curls will be like really bouncy and they will be so close to each other. You see all those skills where this is how i did it. They will be like really close, really bouncy yeah. If you ever seen like the way a spring looks like if you know a spring, this is how i wanted my curls to be at the ends, so i just uh laid it flat on the flex rod as you can see at the beginning, i'm twisting the Hair twisting the hair twisting the hair and, at the end, i'm going to lay it flat really flat, i'm not going to twist it i'm just going to lay it really flat. That'S how you can achieve those curls yeah and it will be secured at the ends. It won't unravel it will be really secured, and after that you can just trim your hair trim. Those uh fly aways, then i'm going to add my refluent conditioner and and then i'm going to add water water, and i will dip my uh here in water water. Then, after that, i'm going to put it outside to sun dry. I left them about an hour and they were dry. Then we can unravel them yeah, so the conditioner gives shine, and this conditioner makes your hair really soft. I really love this reflux conditioner. It makes your hair really really soft, so just remove them from the water and let them dry then can unravel. This is one side. This is how it looks like so i'm going to show you how i unravel them on the other side, yeah. So just turn your flex rod going the opposite direction. Then you can remove it like that and guys you know when separating the year it gets uh fly aways. When you separate the kills. You get a lot of fly aways and i'm going to show you how to get rid of that yeah. So if you want to leave them like this, you can lift them. So i'm going to be using my refluent conditioner again. I just added three drops into a small bottle of water, and then i made uh that mixture and i'm just going to spray it on my hair. If you don't want to separate the curls, you can just spray it, and then you can put the hair put the hair and your curls will be just good yeah. You can leave it like this. Have you ever seen uh indian movies, the way they killed their hair yeah like this, their hair is really long, but they can kill them. So i wanted mine to be uh. Many kills. So i'm going to separate then, when you're separating you get. This fly aways like that, and i'm going to show you uh how to get rid of those using your water and conditioner mixture. You see that compared to this, so just take your conditioner in water mixture. Put it in your power, then take a small portion of your hair, then start applying it from the beginning to the ends pulling it applying applying applying. If it's not uh, like really curly, you can add more of that mixture and guys your kale will be just defined like all those flight aways will be, there will be no fly aways guys. This method works like magic. You can use any conditioner you have, but i tried others. This reflux one is the one that works perfectly for me, but you can try with the conditioner that you have guys look at those skills. Look at those skills. Look how defined they are. It'S looking like. It'S not even braid extensions, it's looking really good, so you can just continue, do the other ones and then you can trim the ends yeah, and this is how they're, looking guys guys look at those kills. Look at those skills so guys, if you are really loving. This curls do say in the comment section, and this is how they look really close guys. You can see that yeah, so next we'll be doing our wig yeah. So i'm going to be using this uh best for cap and i'm going to sew my velcro inside. I'M going to be cutting my velcro about an inch and half and i'm going to be sewing uh five velcros, so i'm going to be sewing the soft side right there on the head and the hard side, i'm going to be sewing it on the hair bundles. So that, if you want to wear your uh your head without the extension, you can store it, it's soft, it won't irritate you so just sew the softer side of your velcro inside your head, like that and on this one is uh. It'S not double it's single. So that's why i'm using a red thread, but if your hair, it is double, you can just use any color that you have, but on this one, if you use black, it's going to show on the outside. That'S why i'm using the same color as my head, because it's not double me so guys. This is how it looks just turn your head like that after you're done sewing yeah, and this is how the will look like and on the outside. It'S not showing because i use the same color yeah, so i'm just going to sew my velcro on my hair, bundles, i'm just going to i measured on my head. They should match when you want to uh clip the your velcro on your head. It should be the same distance and the gaping should also be the same. So you should measure your head before. You sew your velcro on your bundle so that it will be the same gapping yeah. So just so, i'm just going to be using my black thread to sew my velcro on my bundles and i'm also going to sew five velcro and i did the same cutting. And this is the hard side of the velcro that i'm sewing on the panels. So that it will stick with the soft part that i sawed on my head and guys as you can see, i only saw the top part of the velcro. You know so the sides - and this is how uh the five of them looks like after sewing them. Yeah like this - and this is the other side - looks like so guys right here, i'm going to show you i'm going to show you how to put your vehicle just take it like that. The one on the middle on your bundles is the one that you're going to put on the middle of your head. So just stick them like that on your head, and this is why i was saying the distance should be the same unless, if you saw your velcro all the way, you did not space. If you saw it all the way, it doesn't matter with the gaping uh. So just take your velcro like that on your head, yeah and then this is how it will look like yeah. So i'm going to be showing you the other hairs, i saw them off camera and this is the same uh hair bundle. I just saw the velcro on the other head and i just take them. So this is the final look. This is how it looks on me yay, so guys to say what you think about this um hair tweak in the comment section do comment do like do. Share subscribe, if you haven't subscribed and thank you so much guys for subscribing. Thank you so much for commenting. Thank you so much for liking. Thank you. So much guys. Thank you so much yeah. Thank you guys. As you can see this way, you can just switch uh, your head anytime uh. If you are not sewing your bundles on your head, you can just switch just remove the velcro and put it, on the other hand, remove and put it on the other head. Then you can wear the it. According to the clothes that you're wearing uh, you won't be limited to one head. You can just switch your head any time you feel like yeah, so i really like uh it on this one. I think it suits me better than the other hairs. Do you say what you think just my opinion yeah guys, so i will be seeing you in my next uh video guys. Thank you. If you are new, don't forget to subscribe, don't forget to forget, don't forget to subscribe. Yeah so see you in my next video goodbye say what you wan na say to me. You

Comments
Sharon Namayi: Nice!
David Machavunga: Wow