Voluminous Bridal Ponytail With Caralee Pridemore
- Posted on 04 April, 2022
- Clip-in Hair Extensions
- By Anonymous
Effortless bridal ponytails are the perfect style for your modern brides who want a fuss-free style for their big day. Learn from Sam Villa Ambassador, Caralee Pridemore, on how you can transform an everyday ponytail into an elevated & sophisticated style. Watch this live to learn easy techniques for longer-lasting, not-your-average-pony styles that will set your bridal styling apart.
Class Takeaways:
- Learn how-to properly prep the hair for a longer-lasting look
- See how-to recreate a low-maintenance yet not-your-average ponytail
- Hear how you can detail the hairline for a polished finish that soft & feminine
LEARN MORE about this technique at https://www.samvilla.com/blogs/hair-tu...
SUBSCRIBE NOW Want more education? Make sure to subscribe to our You Tube Channel: samvillahairtutorials
TOOLS used in this video:
Textur Iron
2 in 1 Artist Series Marcel Iron
Sam Villa Sleekr
VIEW LIVE EDUCATION our upcoming live online events can be viewed at https://www.samvilla.com/education-cal...
GET SOCIAL with us!
Instagram - https://bit.ly/2Bq94bt
TikTok- https://bit.ly/3AdlboU
Facebook - https://bit.ly/2PKuAAi
Pinterest - https://bit.ly/2DytLDo
Linkedin - https://bit.ly/2PGdfZo
Twitter - https://bit.ly/2BnqG7Q
SHOP NOW samvilla.com
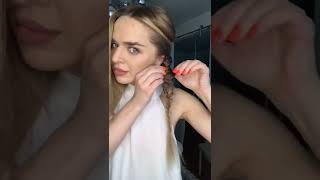
Today we have a great show for you with our good friend and sam, the ambassador, carolee pridemore carolee has been doing hair professionally for over a decade. She'S a zombie ambassador, of course, like i said, and a part of modern salon's artist connective. She specializes in styling, bridal hair for the past decade, she's a bridal hair specialist and owns her own business in ohio, called sweetly, pinned she's been published in modern salon, aesthetica beauty launch pad and more so we're really excited to have her. Please, let's give her a warm welcome in the chats, welcome carol lee pride more hello, what an introduction! Every time you guys are just so kind to me, hello, hello spring, has from here to answer your question andrew and i saw some people are watching in the comments from maryland and phoenix, and somebody was excited that it's ponytail time so i'm excited to be here With you, i am going to show you how to do a voluminous, ponytail um. So what does every great house need, and why am i talking about a house and not hair um? A house needs a great foundation right to stand on um. So that's what i like to think of when i am prepping my hair. My hairstyle needs a great foundation to stand on so that it can go through a drunken reception. It can hang out with the girls all day and it can just have all kinds of fun and last all night long so um, as you know, since we're doing a ponytail, which is highly requested right now in the wedding world, even with bridesmaids - and you know, Everyone is like requesting a really full, pretty um ponytail, so i am going in here and i'm just kind of taking the sections. Don'T have to be super clean um, but i you can change the sectioning around as well. You can do vertical or horizontal. I couldn't say that word apparently um you can take horizontal or vertical sectioning. It just kind of depends on what your preference is. I like to use both i like to use vertical sectioning in the front, and i like to use horizontal in the back. But again it's preference, so i'm taking about one inch, sections here: um and then i'm just taking my samvia texture iron and just stamp stamp stamp. Taking that about four fingers down now i cheated a little bit. This mannequin is pre-prepped, but i want to show you how i prep, so you know um, but this is more about the ponytail today than prepping, so i'm just running through that quickly to show you um so anyway, you're going to prep the whole head. I like to use you know you can just kind of base it on how full the texture is. Do you have somebody that has really thick hair or finer hair um? If you have someone with really fine hair, you can just do this all over. If you have someone with really thick hair, you can take sections starting in the mid occipital area and then you can work your way up. So again, i'm just taking this about four fingers down we're going to stamp stamp stamp. I'M going to show you this and then we're going to move move on to curling. This is my texture iron. So you can see how awesome that is. It'S a micro crimp and we're just kind of stamp stamp stamp, and that's going to leave that little micro stamp in here. You can see just like little divot marks uh, not very much because obviously you don't want your bride to feel like they're, madonna or britney spears. Unless you know we are kind of like not madonna, i guess she's like 80s, but um back to the 90s right now, where everybody's doing really small, tiny curls, i think that's 90s right or is it 2 000? So i'm not sure um? Where is the beauty? Show i think the beauty show is in illinois. Is anyone going to the beauty show this weekend? It'S going to be so much fun, i'm so sad. I have to miss it, but it's going to be a great lineup. So again, just kind of running in here. Just wanted to show you, if you're just tuning in we're going to do a voluminous, ponytail and i'm just kind of prepping the hair, because an important style requires important prepping. So we're just going to run that prep all the way through and if you are just tuning in, i already told everyone that i already pre-prepped her. So now we're going to go in and just curl, but yes make sure you watch. We have a bunch of other videos too, over at cmv, i believe, on youtube and even on instagram, that showcase a lot of the previous styles that i've prepped in case you want to check those out, and then you can see how i do that. A little bit more thorough, so we're going to come in here and just again section her off so she's already been pre-prepped with the texture iron and then i'm going to come in with my artist session artist series um curling wand. Here this is one inch. So i'm going to just lightly curl her all over. It doesn't have to be super nice and neat um. The picture that's actually shown for the demonstration that bridesmaid had extremely curly, hair and really thick yes, andrew, and what what temperature are you using on the iron um? I have it on a low setting, so there's actually three settings on this curling wand, um and then i have it on low and there's a colored temperature and then there's high. So i think it's really great that there's a colored option. Um when i say colored i mean like if your hair is colored, it's a heat that is good for your hair. If it's been colored um, it's a little bit better, i would say for your hair now always be using your heat, protectant um. I use my redken. This is number 11 iron shape. So i spray this all over, just even when i'm um already like using my texture iron, so it already has that layer of protection and then i'm i can you know i can add to it as well. If i want to throughout the style but um it's not it's not necessary, you can just spray it once if you're just using the texture iron just make sure that it's evenly distributed through the hair and that way it's like fully saturated. So that's getting protected. All the way through um, oh 375, yeah 375 degrees, i believe, is it. I should know that. I'M sorry, you guys, i'm like just in the process here doing what i love, i'm not good with the degrees. So i just know that it is awesome because every time that i curl the hair you can see - as i just did like it's just amazing, because it heats all the way through. You don't have to wait a super long time and then it's all like evenly distributed through the hair. So that's a pretty big deal when you're trying to work really quickly. You want your irons to work just as fast as you do so. Has anyone out there tried this curling wand, it's a marcel as well. I just don't have my other piece on it, the clamp part. So are you curling all in one direction or are you alternating different directions? Yeah? So that's a great question, so i am actually curling away from the face. I'M on my right side here, i'm curling away from the face towards the middle and now i'm coming over here to the left and we're alternating these curls. I just like to have that. Little bit of dimension in the style and again the curls, don't have to be super perfect. It, it kind of depends on what the picture is. The inspirational picture is that they show you uh, some even have the curls completely brushed through which you know. I really love like a very soft um, a very soft curl pattern as well. That'S we've seen that that's very trendy right now, especially with glam waves and all of that, so i'm just gon na take a second to pause here. We'Re just gon na use a hairspray. This is a flexible hold and this is still warm, so i'm obviously not going to brush through that. We want it to cool all the way through and then i'm using my zambia sectioning clips here. These are really great clips. I mean, as you can see, this is a lot of hair that this mannequin has and then this clip, i'm just using one and that's kind of a big deal when you're in wedding hair, because you have people show up and they could have like a ton Of hair i mean some people, just god has really blessed them like i don't understand it. I can't seem to have that much hair, but that's okay. I guess you could just get extensions too um. So anyway, i like to just kind of take all this hair and then just curl it in these alternating patterns. And then, if somebody has a lot of hair like i was saying you can just clip it up with the sectioning clip and it holds everything right up. It'S just it's phenomenal how it does that um and then you don't have to worry about it. Falling. Oh, have you ever used a bad clip and the hair just continues to fall out of it and it's like the most frustrating situation i mean. I don't know if that's just me that that's happened to, but it is so frustrating because i'll continue to just clip up clip up, go back um if you're just tuning in i'm prepping hair we're going to do a voluminous, ponytail um. I just kind of want to show you my prep process here and then the mannequin behind me over here on the top, the blonde she's. Actually a i'm going to show you a version with her as well. She has finer hair um, so i thought it would be good and she has layers. So i thought it would be kind of good to show you both uh. So this one has thicker hair and it's more one length, and then she has thinner hair and then it's just a little bit more layered, which, if you're asking me, i love like the layered, look and all that. But i do think it's good to show versatile styling, especially because you never know what client you're going to have sit down in your seat, um so, and so anyway, i'm taking the curls we're just alternating curl patterns. I'M sorry! If i get repetitive, this is a lot of the same technique right here and it's just really good to know uh, because you need it when you are trying to work efficiently and quickly on a wedding day. So again i'm taking this is my one inch uh wand and then it's my artist series uh, it's two in one, and so it has a marcel part as well - and i don't have that on here, but i'm just using it as one and we're just taking All that hair back away from the face to create a really nice curl um, and if you are just tuning in the demo picture that we used the model or not the model, the bridesmaid had extremely thick curly hair. So the technique, i'm about to show you is extremely great for that situation. If you have even someone with really fine hair and i'm going to show you with that, mannequin as well um that you know you need to be able to utilize this technique, because it's going to help the hair hold all day long and then it can also Create more layers in the hair if the bride or the bridesmaid doesn't have any dimension in her hair or layers in her hair. It'S kind of nice to use this technique to see how to do that. So does anyone have questions for me, this is a great time to ask questions. If you haven't. I know i haven't shown much but um. We are getting there and then i'll be able to show you how to do a voluminous, ponytail um. If not - and you guys haven't said where you're tuning in from i would love to know where you're watching from i always go back in the comments after the show - and i always read everything, so it's really sweet. When i can read that people like have a light, bulb, go off, it's like a light bulb moment and they're like oh, my gosh. I haven't used that before i'm going to do that. So i love reading that carolee. Where do you stand on the whole like um? Should they come in with freshly washed hair next day hair? I know that there's a lot of talk about that yeah, that's a great question, so um so yeah, just as long like how we were talking at the beginning about a strong foundation and how a house needs a strong foundation, i believe the same for hair and So, yes, you definitely need to be encouraging your brides to either see you the day before for a blowout if they can um or if you don't offer that as a service um to provide them even with maybe the right area to shop, to get like a Voluminous um a volume, shampoo or conditioner um, you know i have several favorites that i post on my instagram page as well, and then i also share that information with my brides just so that they can be um just so. They can be aware of like how i need them to shampoo. I like them to shampoo and condition and blow dry on the day of i like them to use a little little bit of conditioner. I don't want a lot of conditioner in the hair. As you know, it makes the hair very soft and it's a little harder to get that you know grip on the hair with my products now that being said, i can do it, but i think it's really important to be educating your brides and your clients to Know how to wash their hair and be able to even style their hair at their house with a better hold. Everything starts from that point, though, when they're washing their hair in the shower so and then, when they get out, you know using a volume, mousse or anything like that in the crown area, especially and if they can drag it out through the ends. That'S doing what our heat protection is doing as well. It'S creating that barrier that layer through the hair, where um you know it's just giving us extra protection and extra um styling advantage when we are curling and everything because it has something to hold. There'S a little bit of hold on that hair and you know you can read the bottles for different things too. There'S medium hold strong, hold light hold, so it's always what you're kind of going for and if your client has extremely fine hair, you might need a better like a stronger hold um in a product and so yeah. That'S a great question andrew. Thank you for asking me it, because that is so important, and then i also like to tell my brides and bridesmaids to um if they, if the bridesmaids ask um to blow dry their hair upside down, because you know, i just think that that helps so much Uh, it creates a ton of volume up here at the crown area and that's what we're going for, usually because when i go in and back home um, that's very important. So right now i'm getting on my right side working on my right side here and i'm just kind of taking section. By section we are curling the hair with our one inch wand and then we're just taking that hair away from the face going back towards the middle and has anyone does anyone else like out there watching? Do you section the hair differently when you are curling? I always love to know how people do things too. You know it's just it's so fun as a hairstylist, we're always learning. We are learning from each other um, and i think it's just so. It'S awesome. I think it's a great community to be a part of. I think hair stylists are a very encouraging group of girls, especially all the bridal stylists, that i've met, we're always willing to talk to each other about things that we do and experience. So if you aren't in this industry and you're thinking about getting into it, you should it is it's really rewarding. You know you get to help. People just feel beautiful and like on their wedding day, especially that's so so nice to be able to be a part of that big day in their life and curly any tips for um hair. That has a lot of strays and frizziness to it. When you're prepping yeah so um, i'm gon na kind of show you here in a second, i have a frizz taming, smoothing cream that i like to use, and i always curl the hair before i do that. So that way, even if i use that um texture iron, that has that little micro crimp it's nice to kind of go back in and add a little bit of shine with the smoothing cream. And then that will take away. That'S going to take away any kind of frizz leave the style for us free, that's especially important after we do the um back combing in the crown section, and i think i'm actually just going to stop here. I know this looks crazy because this is like halfway done, but i'll show you in a second. Why um so yeah we're going to go ahead and i'm going to just backcomb her a little bit and then we're going to go in and use just a little bit of this volume powder? As you can see, she has a ton of volume. Now you can do this either way you can curl. You can finish curling all the way to the top um just for time's sake. Today, i'm just going to go ahead and show you what it's like, when i put it up in a ponytail, so just create a big section here at the top and you've already added that micro crimp so you'll see once you start using a micro, crimper, um And the texture iron - you can just go back in kind of lightly back comb here and then that hair is gon na i mean look at that. Is that not the best thing you've ever seen like come on? This is too good. The texture yeah sorry to interrupt um just because we got quite a few questions about product. Just all at once, can you just um real quickly remind us what what products you prepped with and what aerosol like what um you'd suggest for as they're cooling? Yes, yeah um, okay, so for prepping right when i did my texture iron all over, i use my heat protectant. We want to get that that barrier on the hair. We want it to be layered and saturated with this, so this is just iron shape, shape 11 redken. I love it. It'S uh! I don't! I guess it's medium control, yeah. That makes sense. Um i've never looked at it. I just know that i love it. So honest moment from me um, but yes, it is a medium hold that makes sense, and then it does kind of control that hair as i go in and use that texture iron on it so uh, then i went in when i was letting them all cool And i used um my osis, it's a schwarzkopf and this is a level two and this is freeze um. I i think it's supposed to be used as a firm hold hairspray, but you know i like it as a medium hold. I i don't really layer it on there too much um and then i'm just kind of going in. You can see i'm just kind of back combing everywhere, picking this up back combing um and then i usually use a volume powder, so kenra this is 14 and then you can just spray this in either before or after um. I typically on a wedding day. We'Ll do it before i start back combing, but this kind of just goes into that padding here that i've created and that's just gon na add extra, lift so um and then we're going to go around front. And then i also do the same thing up here. At the crown, i just really want to make sure when i lift her hair into the hair bungee that it's all um lifted at the root as well with my back combing and there we go - and this is the signature series tail comb from zambia, and i, Like to use it because it's just such a it's, oh it's just amazing. It'S really good! It gets in there and just does exactly what i need it to do for backcombing um, because you know sometimes you can just get too much when you go in and back home with, like. Let'S say something that has a comb that has just a lot of. Oh i'm trying to think of the word hold on. I lost it. Um we'll come back to that, but as i'm going through here and i'm kind of just lightly curving my tail comb on top here i want to just smooth down all of that hair that i just created all that backcombing in and that's because we don't want It to look um, you know we don't want to look bad up here. We want it to look smooth and put together, so i'm going to use meiosis. This is tame wild. It'S a number three, it's strong control. So what this is going to do? I'M just going to kind of emulsify that into my hands, we're going to rub it through run it through the curls and that's going to break up the curls too. So i like to just kind of run through break up everything that i just did. We don't need this to be like if you went to hair school. You know i went to hair school to graduate at 09 and we were doing those spiral curls all over our head. We wouldn't brush them out. Oh, my gosh: do you know what i'm talking about it's the worst um and i would ride the bus so proud. I'D ride the bus home with these spiral, curls looking like little house on the prairie, and i was just like okay, i'm cool so anyway. Okay, so we're getting to the volume ponytail part here, depending on how high they want it um i like to leave a few pieces around her face, so we're just going to kind of leave zigzag this part right here. Um again, mannequins, hey, like hairlines, are just a little bit different than human, so we have to take that into consideration, but i want to just leave this hair softly out and we will come back and mess with some of this, so you might feel like. Oh, that's a lot of hair we're leaving down, but there is a reason why so we're coming in here i'm taking my tail comb to the top of the ear. Okay, you can see how that is going to line up. So i'm just like going to lift all this hair up we're going to cut this in the middle here again. If you have questions as i go, that product i just used was the tame wild osis. That'S for helping smooth and kind of get rid of all that back, combing messiness that i put in here, but we don't want to brush it all the way out. So it's still that padding is still in here, i'm just kind of running through the top layer of that hair to smooth it out, so we're doing the same thing on the opposite side as well, and you can use a couple different techniques here i like to Use my hair bungee, so we want to just really focus on getting this ponytail where we want it right here. So i'm just going to kind of smooth that down. If you guys are just joining we're doing a voluminous ponytail and i'm going to show you two different techniques right now, i'm getting my first one created and then we will go from there. So, as you can see, i've created that ponytail and i'm focusing on the top of the ear here. I really want that to line up okay um, because that's just a really that's going to look really beautiful in photos once i come up here and kind of pull that up uh and then i'm going to take my hair bungee. So tell me if you're not able to see this really well, but this is a hair bungee. If you've used a hair bungee in the comments, can you put hair bungee? Is my favorite or i don't know something about hair bungees. Tell me a good joke about hair bungees, so we're gon na go in here and just take this hook right. We'Re gon na stick it down in the center of this ponytail, i've created i'm still holding onto the ponytail and then here's my other hook. There are two hooks on the hair bungee. We are i'm placing pressure. Let'S show you a little bit better, i'm placing pressure right here onto the first hook that i've taken into the center of the ponytail i'm going to pull so i'm putting tension on this. Just like a bungee uh that you would need to use if you were like trying to put something in your trunk of your car and it wasn't shutting which, by the way, i do have a great story about this. My trunk well i'll tell you in just a second, so we're gon na take this underneath the ponytail all right and then we're going to wrap it again, wrap it as much as you can, and it's going to feel really tight and just for the sake of Me not losing this, i'm going to pull this more my way for just a second and then we're going to get in here we're going to connect the hooks at the center okay. So that's going to create ponytail. Has anyone has anyone done this? I love using a hair bungee. It'S just such a great way to secure the ponytail um. My story was that my trunk would not shut one day and i was at a wedding and i was freaking out that i wasn't going to be able to drive home because my trunk kept coming up. So i tried to take a hair bungee and attach it to the hook of my trunk and tried to attach it to somewhere else in my trunk so that it would hold my trunk down and it does not work. So i would not advise that and where do you order your hair, bungees uh? You can get them from amazon, they come in a big pack. You can get multi-color, i believe like brown, uh, dark brown and then black and blonde. So i have her as a blonde um and then there is our first ponytail okay. What are we thinking? Do we love it? Let'S clip this out of the way we're gon na work on our second ponytail you're like what. Why are you doing two ponytails? This is gon na, be ridiculous, and it's not. Let me tell you it is so great to use this hack, because if your client has extremely thick hair, you have to focus on how is this hair going to hold all night long like well? This is how i'm going to show you so we're going to use our hair bungee again so you're just going to come in here and i'm going to hold this tight. So you get to watch again. So if you missed it the first time so we're going to take it into the center of the ponytail, the first hook is going into the center. I'M placing tension on that as i wrap it. So right now there's a bunch of tension on it and it's getting tighter just like you would if it was a regular elastic, but you feel like how much different this feels so we're going to tighten that up. Okay, so we've created two ponytails here: i'm gon na show you just a couple different ways how to do this, so you can come in here. Let'S say your client's like i want some, i want some more um hair. Then you can add hair here some extensions. If you wanted to add some extensions, you could add them, they have all kinds of different kinds of ponytail extensions as well. You could even add this like in the second ponytail and just wrap it around, and then you could take this hair and split it. I'M going to show you the technique without the extension, but you can take this hair and you can split it and then come up and above this top ponytail okay. So that's going to create. It almost looks like you've taken the hair from this ponytail and wrapped. It around, but you didn't so we want to take this top part here and then we're just going to use a clear elastic if i've lost anyone as if anyone's like catching up. Please let me know because then i can kind of show you again. I know it's a lot to take in um, so i'm using a clear elastic at the top here, so we have like three. We have two hair bungees in here. We'Ve got two hair bungees and then we've got an elastic at the top and then that's all coming together right. So we've got this is already looking so full and big and it almost looks layered right. That'S what i was saying earlier: um, that's so important! It'S because it just like look layered and if you don't have that dimension, that's something you can do so you can come back in here and you can backcomb this hair and then you can also just kind of come in here split this ponytail in half and Then just backcomb, underneath there again, i'm using my signature series comb. This is a tail comb from zambia and it's the bomb. When you need to section you can use it. I don't color hair or highlight hair, but you can also use it for that. It'S really great for that um. So again, are we like what do we think show some heart emojis if you're loving this i'd love to know, if you have any questions, i would just love to be able to answer them. So we are just kind of cr taking all that so now, if you remember, i stopped curling up here at this top part. Oh that's a lot of hearts. Well, thank you. I love those hearts um and we're just going to kind of clean this up. A little bit too and you're, probably thinking like what. What is she what's this front part out for and i'll show you so now, i'm just kind of coming in here with my sandia sleeker. This is such an amazing tool to have on hand, because again it just creates that heat really evenly through the hair. So i'm able to get a very nice curl with the hair and i just kind of want to take any curls that look like they're sticking out funny and i'm going to just clean those up. So we're just cleaning up the curls. What um does anyone use a their sleeker to create nice waves in the hair, because i do that as well all the time i love to use it especially on front pieces when the curls just really need to last all day long. It'S just it's such a good temperature and heat to be able to use on those front pieces i'll, show you how i do that as well, so we're just kind of curling these ends under. I want them to just kind of be a little bit cleaner here and, and you can even brush like you, can even take that um, your sleeker and just kind of run through the ends and just kind of make them a little bit more beachier. If you want the wave pattern to be a little beachier so um, if anyone is just tuning in we're doing a voluminous ponytail, i have two hair bungees in here. If you're not sure what a hair bungee is, it is an elastic with two hooks on it, and then this is just this is really in here like she can go party hard. So, okay, so we still have this elastic, showing just a little bit up here and if you're like me and you hate having any kind of elastics or bobby pins showing, then you can kind of figure out what pieces you want to be framing the face here And then you can just take this other hair back, and i like this too, because if you curl the front, it creates almost like this beautiful wave too right, and so you can just even kind of pinch and pull so i have her over here and i'm Getting ready to like cross it underneath the ponytail and then i'm just kind of pinching and pulling here to um, create a really beautiful, dimensional ponytail, and then i'm going to wrap that hair underneath or over wherever it ends up. I'M going to wrap that hair either. Underneath or over top and then i'm just going to place a pin right in the top of that, okay and then i'm going to do the same thing on the opposite side. So i really like to make sure that this these front pieces are going to lay beautifully if you have a client that has extremely let's say, like really long hair like hers, um you're, going to want to advise them to get their hair cut prior to the Service so have them get those face framing pieces um the same thing was like a big voluminous blowout. You know everybody wants this big hair and it is beautiful, but you have to have the correct layers and haircut to achieve that um. So again, we're just going to kind of take this other piece we're going to connect it over top and we're just going to go the opposite way here and then just kind of pull that through and another trick i like to use, is you can take your Little topsy turvy. This is a little metal one. I like this one, a lot um, i think it's out of stock, though so i think you can find them on amazon, but you can just pull that hair through and then you can also like, pin it. If you want it to have extra security but yeah um, obviously if this was like a real wedding day, i would advise like that she gets extensions because they're still just like not really enough hair like down here to um like you, can even push that hair Bungee up and kind of hide it it's up to you as a professional to kind of figure out what works for you and if you are, if you're not feeling it down there and you want to push it up more. I would advise that, especially before you wrap the hair around it. That way, it's just hidden a little bit better um, but the advantage of using a hair bungee is that it does. You can kind of come in here and you can't do this with an elastic because it could. The hair could get messed up, but you can come in here and you can just kind of pull up on this hair and add way more volume. Um and i love that about those hair bungees so anyway, let's see um and then you can also take your sleeker um and you can even just the hairs that i pulled up. If you want like a little bit more dimension, let's say like 3d dimension, you can just kind of tap tap tap and that's going to really create those fine ridges. If your client is desiring like a more clean ridge look, so i think that's always a nice little touch. You can kind of see this side versus this side that i did not do and see how much like dimension that adds so um and also if they have like a lot of color in their hair, to let's say they're, brunettes um. That'S also a way to do it too, so we're just gon na leave her up there, and then i made a really nice um. I just posted a really nice tutorial on my instagram page, where you can actually take that split it into two. Maybe do you guys want me to show you? Let me just show you what i did on instagram i'll show you um with this one, so where i split it into two which i'll do and then i made a really nice bun like it was just so surprising when i was doing it because i'm like Wait a minute: this is a very cool technique. I wasn't really trying to do it and i love like what is that happy surprises like i just love. Little happy surprises, so um she's already curled all over and then i'm gon na take her hair up. Do you guys want this to be like a little bit lower? Do you want me to show you a lower ponytail that one was a little bit higher um, let me know say lower in the comments, if you'd like me to do it lower than andrew, if you are able to like, tell me what everyone's saying if they Want it lower or higher, i can do either one you're doing great. Okay, are you learning anything new andrew? Am i teaching you anything new, i'm totally getting into the bridal game after this class? Okay? So i'm gon na use um. This is just a different way to tame your frizz and add more texture, so i'm gon na add um. This is my kenra platinum, texturizing taffy, oh my gosh, it's so good um! It'S like very! Like oh stringy. It'S almost like glue. I don't know if you can see it and you can kind of just you can rub this in your hands or emulsify it in your hands or you can just rub it into the hair straight. This is adding texture while maintaining beautiful shine, and just i just love good products, you guys. So these are my go-to's. I also use a ton of air products and aqua has a new spray wax. That'S really great. I kind of use it all. You know if you're in this industry, you got ta, you got ta play around with everything find what you like um and then i have like a texture spray and a flexible hold hairspray from air. That'S just really wonderful, too! Okay! Is anyone saying lower uh lower? Okay, all right so we're gon na go lower with it. So you can leave out a little bit more here and then you can. If we have time i'm like rushing here, but i can show you how to do the bun, if you're interested in the bun as well just say, lower and then say bun if you want to see a bun, so we'll do this quickly. This is a lower ponytail, so i'm not gon na backcomb. The way that i would and the other one. This is just a different option. If someone doesn't really want all that volume and they want just a little bit more texture here - so you can see - i'm just kind of this is already curled we're gon na just kind of pinch and pull up on this um, and you know we were talking Earlier about um, a good foundation right and like if you need to have your bride prep the hair in a specific way um when she's actually blow drying her hair um. If she was to have like really curly, hair, uh or coarse hair, um sambia has like a three in one, i'm sorry three in one thermal brush, and so it gets hot. I'M gon na pause here for a second. It gets really hot and it's really nice and it like you - can use it almost as a blow dryer because it gets. I love it right because i can bring that if a bridesmaid shows up with wet hair, i can run through it and it's going to get rid of like a lot of frizz. It'S going to maintain the wave, but it's also straightening it out for me. So i'm not going to have a lot of frizz um so anyway, i am just using my hair bungee again, so we're doing a lower, a lower ponytail here and i do bun so much, i always think, of a bun, but i'm just gon na place pressure Here, on that middle hook that i've already taken down and under and then i'm gon na, take it we're pulling it adding that tension and then we're going to go over until we run out of that hair bungee and then we're going to cross it and just Tuck it in okay, do we think, like what do we think hero she can just like it's just so it's in there. Okay, you don't believe me there. I showed you um. So do you have a bride or anyone in your um lineup this year for wedding hair? That is wanting a ponytail. Let me know in the comments say yes and then also we're getting ready like i'm getting to the final stages here i would love it if you guys found zambia on instagram found carolee styles on instagram, follow us tag us and if you can take a screenshot Right now and post that on instagram and tag sam via tag me, i'm gon na repost, you and my story, and thank you so much for watching. So i'm gon na take this section right here. This is my right side and we're just going to kind of twist this hair we're going to pull it over that hair bungee and we're going to just wrap it. Okay, isn't that pretty already should we just leave the other side out, eh just leave it right! Um we're gon na just pull this through and then i'm gon na just kind of pin it right in here. The pin i'm using is an open pen, but i'm gon na go back in later, where i pinned it openly. The open pen gives me a little bit more um. I can get in here and just kind of pull it apart, a little bit more because that open pen isn't closed. So it's not holding it tight, um, okay and then i'm gon na go and do the same thing here and then i'm just going to take that and do the opposite so we're crossing over the right and then we're going to go up and above and underneath Until we run out of hair - and you can hair spray, that down use a closed pen and just kind of tuck that pen into um up and in to the occipital bone here so okay. So what do we think that was quick right once you get that hair bungee down and you're like okay? I know what i'm doing like this is foolproof. Do we love it say, love, it say, love it in the comments and oh here's a great time. Take a screenshot and tag samvia online, i'm going to show you how to do the bun. Since you stayed with me this long. Do we have time for the bunny andrew bun it up all right. So we have this here, we're just going to split this into two. No, that's not how i did it. I have to remember, because i did it so spontaneously. You know it was a happy surprise that i have to remember how to do it again. Uh! That'S the part of being an artist right like you get to have fun, just creating different things. Um this bottom part fell out, so we're just gon na go in here with an elastic. I just need it to be a little bit tighter than what the hair bungee can do, because this is just it uh. It'S kind of a weird section right here that i have so and that's mostly because i'm teaching and i'm working quickly - and i want to show you guys all the things so, okay um, so you can take an elast, that's just a regular elastic. We just put that in there and then you can take this and i kind of i was just playing around with it right. So i just kind of brought this up and then it just created, like this beautiful c shape almost and um. I just kind of held this up here right, so just create a little bun form the little bun here and it almost created, like a french like a just like a real modern, french twist type of situation, which we're kind of seeing like that. Bigger um, bigger hair, just like different dimension and all that so i'm going to take the hair is going kind of flowing here to the right. And then this bottom one i'm going to take to the left. So we're just doing an opposite direction and then just kind of pin it - and you know guys this again. It'S just like a really fun way of just making happy surprises. Um. It doesn't have to be perfect the first time you do. It don't be so hard on yourselves just kind of get in here and play around with shapes of hair um it. This is like this could be very editorial right. Like i mean i don't know um, i wouldn't i haven't seen anyone walking down the street with anything like this, but it definitely could come in just because bigger hair is on its way in um, so we're just gon na kind of pinch and pull and it Again, it's just kind of it's kind of messy, it's like a french twist um and then you can even take these pieces and incorporate them in or when i was doing my happy surprise. I didn't actually have any of this out, so it all kind of flowed really well so um if you are tuned in and you watch how to do a voluminous ponytail. Thank you so much for watching. I really appreciate it again tag us on instagram. Let us know you watched the show and you loved it. Oh yes, um, oh yeah did you guys watch the oscars. We should have talked about that anyway, great job as always, carolee and all just simple enough that i you know even someone like me that doesn't specialize in this style of hair. I feel like i could go, do a lot of this so watch out world. I'M coming i'm coming for you in the bridal industry just kidding, i'm really not, but thank you carolee. That was awesome. Yeah. Thank you for having me and everybody enjoy. The american beauty show i'm so jealous that everybody gets to go all right. Thank you. Bye!


Comments
Angela D'Onofrio: Hi. I would really appreciate seeing a tutorial like this with an actual model. It would be even better to see models with different textures and densities each with the same style.
Melanie Barnes: ❤️ Hermosa eleccion 4.FO/Elizeid de mejor 1 (elecciones ) 9.9/10 2 ( culturales ) 9.7/10 Son unos de los mejores conciertos , no-puede-ir-pero-de-tan-solo verlos desde pantalla,, se que estuvo Sorprendente .
Olivia Nelson: ❤️ Hermosa eleccion 4.FO/Elizeid de mejor 1 (elecciones ) 9.9/10 2 ( culturales ) 9.7/10 Son unos de los mejores conciertos , no-puede-ir-pero-de-tan-solo verlos desde pantalla,, se que estuvo Sorprendente .
Tanya Wersinger: Watching a bit late, beautiful work!
Ron Ty: I DON'T BELIEVE IN HAIRSPRAY EVER!