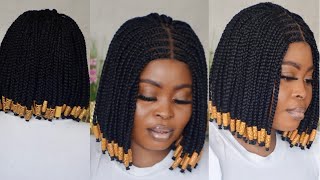
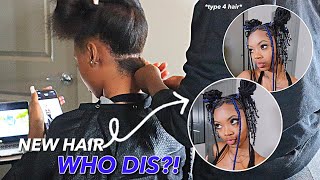
Bellami Hair Extensions Install
- Posted on 11 March, 2021
- Microlink Hair Extensions
- By Anonymous
Watch to see how Amanda Moncur Salon installs I-tip hair extensions
Okay, so we're doing a beaded install today, so i've already installed some of her hair. I'M going to show you the rows that i've done so in through the back here you can see. We have a few rows. We have one two, three, four five. We have five rows on the bottom row here. I used a bead with silicone because extensions are more prone to slip in the nape, so the silicone gives you a little bit of an extra grip on their hair, so the extensions don't slip for the rest of the beads. I just use the regular beads. Typically, when you do a beaded extension install, you don't need silicone everywhere, just through these areas here, when you put them in you want it to be the same section size as your bead when you flatten it. That'S how big you want the sections to be. You don't want to see any hair being pulled into the bead from other areas, so just nice and straight - and you also don't want to have any cross hairs which would be like a hair coming from this bead over into this bead. So you don't want any of that either. You want to make your section as clean as the crossed as you can for doing the bottom row. How to know where to start is to do a two fingers from the bottom row. Another way to know where to start is to take your rat tail comb. So you take your rat tail comb and then, if you bend the hair - and you can see the rat tail comb through the hair, then you need to go up higher, because that will mean that your extensions will show so we're going to put in her first Row on this side we're going to go a little higher. Then i like to set myself up for success and use another clip to make my section for the bottom. So i'm going to go across this section should be about a half of an inch thick. I'M going to go ahead and just clip this right underneath here, so that i have my clean working section area and then we're gon na go ahead and start. I usually like to go from back to front, so i have my loop tool all prepared. You want to make sure that the beads with it where the lip is here that it goes down so you're gon na, have the open top and then the lip on the bottom. So that's how you load the beader and then you're gon na use this tool. This one is going to have a lot more of clamping power. If the plier is too small, you might not be able to clamp all the way across the bead we're going to begin with our pre-sectioned section. If you do not have fingernails, i would recommend using the garage talk home because you want to make sure that your partings are really clean and i'm going to take just about the width of the bead when it's smushed. So that's about, like the tip of my fingernail, there um a little smaller than a fourth of an inch and then i'm gon na take my loop tool with two fingers through it. I'M gon na grab the hair through so now. The loop tool is now on the hair and take the bead and push the bead up over to the hair and pull the hair all the way through, and then i will make sure to grab it with my hand so that the bead doesn't slide off. I'M going to put this back on my hand just on one finger, so i can use my hand to work and i'm going to slide the bead up to where i want it hold it with my left hand and grab my hair now you're going to shove. The eye tip a little further up into the section for now, so that you can get control over where you want it to go. Grab the bead, don't clamp yet you're going to go ahead and then move the bead up to the top of the eye tip and then you're going to squish right in the middle where you want. This is right at the bottom of this section. You don't want it too far down and you don't want it too far up so just right in the bottom of the section. There clamp in the middle first then clamp the top and then clamp the bottom. The eye tip should be very close to the top of the bead and are flush. You don't want it sticking out very far. It should be just right to the top then go ahead and take your next section. You can do the same section size that you did before and you're going to do it right. Next to your other bead, you don't want to add any hairs in between when you're creating a row when you clamp down with your plier, you want to make sure that you really clamp so that it's going to give it enough tension if your guest comes back To you and there's hair coming out of the bead, this direction, that means it wasn't clamped tight enough or the bead you used is not strong enough for their hair type once completed with a row and the hair falls you'll see that there's a slight bit of Gapping in between, and that's just because of the way the beads go so on your following row. You want to place extensions in between so that it's bricklink, so you'll start a little bit different over here. The next thing to know about placement with extensions - it's really important, as you can see right now, that there's a disconnect from the front and the back there's a hole right here and what that comes from is from there not being much overlap with these extensions here. So you can see where i put this row and this extension here ends right where this one starts, so you always want to make sure that you cover your corners really well, so this is going to be the beginning of our impact row. The impact row is a row that goes all the way across to the other side, and then you begin to continue to fill in through the sides. Okay, we're going to begin the impact row. You can see on this side that we have our bead here and then we have our bead here. So this is going to be the row that connects the two sides together um because of the placement of how far up we normally have to put the sides. So that they don't show there is going to be hair left in between this row and this next row. Typically, you don't want to leave space if you can help it um, but usually the impact row is a little higher, so you need to leave some space. So i'm just going to go ahead and go through and section out the correct amount of hair and get myself set up for success so that i don't have to deal with it. While i'm beating this row also too dips a little bit in the back. If you can see that where it comes here, so it starts a little higher than dips in the back. That'S gon na make it so that when they put their hair up, it's a little bit more comfortable. The hair that you're going to leave out in between here is going to be from the bottom of this beaded row to the bottom of this beaded row, so that on top it will match evenly. Sometimes people's heads can be longer on one side or shorter on the other, or there can be more hair density or less hair density. So you want to do your sectioning based around the hair density, not necessarily because you want it to be a perfect line underneath from here to here. You can see, there's more hair here left out, then there is hair here, that's left out in this video. I do have my model handing me my hair for convenience in real life. You will not ask your guest to hand here to you, you will have an assistant or you will pick it up off the tray, even if it is difficult to do so. This is the row: that's going to be covering that gap area right above her ear. So it's really important to make sure you get those all together here so that there's no gapping in their hair. So do you


Comments
Ashlyn Cobain-Wheeler: Love this! Thanks!
Annette Lee: How many hair packs did you use