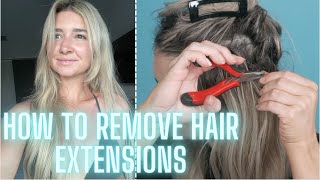
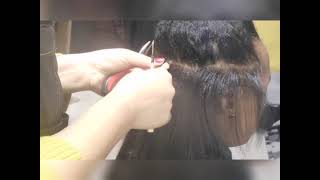
Donna Bella Milan I-Link Hair Extensions
- Posted on 10 February, 2013
- Microlink Hair Extensions
- By Anonymous
Donna Bella Milan demonstration of their I-Link method. The I-link method is a non glue based hair extension technique (beads). Visit http://www.hairextensionguide.com/hair... for more hair extension techniques.
When using Donna Bella hair extensions, the consultation process is quite simple: you'll first need to determine what kind of a look your client is hoping to achieve. There are a few different approaches. You can use first length, second volume or thickness and third highlights or color. It'S also common to mix and match these three approaches. In fact, when adding length, you'll also need to add volume to make the extensions look natural before you start to apply extensions to your clients, hair, it's important to find the right color to help with this matching process. Take your Donna, Bella color ring and hold it up against your clients, hair with such a wide range of tones to choose from finding the right. Color should not be difficult. Remember if your clients hair does not match exactly you're able to dye and bleach the Donna Bella human hair. Now it's time to section your clients hair to help with this process, you'll use the rat tail comb and large Clips provided in your Donna Bella kit. First, divide your clients, hair into two equal halves using the rat tail comb, create a straight and defined part line. This part line should run horizontally from one ear to the other, passing just below the occipital bone, using the large clips clip all other hair. On top of the head make sure the clipped hair is secure and also that the horizontal part is as straight as possible. We so your client can wear her hair up or in a ponytail, do not apply extensions to the NAP area or lower back of the head. This is the needle hook and loop tool. We'Ve provided both methods because some stylists like the loop tool and some like the needle hook tool, let's start with the loop, simply slide the loop into the end of the handle and twist to tighten notice. The eye Link beads are threaded inside which prevents the extension from slipping or falling out of your clients hair to place. Ilink beads on your loop tool simply run your finger. Nails down the loop making the tip pointy now place the beads on the loop one. At a time once you have a sufficient amount of beads on your loop open the loop back up, sectioning or grabbing the correct amount of your clients. Hair is an important skill and takes practice. It is suggested that the portion of your clients, hair that you sectioned, should be approximately the same density as a Donna Bella extension. You want to make sure that the strands of your clients, hair, are pulled from the same area, creating an even tension, use the rat tail comb to section off approximately the same amount of a Donna Bella extension place your thumb and finger through the loop grab, the Small section of your clients, hair and pull it back through the loop, take one eye, link bead and slide it up off of the tip of the loop. By doing this, your clients, hair, is fed through the bead. Let'S do that again, section off a small portion of your clients, hair pull the hair through the loop, take one eye, link bead and slide it up off the tip of the loop. The bead should now be neatly on your clients, hair. It'S important to pull the correct amount of hair through the bead pulling too much of your clients hair through the bead may not allow you to fit the tip of the extension into the bead or could cause an unnatural look once the extension is applied. Pulling too little of your clients hair through the bead, may not allow for a secure connection or could create added stress even breakage to the hair. This is the open/close bead tool notice. It has multiple grooves used for different parts of the application process. Now that the bead is on your clients, hair, with your other hand, pick up, one Donna Bella extension place. The tip of the extension inside the bead, along with your clients, hair holding the bead and extension in place with one hand, pick up the bead tool. With your other hand, position the bead and extension in the first groove on the bead tool, applying slight pressure, move the bead and the tip of the extension approximately 1/4 to 1/2 inch away from your clients scalp once in the correct position, use the bead tool to Close the bead firmly around the tip of the extension and your clients hair the beach to be clamped tight enough for the threads on the inside of the bead to sink into the tip of the extension assuring the bead will not come loose or slip. It'S also important to clamp the bead in a direction that will allow it to lay flat against your clients head now. Let'S go through the same process with the needle hook tool simply slide the needle hook into the end of the handle and twist to tighten to place. Ilink beads on your needle hook tool simply feed the needle through the beads and scoop them out of the container. To help speed up the application process, the needle can hold multiple beads at one time use the hook to grab approximately the same amount of a Donna Bella extension secure. The small section of hair in the hook take one ilink bead and slide it up. The needle and over the hook, by doing this, your clients hair, is fed through the bead. Now that the bead is on your clients, hair, with your other hand, pick up, one Donna Bella extension place. The tip of the extension inside the bead, along with your clients, hair holding the bead and extension in place with one hand, pick up the bead tool. With your other hand, position the bead and extension in the first groove on the bead tool, applying slight pressure, move the bead and the tip of the extension approximately 1/4 to 1/2 inch away from your clients scalp once in the correct position, use the bead tool to Close the bead firmly around the tip of the extension and your clients hair. The beach should be clamped tight enough for the threads on the inside of the bead to sink into the tip of the extension assuring the bead will not come loose or slip. It'S also important to clamp the bead in a direction that will allow it to lay flat against your clients head. Do not apply the extension too close to your clients. Scalp. If you do, the bead is not able to rest flat against her head, which may cause discomfort, while sleeping also the extension will stick out from your clients head, causing an unnatural look. Let'S watch the application process a few more times using both methods you, after completing one row of ilink extensions. Your work should look something like this. This is a good time to check your work, make sure each extension was correctly applied. Also checking the space between the extension and your clients. Scalp is important. Let'S take a closer look at this checkerboard placement pattern. In this case, there are three rows that create this checkerboard effect. Different hair extension stylists use different placement patterns when adding length and volume you will apply the extensions closer together and create additional rows. There is no one correct way of placing extensions. The most important skill is applying the extensions in the areas that will not be seen to help conceal. The extensions attachment. Do not apply extensions in or around the temples area also do not apply extensions in or around your clients, natural part line, and you do not want to apply extensions in or around the bangs area. This is what a row of ilink extensions should look like on the side of the head notice. The extensions were not applied too closely to the face of your client with the specially designed extension brush, provided in your kit brush through your clients, hair, explain to your client that the extension brush will not damage her extensions. Here'S. What an extension looks like after six to eight weeks of growth, tightening your clients, hair is also a very simple and fast process, simply open the bead slide it up closer to your clients, scalp reinsert, the extension tip and then close. The bead now we'll show you how easy it is to take the Donna Bella, ilink Extension out of your clients, hair, look how fast that was turn the beads sideways and place it in the second groove of the bead tool, simply clamp down halfway. This will open the bead and release the threads, causing the extension to fall right out. You


Comments
L H: Thank you for sharing! This is the only detailed video that has given a close up to really show how it’s done! I’ve searched high a low. Awesome job! from a retired stylist
Tamika L Bachelor: This is the BEST video for the extensions, thank you!!
cante davis: How many grams/strands or packs(However you would like to measure it) did you use?
Mahine Beauty: Thank you for your help.
Keisha Nicola: Great video!
Christine Morgan: The best
Princess Rosie: Thanks for this info
Aida Rodriguez: Where can I go to get my extentions? I'm in the Palm beach area FL. any suggestions?
Olomiyesan Omowunmi Martha: Best video ever
Musa Bolla: 心痛不已
Maya Maya: Prezzo Grazie mille indirizzo
B UK: Plz I want to do how I can book with u
jassi nabha: Can we wash our hair plz reply me
Argelia Milane carbajal: I'm argelia obrigado
Musa Bolla: …