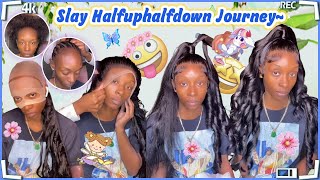
#014 Rubber Band Sew-In Easy Install!
- Posted on 30 October, 2017
- Microlink Hair Extensions
- By Anonymous
Music by Kinemaster
Products
Basic's One Step
African Pride Hairdresser
Coconut oil
Influance Spray Gloss
Social Media
Instagram @ epitome_of_london
Facebook @ Epitome of London & London Brown Wilson
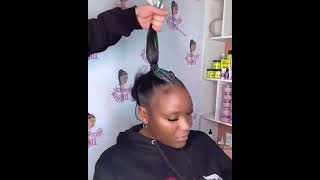
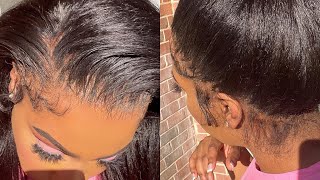
Hey loves, you know how I do I'm ready to get started so right now. What I'm doing is just analyzing my clients here, or in this case my daughter, I've already sectioned out her parameter who's, we're gon na, do it so in and the outside I'm actually gon na do a special treatment. So I want you to stay tuned, so you can see how I go about making certain that her leave out stays as straight as they can for as long as we need it now. Right now, I thought blow dried her hair, and this is a straighter hair - gets with a regular blow dryer. I am now sectioning the section right around her part, her leave out and I'm gon na do a different technique. If you can see here, I'm gon na go ahead and I'm gon na section these little pieces right around this part and I'm gon na put rubber bands there. Yes, rubber bands. I know people are so taboo about rubber bands, but they're harmless. I'M actually making small little boxes like this right here and what that's gon na do is that's actually going to create an anchor for me and you'll be able to see a little bit more in detail as I continue, but what that does also is it prevents A track or the wealth of the hair from sliding when someone's here it's really really thick a lot of times. If you do a cornrow, then it ends up being really bulky because they have so much hair strands and it's so dense. But if you actually braid in the opposite direction, which is going down parallel to the face, then the hair, the West itself slides. So, instead of having a bulky, braid or trying to braid separately and braid it going down and having my wife slide, I go in and I actually add those rubber bands and honestly, the rubber bands are just at the base. I'M still gon na go in as you see here and do a regular cornrow as usual, and so this is what I was speaking about when I said that the way you braid, if you braid it down like this, usually within about a week or two, the Weft starts to slide away from the part, and then you have that gap, barring clients, fight we're trying to prevent it from gaming and being obvious when they're styling their hair, and as I said, if you braid a con roll along the part, it ends up being Really bulky - or you have to do it so small that as the sewing gets older, it becomes a nuisance to try to get out because that hair, just kind of matched together and clients hate that, and I hate it myself, because I have a few that actually Come to me and had me remove their sewing, so this technique works best. You will not do this on every client, just those who here is really really dense and you want to get a very flat surface right at the opening or the leave out so and if you can see here, I am literally just braiding down, just as I Would before now some people actually do this with a braiding hair, but again her hair is so thick to a braiding here, which is defeat the purpose it would cause the corals themselves to be a lot thicker. I'Ve tried using very, very small pieces of braiding hair at the base so that it didn't bulk up the actual braid, but then it didn't leave enough of a knot at the base of the braid for me to sit the left on. So, as you can see there, I'm just showing you - and this is just how thick her hair is as small as I have it parted. It is still big. It'S still bulky, but thankfully this is towards the back. So it's not gon na matter as much and I'm I thought is very simple: she didn't want to do a whole lot of curls or styles, or things of that sort, so we're just gon na wear it straight now. I'M showing you the products that I used right before I add the net and start sewing. So of course, I'm gon na put this on her scalp to make sure her scalp is hydrated, and I believe this is just some coconut oil, her hair's thicker. So I choose coconut oil for hers and then I'm gon na go in with that creamy African pride and I'm gon na rub that all over her hair as well - and you want to make sure that you get everywhere all in between. So I'm being sure to saturate these braids, you know natural hair gets dry and the netting and just day-to-day doesn't make it better. So I want to make certain that I coat all of her braids and that's what I'm doing here so now I'm going in - and I am actually gon na - apply this technique and this is gon na be to her leave out. So this is a way I know some people do a relaxer. They do partials, so they leave out. But when you're leaving this much hair out, you definitely don't want to relax it. Because when you try to go back into your natural state, you won't be able to do so successfully. So this is the product, it's the basic one-step, and usually you can get this from a local distributor. It is not a product that you can buy at a beauty supply store, so you do have to be a professional stylist to purchase this, and, as you see, I pumped a very small amount. I'M just gon na go ahead and run that through her hair and what this is gon na do is it's gon na actually release her curl pattern, so it's gon na allow her curl pattern, so relax a little bit sort of speak and when I say relax, I don't mean straight, but I mean not as tight, so she won't have to apply as much heat she won't have to Flatiron. It is often - and the best part is when she does Flatiron. It will stay straight for a longer period of time. So I'm going in at the top and again I'm using just a very small amount. A little bit goes a long way and I'm coming through I'm going to add a little bit product here. As you can see, I'm gon na curl this from the scalp. All the way out to her ends and then I'm gon na section out a little piece right above it and mesh it together. So as long as I can still feel product on my hand, I don't have to add another pump. This is just as needed, and that's what I'm doing here so now. I'Ve done that entire section, her outside perimeter and her top now, I'm actually adding a cap on because I'm gon na sit her still for a little while so not necessarily under the dryer. But just enough for the heat from her scalp to help it penetrate so now I'm taking the shower cap off and I'm going in with the blow dryer. So remember this is here that has been previously blow-dried right after it was shampooed, and this was as straight as e they got now. I want you to see the difference now that I have applied this solution and I want you to see how much straighter that here actually gets just from blow-drying. So this is probably too hot. Adding any heat from the Flatiron you're gon na see a huge difference. So that side, that you're looking at, which would be your right side, that is partner, 2 and then this other side that I'm doing this is after applying the heat from the blow dryer. Look how straight that gets you guys. I mean that I mean other than being really soaked out, that's extremely straight and that's the difference that this product makes so now I'm just gon na go ahead on and I'm gon na add her cap about this particular cap cuz. It already kind of had a cut out. It wasn't deep enough, so I kind of went in and customized it myself, but it pretty much served the purpose that I needed for this particular style. So I'm just taking a little piece out of that back so that it fits a lot more snug and the Hat itself was a little bit too big the net. I should say so, I'm just going in and I'm just clipping the excess off. This is after. I have sewn the entire cap down okay, so I'm going in with my Chi you're, not I love this product and I'm gon na go ahead and rub this on the outside perimeter of the hair, I'm gon na go ahead and flat iron. These areas in advance. It just makes it a lot more easier once I install the weeds and not have to pin my hair up and go underneath and have to do this process, so I'm gon na go ahead and do this process first. That way, once I install this area is already done and then all I'll have to do is just her top and blend. So I don't do the top beforehand, but I do do the outside in the perimeter. Now, I'm being sure to take small sections, I want to make certain that I don't pass through the hair too many times. I just need enough for it to soak it out and for it to Blaine. In case she decides to pull the ponytail up in a ponytail or do any type of Styles like that, but again a little goes a long way. Smaller sections means no less passes. You have to take with your Flatiron okay. So now that that's done, I'm gon na go ahead in and start to add my West. These are eighteen and a twenty. She has a very small head so because we were doing leave out. I did not do three bundles. I did just two sometimes for her. It tends to look bulky to the scalp if I've try to put too much hair in now. This I wanted to show - and I slowed it down, how flush you can get that wet when you're using this rubber band technique. I mean like it is literally as close as you would have gotten it if you were using glue, so I'm gon na go in and show you some of the technique that I use. I know this is a little bit out of focus, but I'm taking the same with that was on that other side and I've just flipped it around to this side right here and I'm getting up close and personal and actually believe it or not. There'S enough room to lay one more welfare. If you can see, I can still see a little bit of her scalp and right above the rubber band, and I love that this lets you get just that close. But I wanted to show you this technique that I do before adding the final web onto here, and so when I get close to the end, I start to go through the actual web itself and I took the thread when I say tuck. I go up underneath and I pull out through a lower end. So, instead of pulling out to the top because of course you're gon na have to knot it, and I don't want the knot to be sticking out right at the beginning of her hairline and here's a closer view, I actually tuck it. That'S me going through once I pull it through. I go up underneath and then I pulled from the bottom somewhere a lower part of the side of her head. If you can see, I'm gon na pull it taut, and this just prevents me from having to not so close to the hairline, so I'm gon na go through again, because we also don't want that little flap, that's usually there you sometimes see girls and they comb. It and you like her track is right there. I can see it. This prevents that and again, I'm gon na put another old track right above that. So now that I'm done with that, I'm just adding just a tad bit more Chi, just rubbing it through there, and I'm also rubbing it on the outside of the weft that the hair is gon na, be laying on so that it'll help it's a blend. A lot more seamless, so again, I'm going in with small thin sections, and I'm just gon na run my Flatiron through and the sitting on my flat iron is still pretty high. It'S still at 450. She definitely has hair that can withstand that you're not going to use 450 on all your clients, so just those who here can withstand it or you yourself. If you're doing this method for yourself and again, I'm just gon na soak that out and bring that right through now, I'm being sure to leave a little bit of texture a little bit of how I want it to look like it's coming out of the scalp. But not like it's just like slicked to the head. If you can see there and I'm gon na do the same thing with the back and the other side. So once that said, I'm just gon na go ahead and comb the hair and blend, and you see how flawless that is. So what I'm doing now is just taking a few strands of her hair and both the weave and blending them together, and this is just more so around the face. We didn't layer anything around her face, I'm usually that's what I like to do, or maybe feather a little bit out of the face. But again she just wanted really really straight really really blunt. These are the products that I've used that spray. I love it. It'S great for the flyaways and then I just used a little bit of chi holding spray, and this is the finished look so again, very simple, not a whole lot to do very, very easy, like work, she loves it. I hope you guys do too. This is her before and, of course, this is her after don't forget, like share and subscribe.
Comments
red roses: Looks like a standard sew in to me
Destini Grissett: Its like you opened my eyes to a whole new world i feel like duhhh now and your daughter is very pretty n i like her dance moves lml
Emp: I need that product wow❤️ great job
Nairobi Fiona: Ima need that product and that blow dryer since my bday coming in all I just wanna say Thank you in advance and I will be trying this method
Louise Lee: What is the product you used to help strengthen
Nairobi Fiona: Oh yea do you have any suggestions for edge growth? Because I went edge bald lol
A Harris: Did her hair grow from this ?
Luxury Brown: What type of blow dryer is that and where can it be purchased? Thankies