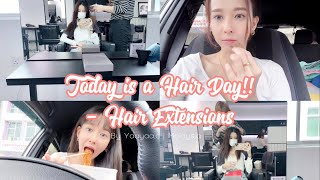
Turn Your Weave Into Hair Extensions! | Diy Hair Extensions | Lovekenziie
- Posted on 30 July, 2016
- Sew-In Hair Extensions
- By Anonymous
I hope you love the video! leave some love!
Love,
Kenziie ❤
❤ DON’T FORGET TO SUBSCRIBE TO MY CHANNEL! ❤
❤ Social Media
Facebook: /kenz.lovekenziie
Instgram: lovekenziie
Twitter: lovekenziie
Snapchat: lovekenziie *NEW*
❤ Special Information mentioned in video
➻Chelsey Washington @chelseyyyw INSTAGRAM
➻Chelsey Washington YOUTUBE SUBSCRIBE!!! https://www.youtube.com/channel/UCnCxs...
❤ Music
Recreated by KWoodMusic1: Aaliyah, The original track is called "We Need a Resolution" and it is copyrighted by BlackGround Records
no copyright infringement is intended
❤ Technology
-Sony OX 6000
-iMovie (Editing)
-iPhone 6
-Diva Ring Light
-Photography Photo Portrait Studio 600W Day Light Umbrella Continuous Lighting Kit by LimoStudio LMS103
❤ Business Inquiries
Hi, my name is Mackenzie and welcome back to my channel. So today I just have a few updates for you guys, and then we will get into the tutorial on how to turn your weave into hair extensions. If you want to go straight to the hair extensions I'll put the time up somewhere in the video but um as far as updates, the wedding is over and done. Finally, it was so it was so successful. It was better than I could have ever imagined. It was worth all the stress, I would say I'll - do a wedding kind of after the wedding update in another video because I feel like it could be long and I could give some more tips and stuff, and then I think, in about six weeks, I will Get the actual wedding video that the video Aquifer put together. Sorry, it took so long to get back. I just got back from my honeymoon July 6 and then I went to Miami for my husband to Train and now we are finally back and I can start doing videos again. It was really hard to film when I was gone, because you know I like having my setup and it just makes things a lot easier, but anyways, let's get into the tutorial so so far. This is, I think it's one bundle, I'm not really sure cuz. I didn't purchase it, my hairdresser did, and this is actually the weave that I wore in my wedding. So the only time I wear this because it's not my curl pattern. It was my curl pattern, believe it until we straightened it so much that wedding weekend and now, let's kind of beach wave so I'll, be using this with my hair straight, but this is kind of folded in half right here. I don't know if you guys can tell like if you open it, but I decided to keep it together because it made it a little thicker. But as you can see, I spilled four wig clips to it and I will be showing you guys how I did this. I also did some side pieces as well, so I would suggest that you look at how much weed that you actually have and see how you want it to fit on your head. I knew I was going to need at least two pieces to go on the side. I wanted a piece to go on the top crown of my head, the middle of my head and underneath my head. If that makes sense kind of in three layers with two side pieces for thickness on the sides, oh, I also wanted to give out a shout out to my friend, Chelsea Washington, I'm gon na put all her social media up here, she's the one that gave me This idea she's the one that actually showed me how to do it and she's um, potentially going to be starting a YouTube channel too, and I'm mentioning this so that she'll hurry up and start one so I'll link all her stuff down below and then which his Youtube channel I'll come back to this video and link everything below again, so the stuff you'll need to complete these hair extensions are obviously some weave. You will need some thread. I picked this all up from Sally's or you can. You can pick this up from any beauty supply store. Then you will need a. I call a weave needle because they're a little different as you can see, they they're curved like this and the whole tends to be a little thicker than a typical needle. I would get, I would say you also need a pair of scissors and then some wig clips, okay. So, let's begin I have my weave right here and I have already sewn in two clips, as you can see that there there are holes in the clips and I used the uppermost hole to sew the string around the weave into the clip. So if you look over here, I have one started. I don't know why. I think it broke a little bit there, but I haven't started and I nodded it off. So I will be using this uppermost hole, don't use the bottom hole because you want it to hide behind the leave. As you can see it, you can't see the clips like in their entirety on the backside, so you want it to look like that. So start by threading this string through the weave needle this is kind of tough. I would bite the end and kind of get it flattened and squish it through and once you have it through the needle, then just go ahead and tie it off. I do it about two or three times now that I have this tied off. I can go ahead and start sewing so, like I said before, I'm going to use this uppermost hole on the clip and oh also be careful, make sure that this little rubber thing is against the hair, so make sure that it's the right way. The comb bits are going to be on the top, so I start by just right, underneath the hair it'll come right up underneath this and the uppermost hole oopsie see, and it just comes through the back of the leaves like that and then bring it around and Then, literally, you just keep making a circle, so you go back through the uppermost hole and then bring it through, and I would do this about six to seven times. So I make sure I have slack left on the thread so that I can tie it off. So what I do is I go in and I cut that off and then I tie it off to make sure that it is secure, and I do this only three times, because if you make too big of a knot, it will just come apart. I'M not exactly sure at this time why there is two end pieces, but I'm just going to tie them both off together once I have it tied off, I go ahead and clip the extra string. It'S literally that simple and when you are finished with your hair, you will end up with this and you can go ahead and clip this all into your hair. However, you like, and you can take them out at the end of the day and that's what makes it so awesome. Obviously this doesn't match my hair right now. I'Ll do another tutorial. How I put in my weave homemade extensions. Thank you guys for watching my video and I'm really glad to do that. Don'T forget to Like comment and subscribe and I'll see you in my next video thanks.


Comments
MoreAlyssa: Love your hair
Niki G: Nice video but it took to long with the talking...I almost next click, but I do still support my sisters so no worries I hit that like button, maybe I am just too impatient..lol it could be that too!
Dj smiley: im so blown away of your natural beauty.i saw one video of yourself without makeup i was like wow i had to watch the video twice.you are a goddess.if you are taken your man better take care of you, because you're not gonna have a problem finding someone that will treat you like a princess.im an asset rich young black male, my ancestors after the civil war created a town called the Armstrong colony,you're able to read the history of the Armstrong colony on the web,im an heir to many families the simms,armstrongs etc.i own a house with $400,000 in equity and im in the process of starting a music publishing company.if youre single i really would love to get to know you.
Dj smiley: im so blown away of your natural beauty.i saw one video of yourself without makeup i was like wow i had to watch the video twice.you are a goddess.if you are taken your man better take care of you, because you're not gonna have a problem finding someone that will treat you like a princess.im an asset rich young black male, my ancestors after the civil war created a town called the Armstrong colony,you're able to read the history of the Armstrong colony on the web,im an heir to many families the simms,armstrongs etc.i own a house with $400,000 in equity and im in the process of starting a music publishing company.if youre single i really would love to get to know you.