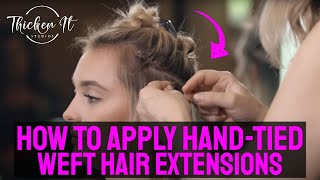
Bead Weft No Sew
- Posted on 30 January, 2021
- Sew-In Hair Extensions
- By Anonymous
New Video showing full #install for the #bead weft method. I use only beads to secure the weft.
This method can last 4-6 weeks and they need to be moved up.
Please subrscibe I will be updating more often , thanks for watching
Insta hairbycaren
All the tools and products I use can be found on
http://www.amazon.com/shop/hairbycaren...
#hair #extensions #nosew #microbead #beadweft
Okay, so here is a full install of the beaded weft weft with beads, so we're first gon na make our part like a clean neat part i'm working on my mannequin. So it's not perfect, but we take our first weft measure cut, clip each side to keep it in place while you're working. So here you take your first section: we're going to take a section you're going to put your weft back in place and pull your section over the weft now you're, going to take a small piece of the weft hair and a small piece of hair underneath make Sure that it's neat and clean so that there's no extra hairs being pulled from each direction too far over, because that's going to cause tension and breakage you're gon na use your little loop tool and bead, which i will put the amazon link down below. So you can see what all the tools and supplies that i use for these. I use the silicone beads because i find that they hold the hair in place for this particular install. I use different beads for different methods, but for this one i use the silicone lined beads. Okay, let's do the top row so for the top row, i'm going to do a double weft. So basically, you just put two wefts together and it's going to make it thicker, which you can do double wefts on every row. If you want you can just do one row with a double weft, i'm going to do a double one here. Just so you can see clip it in place, it's a little heavier, so it's a little bit harder to work with, but do the same thing take your section from the top section from the bottom section from the middle and clamp them together a little harder to Keep my rose straight on this mannequin head, but just keep going around the head and then i'll make another video to show the corners. How i secure the edges, so you can see, i always start from the middle of the head. I do that because it helps me keep the weft straight in place and even on both sides. I leave usually about a quarter of an inch in between each bead and then when i get to the edge. If i need to trim it if it's too long or too short, then it's just easier for me, so i use start from the middle. I go left and then i go to the right that way. Also, if you, if it's too long on the end, you can you can always trim it when you measure and cut it, always make it a little bit longer than you need just in case as you can always trim the edges. When you get around to the side, so here i'm doing an edge which i'll make a slower, more detailed version. But you can see that the last piece i do kind of in an angle so that it covers the corner. Then i take a tiny piece from the last two beads and put them together to make a triangle. I found that this keeps the edges from lifting slipping falling off, just keeps them in place, thanks for watching

![Invisible Weft Hair Extensions With Kera-Links [Custom Hair Extensions For Fine & Thin Hair]](https://static.hairurl.com/p/2022/04-22/70d0395b363947a05e283d0373471ba1.jpg)


Comments
clipinqueen: Great tut. Would love to see one on the reverse microweft method where the beads are underneath the weft near the scalp. You can't see the beads. Thanks.
Sara Nava: How many rows of wefts do you usually do? I’ve seen you add tape-ins sometimes, too so I’m just wondering how many weft rows can you get away with using this method
Juju Bee: Hi, I'm wondering if you can do this method with more delicate hand-tied wefts too?
Elizabeth McGraw: Hi!! Have you ever tried this method on a client before? It’s very interesting to me.. I’ve tried the hand tied’s. And they just stressed me out. I wonder if this method would hold up..