Tape-In Extensions Diy | Glam Seamless Review (Not Sponsored)
- Posted on 12 April, 2020
- Tape-In Hair Extensions
- By Anonymous
How to do tape-in extensions at home & a quick review of the Glam Seamless tape-in extensions. *video is in no way sponsored*
Link to the extensions used below!
https://www.glamseamless.com/collectio...
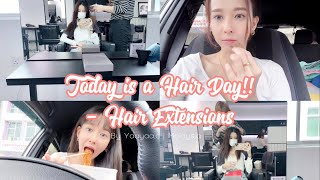
Hi guys and welcome back to the babe cave today, we are going to be putting in my tape in extensions. I filmed the video yesterday showing how i got this shadow root with my ashy blonde, so that should be up. So the brand of extensions that i'm going to be using are from a company called glam seamless. I did purchase these myself. These were not gifted to me. These are the 22 inch extensions in the color platinum ash blonde. It'S number 60.. I bought two packs of hair, so it's 40 pieces total and it equals about 100 grams of hair. I felt like this is going to be enough. Hair for me, i have clip in extensions, and i have i think, like 180 grams and that's almost too much hair to where it's like really heavy, and it doesn't even look that natural. So i just went with two packs of hair. They said that that's the minimum 40 pieces is usually like the minimum that you're gon na need to get an entire head done. So i did have to tone these myself. They do have a color. That'S i believe it's like ice platinum blonde. It'S just like the next color, it's 60s. Now, that's like the number so that color was sold out. So i had to go ahead and go with the regular platinum ash blonde. So i did have to tone them myself to do this. All i did was fill up my sink with water and put some purple shampoo in there and then just mix it around, and then i would just keep dipping and kind of just like moving the extensions around in the water making sure not to get these little Tape parts up at the top of the extension, i will insert a video of me doing a little bit of the tony. It'S really easy, especially with already bleached extensions. They were already pretty blonde. They just needed a more of like an ashy tone to match my hair okay, so i just wanted to show you guys these holes sitting here, how i'm toning, the extensions. So this is just a bowl or my sink filled with warm water and purple shampoo, and i just mixed it up and i'm just kind of dipping and letting the extension soak making sure not to get the tapes in there but yeah. This is how i'm toning them and then i'm just going to set them out to dry. So the extensions come in a box like this in the inside. It has this little bag that they're in and it has a sticker that says, cannot be returned or exchanged. Once open, so, if you choose to use these extensions, you need to make sure that whenever you get them, you really hold them up to your hair and try to see as much as possible if it's a good color match for you, because if you open that, Unfortunately, they will not let you exchange the color. There also is an option on their site to basically get a color swatch, so you can let them know what colors you're interested in and they will actually send you a tiny swatch of the hair before you go ahead and buy the extension, so you can really See what color you think you might need if you've never worn extensions before and you don't really know like what color would look best with your hair. So i, like, i said, have never done this before. So all i'm going to be using is my brush a comb, so i can part with this and then i just have a little ponyta holder on my wrist, so i can make sure i'm holding the sections up whenever i'm putting the tape inside this brand of Extensions, you don't need heat to get the tape to adhere most brands. You usually take some heat like a flat iron and just kind of sandwich it together. I'M sure you could still do it with this, but they said it's not necessary. So i'm not concerned. Basically, my plan of action is going to be sectioning out my hair, taking one of the tapes putting it on top and then lifting it up and sandwiching the other piece underneath. So you want to sandwich a super tiny amount of hair. If you do too much. Obviously, the tape is not going to stick to each other. So another thing that you have to know whenever you're placing the extensions in is, if you are someone who likes to put your hair up a lot, you're, obviously going to want to make sure that the extensions aren't too far forward or around your hairline. Because then, whenever you pull them up, you're going to be able to see them, we don't want to do that. I'M going to go ahead and start putting the extensions in i'm going to start in the back of my head and then just work. My way up to the front, i'm gon na check my part with my mirror, so on this first section, i'm gon na go ahead and do three extensions, one in the middle and then one on each side. So i'm gon na go ahead and take the extension. I'M gon na peel off the side that says glam it's where the little adhesive is and i'm going to go ahead and feel and place it not too close, but close enough. You want to make sure you have room to move it up and down. If you don't, if you're unable to do that, then it is way too close to your scalp, i'm going to go ahead and put the other two on okay. So now that i have those on top, i'm gon na part, a super super super thin section right. Underneath, where i have the tapes, i'm gon na clip that up here and then go ahead and sandwich the other piece of tape underneath okay. So here's what the tapes look like so far, so i'm gon na go ahead and do that to the rest of the back of my head. So what my game plan is is to do a row of four above this and then a row of five at the widest point of my head. So i'm going to go ahead and do that and then i will be back to do the front. So i have all of them in the back. I have three rows. I have a row with three a row of four and then a row with five. So apparently the key for doing that in the front is to do a diagonal line. So i'm just gon na put one right here for right now, because i already have an extension right here and then i will part it again to get one like back here. So i'm going to make another diagonal part above the diagonal part that i just made now. I'M gon na put three i'm gon na go one two and then three like right here: [ Applause ]. So i think these are blending extremely nicely. I'M going to do the same thing to the other side. Okay, so i have all the extensions in so i'm going to grab my curling wand and style it, and then i will be right back. Okay guys. So here is what the final product looks like i'll stand up a little bit, so you guys can see how long they are. So they go to about the bottom of my rib cage. I think they blended so well. I probably could have gone ahead and got another pack, but it definitely isn't necessary. So, overall, i would say that the process was actually fairly easy to do it just kind of reminded me of putting in, like my clip-in extensions, i did a similar layout as well, and this brand of extensions feels so soft. Usually, whenever you get extensions, especially ones that are already platinum blonde, they sometimes kind of don't really have any life left to them. Even after toning, these i mean they're, just so soft i feel like. I just want to keep running my fingers through them. I hope you guys enjoyed today's video. This is all i have for you today. I plan on posting another video coming up in the next week of tutorials for ways to style, long hair with extensions. So keep a look out for that. If you like, this video, don't forget to give it a thumbs up, click the subscribe button and leave a comment in the comment section below and as always thanks for coming to the babe cave


Comments
Glam Seamless: We are obsessed with your hair, we love this honest feedback babe
Andrea S: Great video! Finally one updated! I always seal mine with a flat iron! When it comes to around my ears I always put them in at an angle so you don't have that lump when your hair is up! I'll give this company a shot!
Lpg 8: Wow, you did an amazing job, I wish I had your skill and your patience. I would happily pay someone like you to do mine :)
Andrea S: Also I highly recommend getting a hair comb cutter so you don't accidentally cut your natural hair. Great for making layers without the rugged edge.
Jamie Hogenbirk: This was so interesting! I love the idea of extensions but I don’t actually know much about them! I loved this
Gloria Borrego: Real nice, great job! Going to put some on top of my hair and wondered how to put them in so as not to be seen. Thank you!
xSlayer Rose: This was super interesting, I’ve always wanted longer hair, but can never get mine to grow much longer than my shoulder blades! Do they feel comfortable? How long can you keep them in for?
N ea: What a perfect colour match!
A Ortiz: I always seal mine with heat. it will make the adhesive stick better
Naomi Rodriguez: Loved this video ! Your hair looks so good
Kimberly Schwartz: Btw..how do u remove the extensions? How long do u keep them in? Can u wash your hair with them in? Can the tape be reused or I have to put new tape on? How does that work? Thx for info!
Luna Blackwood: Gorgeous! How'd they hold up?
Shyanne Middleton: How long did they last for you? After a few washes was the quality of the hair still as good or did they start breaking off? I normally order from Zala hair shade 60 and one huge problem with the hair from them was that it would break off and shed terribly. Did you experience any of that with these from Glam Seamless?
Millennial Mom Life: They look so good!
Ashley Parker-Kalfin: So pretty, thank you!
Megan Jourden: gorgeous!!
Fatima Medina: You are so pretty and talented ❤️
Life With A Stethoscope: Gorgeous! Keep it up ☺️
ASHTON FAITH: I got 2 packs and the lady at Sally’s told me I would need 8 packs because anything less wouldn’t be enough... so when you said 40 pcs total made me feel better I got 20 pieces per pack
Kimberly Schwartz: U are very pretty and made a great video...also wanted to say that I like the hair straight instead of curly! I don't like the straight ends of the hair after you curled it, but that's just me. Either way, great video and thank you for making it!
Emily Turvey: so pretty
Chelsea Faye: Gorgeous!
Dakota Luna: How long can you continue to use the extensions themselves before you should replace them? Not the tape, but the hair itself
S Hellwege: You also want to be very careful not to touch the adhesive. The oils from your hands can keep it from adhering correctly.
Robyn Lewis: did you end up using all the extensions from both bundles?
bre graf: beautiful
Summer Buckner: Really curious of the quality of this hair. I just ordered from them but haven’t installed the hair yet. I ordered some from Amazon that said real human hair but after 3 weeks they were knotted and dried. That’s with me only washing once a week and only using heat once a week. I thought maybe a bad batch so I ordered again and same. So now I want to try a different brand and I’m hoping the glam seamless ones will last longer.
SkittlesBomb: Im looking into the same brand actually!! It will be my first time with tape ins. Can i die them?
Байки от Настеньки: You are so cute
Iveth C A: Hello I’m about to order the seamless tape ins in natural black, I noticed you had a zala clip in review video. Which brand did you prefer? Did the glam seamless tape ins hold for the 6-8 weeks and was hair still in good quality after? Thanks!
Brianna Church: My hairs so thin I'm scared to go up that high with them and then be visible
Rachael futch: How were they after washing them?
Natalia Pixel: Starts at 4:41
Ma Dzia: I would like to buy this color hair, where I can find this?
Pearla Lizbeth: So did you use two packs or just the one ???????
haroo bommie: Does it hurt when you remove them? Because it is tape... does it wear off? Do you need to remove them when you have to take a shower? I don’t know how these extensions work since it’s tape
chelley bee: I'm gonna do what she did top first than the bottom first cause its easy to sandwich.
Vivian Luong: Are the hair straight after you wash it
Emina Muratovic: awesome vid babe :))
bre graf: how long do they last 4 u:)
Millennial Mom Life: Are you an Aries?
bre graf: i love u
Monique Havens: Hey how did these hold up?