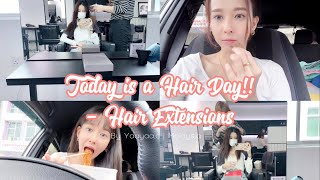
How I Apply And Remove My Hair Extensions Myself!! | Diy Tape Hair Extensions | Zala Hair Extensions
- Posted on 03 July, 2019
- Tape-In Hair Extensions
- By Anonymous
Hi Beautiful People,
Tonight i will be showing you not only how i put my tape in extensions in myself but also how i take them out too!
I know you guys love my DIY beauty Videos and this one has been highly requested so....her you go! Enjoy!!
I really hope you enjoy it, if you do, don't forget to give it a thumbs up and subscribe to stick around, it really does mean the world to me.
As always thank you so much for your ongoing support,
Lots of Love,
Juliette x
Follow me on Instagram : @beingmrsdudley
business enquiries and collaborations: [email protected]
Zala Hair extensions: http://bit.ly/2xvz2aA
I USE: 20" TAPE IN HAIR EXTENSIONS IN SHADE #613
FOR $10 OFF WHEN YOU SPEND $100 AND A FREE GIFT USE CODE : JULIETTE
*This video is NOT sponsored however some links i use may be affiliate links which means this item costs no more for you to buy however I make a small commission if you purchase the item through that link, so thank you for your support ♥
Hey guys welcome back to my channel, so today I'm going to be showing you how I do with DIY Zara type in extensions, so do them myself at home. If you're interested in seeing how I do them, then just continue to watch. My name is Juliette. I'M a mom of two boys and I'll do three videos a week on all sorts: I've, lots of holes and fashion and beauty and lifestyle videos. So if that's the kind of thing you're interested in there is a little subscribe button down here in red somewhere, I would love for you to click that and stick around without further ado. Let'S get into the video just a couple of things to tell you I'll use the Salah 18-inch type in extensions inside six, one three, which is light blonde. I believe, but I will leave the link to the exact extensions below and leave the link to the website. As well, I get a lot of questions about my extensions and it's because my hair is very thin and very fine and so I'll use types. I'Ve had so many different kinds of extensions. I'Ve had micro rings, nano rings clip ins, but I prefer to have tapes in, but I do think for me they're a lot better because you don't see them in your hair as much at all, like they're, invisible, I'll wear my hair up a lot. So when you a hair up, you don't see them and it doesn't really pull and, most importantly, they don't damage your hair. Like everybody thinks, oh, my god, it's glue you're putting glue in your hair, but it's not you just get the tape solvent, which I use to get them out and it just just got dissolves the glue and it just comes out. And yes, some hair comes out with it when you take them out, but only your natural hair loss, because all the type extensions are expensive. I'M not gon na lie. I'Ve bought type extensions in the past that are already per, but I think they are a false economy and I'm going to tell you why, when you buy extension, you find that they're not very thick to the bottom and they can be really large as Rati at The bottom and also you'll find that sometimes you put them in and one where, and that is it, whereas these extensions this time of putting them in is we might 6th time, so they were about 170 290 pounds when I bought mine. I believe - and I only ever use hot I've only used half of that pack, so I've still got another few ow unused and I've used these and six times so the cheaper ones that I bought were 40 pounds. However, I had to throw them away. So if you think about it in the long run, these are much better quality and you just can use them day in day out. So I only have 11 some which is in my hair, sounds weird, so 11 taped sandwiches, so 22 pieces hello. You can see these are the 18 inch, so they are really comfortable or I absolutely love them, and I do them from home disclaimer. Oh yeah, I'm, although technically I'm a qualified hairdresser - and I am not technically qualified to do tape. Extensions I'll just do my own because I'm a stay-at-home mom and don't need to save money. So when I actually bought and was looking for extensions, I inquired quite a few places and it was about 200 to 250 pounds to have them fitted. That is bizarre to me, because I can put my tapes in now myself in just over 20 minutes, so to pay somebody 250 pounds just to fit them. I think is like bonkers, like it's just crazy, so the hair is expensive, but if you can save them money on getting fitted, then do it let's get into the video. So you can see what I can see and I'll show you just how easy it is to do it yourself. Now I will. I will say that if you do have someone to help, you definitely do that because it is easier to have somebody to help you but nine times out of 10 I'll do mine on my own. These aren't my type extensions these have been in now. This will be the sixth time I wore these I'll do is. I will condition them when that in my hair, but you can still say that the nice and silky that really still fix the ends - all probably wear these once more for holiday and because I'm gon na go be going in the pool and everything I will probably And buy some new ones retake these, so you will be able to see on here ready to for that white thing to be peeled off, and I retyped these you can buy them new types from Zara as well. It'S really important to get a tail comb I'll use this one, and what you want to do is. I think that the most important part of putting taken extensions in is really getting your sectioning right, because if you get that right, then everything else looks great. So brush through your hair, and then I go my first section it's out of the way. Yeah you'll need a Clippers off it's close to the bottom, as I can, but make sure you've got enough hair. So when you put your hair up into a ponytail, you can't see extensions, so I would recommend about inch of hair at the bottom. As you can see there and then what you want to do. Is you want to get a straight line all the way across? So then you are good to go okay, so right at the base. I find that I only put in two tapes here, so you can put more in if you are put in yours a bit higher or if you put your needs a little low and you'll put one in. That is absolutely fine also, but what you want to do is, I say, I'll, put about two tapes in here. So then, what you want to do is you want to get your tail comb and you want to so you want to put it about an inch in from the sides as well, because you don't any here when you put your hair up, so you want to Go back in chin back there and you want to get bit of hair and this bit of hair. You want it to be as thick as the tape, but then you also don't want the chalk to be too thick come in pairs. This would be the first one, so you want to lift your hair off that section up and then you want to place your tape. I always do the underneath first, because I think it's easier to control section of hair up place the tape underneath there you want to get it close to the root, but not uncomfortably and then lower the hair down onto it. And then you want to push that hair onto the tape. Okay, so once that Sun reach that bottom sandwich is in what you want to do, is you want to get your next piece and then you want to do the same. So you want to take the white stuff off. This is where it gets a little like when you're doing it on your own. It comes with practice, but it's like because you're in a mirror, everything is backwards. So you want to make sure that you doing it right. So you get your tape and you want to find where you've just put that last bit down and then you want to put your thumb wedge on top, so you I'll do it by feel now. So you find the edge and you put that edge on, and then you want to run it across the tape to the other side, and then you just give it a bit of a squidge together. Now that is it, and that is your one type in and that is in like can you see that is in tight? It is not going to go anywhere and then what you want to do is you want to repeat this process as you go with the hair, you get your tail comb and then you get your next section of hair, lift it up. That is the first section. Pin - and that is how easy it is, I forgot to say - excuse the state of the room by the way, because I'm packing in here, so you see the rest of the room. You know what is going on, I'm still packing so yeah. So that is the first row you can see now on a turn. So if I put my hair up now, you can't see any extensions at all. You can't see the edges and you can't see the bottom and they're all completely flat to my head. So with a lot of different extensions, you're, obviously going to have that Ridge of like weight, your nano rings are or where your weave is or something like that. But with this it's completely like flat to your head and they are so so comfortable. Then you go up probably about not quite an inch. You want to go just above the other types, but obviously you need enough hair to stick them to so I always go by a little bit of a a guesstimate, but as you get used to it, you will get the hang of it. So, that's probably how far I will go off on the next extension. So I'll just tie the rest out of the way, and can you see how all the minds I'm doing a really nice and neat, and oh just think that this is just the best way to preen tape. Just make sure you take your time and you do them nice and neat, because I do think that makes the biggest difference so with the next one, I'm probably going to put put two or three and gety tapes and you can measure up. So you see if you've got one there and you've got one there that is pretty close to the edge. So I'm probably going to put another two on this row again. So I'm going to repeat the pattern of the one underneath emphasize how easy it is to do once you get the hang of it. It'S a bit of a faff to start with, but honestly to say that this cost two hundred fifty pound to get it fitted. If you can master the art of it, you save so much money okay. So this is my next row now you want to get the extent the rows as close together as possible. You obviously need that little bit of hair there to sandwich it, but with my hair, my hair is really thin, so I'll try and get as many as I can like in the bottom half, and so that they are so that you can't see it from the Top so on this row, I'm gon na do three extensions, so I'm gon na brick them with the ones underneath. So these two here, the next one for I'm going to put one right in the middle of my hair. So right in the middle is about here. So I'm going to put an extension yeah pop. Your extension know your next piece, and that is it so a good tip is to like do this with you extension just make sure there's enough movement with it, and then that is it so already I'm getting there. Now already so, I'm going to pop another one in here. That is now three rows in though what I'll probably do now is, I will do one more row, but I will do it coming around the sides now, so that I've got a few in the sides. So let me just take it down, so you can see what it's looking like, as you can see already. That is pretty much all. I would really need at the back anyway, but I will put another row in to make sure that it blends a bit better on the sides. They were like angle up towards my face, and that is so that when you put your hair up, it's just going to be a lot easier. You will get used to place in them and, like last time I put them in. I actually put two really close to the front and although they were really nice and blended really nice, they did really irritate me. So I know this time that I won't do that. I also with my head, don't like to go too high because, like I say, my hair is very, very thin and fine, and you can see them like if they're too high, no, not really, but for me personally like I can see them like. I know that they're there and I like them to be really discreet, and I like them to not look like extensions. If I can, you can see there that I've got up at the sides down and round so now, I'm going to put the last four in, like I say here what I'm going to do with this one is like angle: it up a little, so you want To make sure that it's away from your ear by about an inch, so you won't see it and then so it's angled up this one, and this like a sight, is just so that when you put your hair in a ponytail, you don't see it like I'd, Say let me take it up like this. You can't see this extension at all through the hair and that's just what I really like. So I'm just going to do the last two okay. So this is it now I have got in so I've got how these are putting up all two zeros or two that's two for or over three two four, five, six, seven, eight nine ten eleven. So I'm only got eleven, some, which is in my hair now, and you can see that for me, that is fine, because I've got really thin fine hair, so it matches off with it and then my hair is like here and then these are my extensions. So you can trim it. If you want to angle it down, you can do whatever you like: it's not straightened or styled or anything. I'Ve looked you just put them in so when you wash it or style it or put them together, they will blend a lot better, but that is straight and I will probably put a bit conditioner in them as well, because they are a little dry because I Haven'T conditioned them properly, but yeah, that is it that is so quick and so easy. These will last me now for like I'll keep them in for probably about eight weeks, and then I take them up, because I have my hair dyed every ten weeks and I will quickly just show you: it opened a ponytail okay, so that is in a ponytail. Any extensions at all, like it's ridiculous, and what and I love these extensions because they just add that little bit more volume to my hair and yeah, I just love them, so I really hope you enjoyed watching it and yeah. I am just coming to take my extensions out and I am going to film I'll put them back in so I'll. Show you quickly how easily they come out, because I think a lot of people ask whether they damage your hair, and I thought this would be the best way to show you. So please excuse the fact that my hair is really really see. It'S actually the best way to take them out after so I'm just gon na give it a brush through because it's easier to brush my extensions when they're in and these will be going back in my hair holiday. These are the ones that will get probably matted. The most because these are the ones right at the top, so they get pulled a lot when I'm putting my hair off and stuff the extension these have been in for four weeks. So you can see the hair growth on it. You can see how much the hair is grown. You can see that there is no like bald spot or anything. So what I use is this. This is the Sala type solvent, but it's pretty much like an oil spray see you can use like an oil to get them out, but I will always recommend just use in the one that your hair supplier recommends because then, if anything goes wrong, you can say To Zoila look, they use your root, deceive remover and it hasn't worked or just removing the extensions and then your cupboard. So all you do, is you just spray it onto the extension and like working all I like to the flick I like to spray on the top and underneath as well, because I just think I'd. Rather, it come out nice and easy, and you just give that a rub, and I can already feel the and what the type starting to dissolve well, what you do what I tend to do, then it's like a peel back the extension a little so just one. The edge of the sandwich - and I could you can put you can say, let me see if I can turn to the camera, so you can see there how it's starting to come away from each other, and I just did that. I just put like my nail in and work it apart. Don'T pull don't young, just let the let the solvent do its job and just keep working your way across. If you do get to a bit, that's really really like still adhesive. You just put a little bit more of this in and see how that's just loose and straight away, so I'm not even pulling hard it's just melting away, now she's coming away, so that is pretty much it. That is it a part. That'S the bottom! One off! You can see that there's still like some adhesive residue, you want there it's best to get that often and when it's dry I find because otherwise it's just really like sticky and and then this other bit now, should just pull off the hair nice and easy just The same package peel off like that, so I always do at that point. These are some which the type extension back together, because they won't stick because the adhesive is all oily now give it a brush through and then put it aside, make sure you put in them aside if you're going to put these back in, make sure you put Them aside, in order, so that you know that these are like the top and work your way down, because the length will be different okay, so this is my hair. Now, as you can see, it still got a bit of glue residue in so that will come out when I wash it now. You are going to lose a bit of hair. Let me brush through, so you can see now, don't just go to the top a yank out, because these have been in for a while. But if you work your way up the hair and just give it a nice gentle brush, okay, I should have taken the hair out of the brush beauty. Show you shouldn't know how much hair you lose. So you will lose a bit of hair because it's been in for four weeks, but the amount of hair you lose is nothing like. I'Ve had extensions that I've taken them out and I've had bald spots and which one I haven't got a lot of hair. To start with is terrible, but yeah these will come out nice and easy. So I will go around and take all of these out now and I'm going to show you how to put them in, but I thought would show you how to remove them as well, because there's a lot of videos out there that sure you have to put Them in, but then four weeks later you like, oh my god, how the hell do I take them out. So that is how they come out and you can see they're like I say that the hair is absolutely fine. Getting close, my hair is quite thin and falling anyway, but you can see that there's no ball spots or anything there's just a little bit of blue remanence, which I would suggest getting out with like this and just keep rubbing it and making sure that all that Glues, nice and dissolved, and then, when you wash your hair it'll, be fine, so yeah just gon na quickly take up right. Okay, so that is that it's my hair now with all my extensions out, and let me show you like that's pushing through it. So it looks wet, but that's just all that tape solvent and I just make sure I have loads in it loads of it in my hair, because I just want all that glue to be dissolved out of my hair is in really good condition. Yes, it's really thin and really fine, because because it's what my hair is like, I can't change that with no extensions in and there's no damage still looks really nice and healthy and yeah all that to be colored on Friday. I really hope you enjoyed this video. I really enjoyed showing you how I put my stipe extensions in because so many of you have asked me, and so I'm just really happy that I've got to show you and I have done a video on it before. But it was like one of my first videos: it's really embarrassing and not great, so I thought we'd do another one for you. If you did like this, video don't forget to give it a thumbs up, and I would love for you to subscribe and stick around and until next time guys take care.


Comments
Gabrielle Faye: So, another method to do it yourself which I find easier is to part your hair as she does in the beginning, then instead of parting a small piece to stick your tape too, you just place your top piece of tape onto your hair an press down. you can now lift the extension piece gently, which will also lift your own hair, and place the bottom piece of the sandwich below. I find this far less fiddly and it ensures you have the right amount of hair stuck to the tape :)
FirestormPhoenix: Ive just ordered myself 2 sets of balayage tape ins from Amazon, and you have no idea what your wonderful, down to earth, easy to follow tutorial has done for me. I was planning on saving up to pay someone to install them, but no! I am going to do it myself. The reason this is such a big thing to me is because I have Huntington's Disease, so installing my own extensions seemed like the unachievable because of the H.D movements. But after watching your simple, unfussy, no-frills demonstration, I just KNOW I can do this! Even if it means doing maybe just one row, or even half a row while my hands are steady, then waiting until they are steady again, I know I CAN DO IT!! This is the first time I've watched an upload of yours, I have liked and subscribed and am off to look for more of your vids right now. THANK YOU, THANK YOU, THANK YOU for giving me something that I so often lack... Self Belief <3 <3 <3
natalie hutchins: I use an eyelash brush to brush over just a bit of hair onto the tape. This is a GREAT tool whilst doing this on your own. It helps to get just enough “thin” layer of hair into the tape. I also tap my tape with warm iron then clasp the two pieces with an alligator Clip for a few moments. Great vid
Evelyn MONTEZ: This is fascinating!! I've never tried extensions but I'm gonna do it! You are a great teacher and beautiful! Thanks so much.
L: Juliette, this is the best video on diy tape extensions!! I just did my 2nd installation a week ago since the salons were still closed back in May, and I have to say out of all the videos I have watched yours is by far the best! So easy to follow, and informative, also so relatable for me because I have very simillar textured hair (thin). Thanks again, and keep up the good work! I will continue to do my own because it really is a money saver, and my hair looks great!❤
Flor Olvera: I love this tutorial! I’ve been beating my head against the wall to find someone to do it for me, I’ve gotten quotes for $1,100! You’ve inspired me to do it myself. You’re a great teacher ! Thank you!
Anne Kamstrup Kristensen: Such a great video, thanks! I'm considering doing it myself but I'm wondering how you retape the sections. When you remove the tape after taking them out, does the hair come apart as lose strands or are the sections somehow stitched together or something? Also how do you make sure all the solvent is out of the hair before retaping them? Haha - it's a bit hard to describe but I hope you know what I mean.
Niki b: She’s adorable. I feel safe watching her vids.
Bhavi Byrne: Omg I really want to try this! I gave my hair a big chop and miss the length so much I also have no volume at the top so maybe I could just stick a few in the top. You make it look so easy! Xx
Make Easy Money 2021!: I have watched like 20 or more videos trying to figure out how to do this myself and this video is by far the best ive came across now i actually understand what to do so thank you for that. Your so beautiful btw. ❤❤❤
Marta Lentner: What an amazing tutorial. I didn't even realize that's an option to do it yourself . Well done . I love your tips ♥️
D F: Fab video! So glad I found this tutorial. Thank you May sound like an awkward question, do you just wash your hair normally when the extensions are in?
Diane Hodges: oh and as already said, you have a beautiful face that looks lovely with your hair up in a pony tail. Wearing hair up is a must for me so thanks for that too.
JessicaR: I have been wearing tapeins for a year and this is the beat video i have found!!! Thank you :)
awomanwalksintoabar: Thanks much. When you reapply those same extensions, how do you apply the new tapes? How do you remove the tape solvent from the the extension so that the new tape adheres??
Frisky Minx: Better than most professional tutorials. Thanks!
Diane Hodges: Great demonstration with no procrastination ! And for once, it is someone who has hair like mine. Most videos show hair that doesn't seem to need the extra help!
Itzel Vidaca: This extensions are amazing ! I do them myself as well they are pricy but you can do Afterpay and pay them in payments , which is great very informative video blessing
Chelsea Faye: Thank you for sharing this! I feel like I could do it but I’m a chicken. Might have a pro do it for first time.
Emma Pallister: This is really interesting! Thanks for the video. How do you replace the tapes though because that would lose its stickiness after a few go’s wouldn’t it? xxx
Glesni H: Another excellent blog your hair looks amazing :)
Aleksandra Ka.: Honey thank you so much for this video xx Could you please make a video on how you wash your hair with extensions on? What shampoo you use, etc... ❤️
Courtney B: I found my halo fun to use but a pain to have to put in every day. It also looked obviously fake I think. I used to use clip ins a lot but it seemed very damaging and caused my scalp to hurt at the end of the day and they could be seen if the wind blew the wrong way. I’m hoping tape ins make a difference for me!
1kzooricky: Im so happy I stumbled upon your video. When explaining the application and sharing your experience living and wearing extensions daily Your personality and straight forward delivery was very refreshing. ThankYou for such a honest and real life tutorial.
Suz: They look amazing and you made it look so easy to put them in and take out, I would love them but I cannot do my own hair at the back because I can't lift my arms that high (arthritis in my shoulders) so I would have to get someone to put them in which would cost me more, my hair is fine too but a lot shorter than yours hunni! Maybe one day I could afford them :) TFS lovely xxx
Melody Frazier: this was so helpful! Thank you for all the details and easy to follow steps!
Georgie wills xx: Thank u for this video and thank u for bein such a lovely person x today i bit the bullet and followed this video step by step with the help of ur inbox message x I’m in love with my new hair
Gina S.D.: Thank you for this tutorial Mrs. Dudley!
Sarah Boocock: That was really informative I might try those xx
Eve beinguniquebeingme: Oh interesting I've never used extensions I have hip length hair that's thin it's better than it used to be loreal fibrology range is magic!
Cristina Collins: Hi sweety... really informative video These look amazing, so much easier if you can get used to them...they look so natural I understand they are expensive but you get what you pay for, luckily my hair is long, it is fine but I’ve been growing it for a couple of years .. time to cut it now.. it bloody strangles me in bed Thank you for sharing Sending love & hugs xxx
Pat Titherington: They look amazing and they look a lot easier to take out than I thought. Xx
Star Perry: They look great well done x
NeSaMoSa ku: So helpful Thank you for your effort
Luna Luna: Thank you my hair is really thin so I shall try this if I make a mess of it then no harm done lol it’s worth a bash
amy colucci: Since salons are closed gonna try this sooo scared
It's Me: Hi, I took my tape in extensions out after wearing them for 5 weeks since instal. I found them difficult to remove and my hair was so tangled that I feel like I lost so much of my own hair trying to get the tangles out. I loved them and wondering what I did wrong. I would love to reinstall them but I am learning and wondered why they were so tangled. Especially being stuck at home with the Covid I wore them in a pony most the time.
Gethealthy44: I had thin hair but I started taking Biotin and in 6 months my hair was thicker and longer, I think it grew 3 inches
Hayley Myles: Hi I've never head of tape extentions... I used to have sew in and clip ins... u did them really well however I do think u would get a better look if u placed a few more in to give it extra fullness x but just my view x
Vandy Vanity: Great video thanks for sharing!
Lynn Rushton: Whoop whoop I’m first‼️ Was slightly panicking when you took them out, but there’s hardly any hair loss My hair is long, but very thin......might try these for thickening it up. Thanks sweety x
green rose vlog pinay in UK: Thank you for this video ,this really helpful.
Ellis Sara Smith: Maybe we could just book a girls day and you can put mine in for me still watching though so it may be a tad easier than I’m thinking. But you did say if you can get help it’ll be easier ♀️
kanika Johnson: To remove them use olive oil or acetone nail varnish remover in spray bottle just slides off
Miss Jnet: I’m gonna give them a try I think :) but I’m gonna have to dye them to match.
Hair is geormetry: To pay a professional 250 to put them in, is paying for their product and time. They don’t work for free unfortunately. I’m happy your hair is fine enough that it’s easy for you to do. Other people might struggle and end up with a really bad situation, I recommend going to a professional for optimal results.
Cori nne: I recommend trying a different brand other than Zala. Of all the brands I’ve tried, zala has been the lowest quality and worst hair I’ve seen. It looks beautiful at first glance but it doesn’t last long and gets extremely damaged and frizzy really fast. And it is too expensive for the quality!! :) just trying to help
Michelle Lindemann: thank you very helpful, appreciate it. xx oh, and easy to follow
Della Johnson: You are so cute and I love your accent! We have the same type of hair. Love your videos!
Jessica Alice: can you reapply even after using the tape diffuser on the extensions
Lisa Curran: How many tapes do you need for a full head there are a number of different bundles on the website x
karen yardley: I do my own tape ins too
Vishesh Jain: Does this damage natural hairs, as mine are very thin and weak
Nikki Szcz: Very nice! What color is your hair?
rosa lina: Hello ,pretty interesting vidéo . thank you..just an advice to you , those extensions are really thin and very expensive .you could fine others better . Have a nice day
happyagain: I kept thinking if I could position my phone properly, I'd see myself in your mirror
Big Juicy: Would you find clip in extensions easier?
Nina Schupp: great video!!!
يوميات مصرية في بريطانيا: Beautiful l love you from Egypt to uk
Terry Shea: how long were they in before you removed them?
Laura Todd: Hello do you know if tape in extension would be okay aboard, such as with the heat, swimming pool and the ocean please. I’m trying to decide if tape in extensions are what I should have for when I go away. Thank you x
lisa Connolly: Hiya hunni can u tell me if u do ur own colour would love to knw its really fab and love love ur videos so so brilliant
Melanie Klar: Thank you!
Julie: God Juliette. .If only I lived closer to you. .I'd get you to put some in my hair! x
Tinka ohnebell: i have very thin hair too and im afraid it will show. I got clip ins, but cant wear them coz they show. You think these would too? Its looks great on you
Carol Coll: thanks for sharing I hav realy fine hair you made this look so easy
Louise Babington: How do you choose the right colour? Can't afford to guess or get it wrong x
swetha reddy: Can we use it again?
Bella Noche: Just an after of taken out? No actual application or de-application (made up word ), so is there a link to you applying them?
kanika Johnson: Its annoying with mine cuz its thick gotta put alot in
Natasha Thorley: My hair is the same as urs dead thin
S Wilson: I’m sorry but I definitely see bald spots.