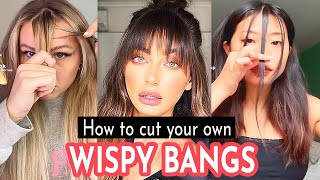
How To Cut Curtain Bangs At Home Easy - Fine Straight Hair - Curtain Bangs Diy By A Hair Dresser
In this video I show you how to cut curtain bangs at home easy and simple, you can use this cutting method to cut your own hair or someone else’s. This curtain bangs tutorial e detailed and easy to follow. Tell me what you think, should I cut my curtain bangs shorter or this lenght is good for my bangs?
Curtain bangs are super trendy right now and if you want to cut it right and not have any issues cutting your own bangs at home make sure yu follow the steps. It is not hard at all to cut this type of fringe and it will give you a very nice face frame.
In today's video i'm going to be cutting my own curtain bangs at home, so as you see, my hair is pretty straight and it's kind of boring i feel like. I need some face framing and i just need it to look better. You know get more attention to my face. I want to do the curtain bangs, which is trending right now, everybody's getting them. So i thought why not you know my hair will grow again. If i don't like it - and it's been a decade that i don't have bangs, let's go ahead and jump into the video and you're gon na need two hair clips to put your hair back. While you cut your bangs you're gon na need a hair comb. I recommend a hair cutting comb like that and shears. I recommend using hair shears, do not use paper scissors or kitchen scissors, because you will have a lot of split ends and your ends will not look good and the haircut won't look pretty and some water to get your hair wet. So first you're gon na start by parting, your hair in two right down the middle, make sure it's very straight. It'S perfectly symmetrical now you're gon na find your highest point of your eyebrow and between that and the end of your eyebrow you're, going to part a diagonal line, creating a triangle right in front of your hair, same thing on the other side, and now you have Another bigger triangle: you can always make it thicker to make sure that you have enough hair for the bangs as well to make sure that it is symmetrical and it looks good, and you should check the length that you want your bangs to be before you go Ahead and cut it, so that's what i'm doing i'm checking to see if that's good enough, if i have enough hair what length i want, what would look good on my taste so now i'm adding a little bit more hair just to make sure that it's thick Enough and it's not too thin since i do have very fine hair and after you do that you should have about two inches of hair on the fringe area, so about three fingers, two inches and now you're, just gon na make it wet it's best to cut Your hair, when it's damp, then when it's dry, it's easier as well as better for your hair and now i'm just combing and taking the excess hair, because it was really long, and i just want to make sure that it's easier for me to figure out what I want to do with the bangs and i decided to cut on chin length, so i'll cut just a little bit more and i wanted to be able to put behind my ears. So that's why i chose this length. You can always go shorter, but make sure you're happy and satisfied with the length and that you can deal with it if you're not used to bangs now you're, just gon na part down the middle again and you're, going to over direct your hair to the other Side of your face with an angle on your finger, maintaining the same angle as the parting of your hair, see so on that angle, you are going to comb through your hair, make sure that it's all aligned, that is all good and now you're gon na slide Down your finger, creating another triangle with the shortest part with the longest part of your hair and you're gon na cut a straight line, removing all the excess hair making it straight and when you drop your hair. Look what it forms a perfect angle, so it makes it blend nicer. It just creates the nice angle on the face frame and you're gon na repeat the same thing on the other side and now you're, just gon na cross check to see that it is perfect and it is symmetrical so you're gon na get both long ends and Compare and they're the same length and now you're going to compare the middle so same thing grab a little bit of hair from each part and compare to one another and it's perfect same length. No problem - and you could stop right here, but i'm pretty sure you don't want a super blunt cut. You want it to look nice and smooth seamless. You don't want to see any harsh lines, so you're going gon na elevate. All of your hair above your head straight up and whatever is left of the hair, we're going to point cut it so see. That'S how much hair we have left and now we're just gon na point, cut it just to make sure that it blends really nicely with your hair and you're gon na repeat the same process on the other side, and you can style. Whichever way you prefer here. I'M just round brushing it and blow drying, so i can get a pretty face frame, so it looks a little more rounded, smooth and nice around my face. This is the result. I think it looks really nice compared to before. Tell me leave me a comment and tell me if you think it looks better. I love it, and this is the final results. I love it. It'S a little bit longer, but i didn't want anything too short, because i want to be able to put behind my ears. Otherwise it will drive me crazy. If you go too short, it might as well just become regular bangs, so make sure you're not cutting it too short. The cheekbone is where it's appropriate, but, like i said i wanted to be able to put behind my ear so for that it would have to be around my jawline. So that's why i chose this length and to finish you know to style it. I just did the blow dry regularly and i just used a flat iron just to texturize a little bit more doing like this movement with the flat iron. So i got this type of results and it looks really nice. I really like it. If i want to go shorter, i can always go shorter, but once you cut short, you cannot go long before you're, not cutting it too much make sure it is to your liking and yeah. That'S it, and i also have another video here on my channel teaching. You how to do a u-shaped haircut at home by yourself. So if you want to watch that video, i'm going to link here on the cards and that's it, i hope you guys enjoyed if you guys liked this video don't forget to subscribe, hit the thumbs up and that's it. Thank you. So much and i'll see you next time, bye,

Comments
Mandi: Thank you so much for this!!!!!! A hairdresser quoted me nearly $100 to cut my hair but thanks to your tutorial, all it cost was the $10 for the scissors. Thank you again ❤️❤️❤️
Kitty Metal: Wow, such a great tutorial! Thanks for the help. Looks sooooo nice on you.
JP: I love the way you part your hair, it is so careful and precise 1:08
Jennifer Glynn: I love this tutorial... About to try it on myself. Wish me luck
Tofa: I am here watching bangs tutorial at 2:00 am Cause I am feeling bored :) ME: I think I should cut my bangs HAND: yes it will be fun ;) HAIR: No don't even think about it EYES : Go TO SLEEP IT'S LITERALLY 2:00 AM . I am tired ️️ BRAIN: Nope eyes I am not doing it . Me : -_-
Positivity Channel: very nice tutorial. Looking very nice afterwards very different .. keep the look
Lindsey Hamilton: I recommend you check out fast hair growth fortified shampoo.
Rita D: