How To Do A Heidi Braid | Braid Hairstyles
- Posted on 09 April, 2012
- Braids Hairstyles
- By Anonymous
Shop Popular Hair Styling Products Here:
Round Hair Brush: http://amzn.to/1LsVTCU
Best hair brush ever made: http://amzn.to/1ekFyVX
Moroccan Oil: http://amzn.to/1Fsutex
Elnett Hair Spray: http://amzn.to/1AjD3gG
Hair Mousse: http://amzn.to/1IPaLxu
Dry Hair Spray: http://amzn.to/1cRQj0U
Leave in Conditioner: http://amzn.to/1HziQ9e
Hair Ties: http://amzn.to/1IPaTNf
Bobby Pins: http://amzn.to/1AjDfNc
Hair and Nail Supplement: http://amzn.to/1HyKNer
Flat Iron: http://amzn.to/1FD87s6
Curling Iron: http://amzn.to/1c9eg3f
Hair Dryer: http://amzn.to/1doNOUI
Watch more How to Do Braid Hairstyles videos: http://bit.ly/1F1xnnd
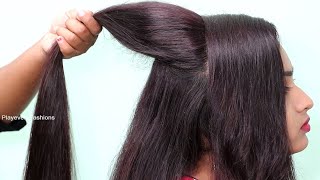
Okay, we are doing the Heidi Braid, also known as the Goddess Braid. And what we've done is, we have actually started with a center part, this time. And we are going to do one braid on either side. Seems simple enough, but there are some definite tips to make it successful for you.
First thing I'm gonna do is, I'm going to, kind of, move her hair away from her face, and I'm gonna put in two very low pony tails. Now, where you put your pony tail is directly related to how long your hair actually is. Just hold it with my hand to see where the pony tail would be, and see how far I can stretch it over. So if you had shorter hair, obviously, you'd wanna go a little higher. I always like to keep it behind the ear, instead of in front or on top of. I think this style would be really great for, like, a backyard wedding, or a casual, beachy day. Something where you needed to look a little bit fancy, but was more of a casual environment.
So now that I've done a pony tail, I'm gonna seperate it into three sections. Trying to get an equal amount of fullness in each section. And I'm gonna braid the braid pretty tight, and then I'm gonna loosen it up. So, just braid all the way to the end of the hair. If you have layers in your hair and you start to get pieces falling out, don't worry about that because we're gonna fatten it up. And you probably won't see those anyway or we'll use them to add to the lower. And finish with a clear rubber band.
And then I'm gonna widden the braid, so I'm gonna start fanning out the ends from the bottom. And you can, kinda, take either side of the braid and fluff it up further. And then I would do exactly the same thing on the other side. Be sure the hair is going behind the ear, then put in another rubber band. And I'm using clear rubber bands, because you can't see them. Another great thing about using clear rubber bands is, if you're using them, kinda, like we are today, where you're just holding something in place so that you can work with it, you can always, after you're finished with the braid, take little scissors and cut this rubber band. And it'll help you work a little bit faster and a little bit easier. So we're just gonna split the pony tail into three sections and braid all the way down, and then we're gonna fluff up the braid.
We can now flip it so that we can actually create the look. So what we're gona do is, I place my finger right on top of where the rubber band is, and I use that to pop my braid over to the other side. What that does is, it just makes it lie really, really flat right here. So I'll just put a little pin in there, to secure it in place. And then we can decide where we want the braid to be in the front of the hair. So, traditionally, I think, we see it a little bit farther away from the hair, but you could also do it around the forehead. Which is, kind of, an angelic, almost a Greccian look, I think. But to stick with the Heidi theme we're gonna go right. And then I just go through, randomly, and as you're doing this on yourself it'll be all feel, so you'll feel where it feels secure. Making sure that this part right here is very flat to the head. What happens if you don't do that, you get this odd shape coming from behind here and it doesn't feel like it flows around the head. So now, on the other side, we're gonna do the same thing.
So now you can see both of your ends are right up the front. You can do a couple of different things. You can criss cross them, and then just tuck the ends in or, if you really wanted to see, like, two seperate braids on the top, that's also a really fun looking piece where one braid lives on top of the other. And then you can see the end is just, kind of, poking up, all you have to do is simply tuck it inside the braid. And then we have this end on the other side; tuck it and pin it also. And there you have your Heidi braids.
Okay, we are doing the Heidi Braid, also known as the Goddess Braid., And what we've done is. We have actually started with a center part this time. And we are going to do one braid on either. Side. Seems simple enough, but there are some definite tips to make it successful for you.. First thing I'm gon na do is I'm going to kind of move. Her hair away from her face, and I'm gon na put in two very low pony tails. Now, where you put your pony tail, is directly related to how long your hair actually is. Just hold it with my hand, to see where the pony tail would be and See how far I can stretch it over.. So if you had shorter hair, obviously you'd wan na go a little higher.. I always like to keep it behind the ear instead of in front or on top of.. I think this style would be really great for like a backyard wedding or a casual, beachy day., Something where you needed to look a little bit fancy but was more of a casual environment.. So now that I've done a pony tail, I'm gon na seperate it into three sections. Trying to get an equal amount of fullness in each section. And I'm gon na braid the braid pretty tight, and then I'm gon na loosen it up.. So just braid all the way to the end of the hair.. If you have layers in your hair - and you start to get pieces falling out, don't worry about that because we're gon na fatten it up. - And you probably won't see those anyway or we'll use them to add to the lower. And finish with a clear rubber, band. And then I'm gon na widden, the braid, so I'm gon na start fanning out the ends from the bottom. And you can kinda take either side of the braid and fluff it up further.. And then I would do exactly the same thing on the other. Side. Be sure the hair is going behind the ear then put in another rubber band. And I'm using clear rubber bands, because you can't see them.. Another great thing about using clear rubber bands is, if you're, using them. Kinda, like we are today, where you're just holding something in place, so that you can work with it. You can always after you're finished with the braid, take little scissors and cut this rubber, band. And it'll help. You work a little bit faster and a little bit easier., So we're just gon na split the pony tail into three sections and braid all the way down and then we're gon na fluff up the braid.. We can now flip it so that we can actually create the look.. So what we're gona do is I place my finger right on top of where the rubber band is, and I use that to pop my braid over to the other side.. What that does? Is it just makes it lie really really flat right, here., So I'll just put a little pin in there to secure it in place., And then we can decide where we want the braid to be in the front of the hair.. So traditionally, I think we see it a little bit farther away from the hair, but you could also do it around the forehead., Which is kind of an angelic. Almost a Greccian look, I think., But to stick with the Heidi theme. We'Re gon na go right., And then I just go through randomly and as you're doing this on yourself, it'll be all feel so you'll feel where it feels secure. Making sure that this part right here is very flat to the head.. What happens if you don't do that? You get this odd shape coming from behind here and it doesn't feel like it flows around the head.. So now, on the other side, we're gon na do the same thing.. So now you can see both of your ends are right up the front.. You can do a couple of different things., You can criss cross them and then just tuck the ends in or if you really wanted to see like two seperate braids on the top. That'S also a really fun looking piece where one braid lives on top of the other., And then you can see the end is just kind of poking up. All you have to do is simply tuck it inside the braid. And then we have this end on the other side, tuck it and pin it also. And there you have your Heidi braids


Comments
Dani: thanks this actually works! :)
de pictura: Thank you so much
JQV: do the princess leia hair
Jad Kayali: LMAO!!!4:02 ... She's gonna cry xD
Meilė S: Thats why she is model xD
B A: Frida Kahlo´s braids
Madelyn Harding: that model looks bored... very bored.
Magnus: she doesn't seem like that
Kim McManus: 1st :DDDDDD