Braid Pattern For Invisible Part Sew In Weave Hairstyles Tutorial Part 2
- Posted on 24 May, 2013
- Braids Hairstyles
- By Anonymous
For Free Giveaways & Weekly Updates, Stay Connected By Email! http://eepurl.com/Am3Kb
Buy My Books, DVDs, and T-Shirts at http://www.howtoblackhairstore.com
My Website: http://www.howtoblackhair.com
Instagram: http://www.instagram.com/BreannaRutter...
Twitter: http://www.twitter.com/BreannaRutter
Facebook: https://www.facebook.com/OfficialBrean...
Google +: https://www.google.com/+BlackWomenHair...
Got Hair Questions? Email Me!
Email for Business Inquiries
To achieve the Invisible Part Full Sew In Hairstyle, you will need as follows;
(2)Packs of Weft Human Hair Extensions
http://www.amazon.com/gp/product/B004O...
Flat Iron
http://www.amazon.com/gp/product/B001M...
(1) Black Wig Cap
http://www.amazon.com/gp/product/B0017...
Scissors
http://www.amazon.com/gp/product/B004K...
(1) Curved Needle
http://www.amazon.com/gp/product/B0001...
(1) Spool of Black Weaving Thread
http://www.amazon.com/gp/product/B005Z...
(1) Hair Comb
http://www.amazon.com/gp/product/B001T...
Hair Spray Bottle
http://www.amazon.com/gp/product/B002R...
Olive Oil
http://www.amazon.com/gp/product/B003Y...
You have the choice to purchase different colored weaving thread but you
want to use the thread that best matches your hair color.
Since my extensions are more black than brown, it's appropriate to use black weaving thread. If you are installing, for instance, blonde, red, or brown weave/extensions, you want to weaving thread to color coordinate with your tracks.
This helps greatly in camouflaging the fact that you have extensions installed in your hair.
It would be an awful feeling knowing that you and the others around you can potentially see blonde or red thread peeking through your black or brown extensions!
Part 1 https://www.youtube.com/watch?v=0EmZXG...
Part 2
https://www.youtube.com/watch?v=L13-xX...
Part 3
https://www.youtube.com/watch?v=npiyFy...
Part 4
https://www.youtube.com/watch?v=Xk9ztG...
Part 5
https://www.youtube.com/watch?v=VBFBqZ...
Part 6
https://www.youtube.com/watch?v=yggc14...
Part 7
https://www.youtube.com/watch?v=avTMOW...
Part 8
https://www.youtube.com/watch?v=PqKMdf...
Thanks For Watching!
DISCLAIMER: All suggestions, tips, prizes, techniques and advice given are for informational purposes only and should be used at your discretion and best judgment. I highly recommend conducting strand tests when trying or using new products, hair appliances and product mixes. I am not responsible or liable for adverse or undesirable effects including hair loss, hair breakage or other hair/scalp/skin/body damage as a direct or indirect result of the suggestions, tips, prizes, techniques and/or advice given.
________________________________________
FTC: I am not representing, being paid by, or endorsing any of the product brands in this video & I purchased everything with my own money - UNLESS OTHERWISE STATED in video/blog content. There are links to products that might be helpful based on the content of this video/blog. Each of your purchases via our Amazon affiliation links supports our cause at no additional cost to you.
Music "Easy Lemon" Kevin MacLeod (incompetech.com)
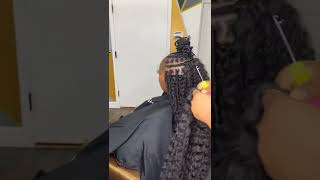
Here we are in step number two of the invisible part sewin hairstyle this that I will show you in detail how to do your braid pattern for this to begin, you want to make sure that you have your hair comb and your water spray bottle to help. You part your hair and detangle ypir hair for your braid when you are braiding your break pattern for your invisible part style. You want to make sure that you have already established where your invisible part will be if you would like your invisible part to be in the middle of your head. That'S where you want to part your hair. If you will, like it off-center or to either side, you want to make sure that that is first, where you part your hair to begin your brain. So I want my invisible part to actually be off-center kind of to the side, but not directly to the middle of my head. So what I will be doing is parting, a rectangular amount of hair on the side of my head with my comb, use your water spray bottle to mist your hair, as it helps you to part your hair and prep your hair for your invisible part section. The type of comb that I like to use when parting my hair as three separate sized teeth on in a all search for different purposes, it's easier on the left side of my comb are the closest teeth that are closest to one another in this serves, as Your typical comb, the teeth on the right side of my comb, are the second widest apart, and these help me with detangle my hair. It'S also great for adding more body to an already straight or curly hairstyle. Also, the 3rd set of teeth at the bottom of this comb are furthest apart, and I also use these teeth to help me detangle my hair, as your afro pick. So you could use this to pick your hair as well. I will be using all of these teeth on my comb to help me detangle, my hair as well. I will be using. I will be using all sides of these teeth on this call to help me part out a rectangular section of hair on my head when parting your area of hair or your actual invisible part, you want to make sure that you are a rectangular size amount of Hair, this ensures that your heart is long enough and also that it looks more realistic, as you do your sewin. So, as you can see, I have already parted my hair and I have clips to hold my hair on both sides. This part that you see hair extends about a third back towards my head, so I haven’t parted as the middle of my head. I went a bow from my hairline to a third of the way up my head. For my part, you want to make sure that the width of your part is probably about half a picky size. This ensures that the braids will be close enough together and the part will not need as many braids when you are sewing on your extensions. So since this is your part here, the way that you want to braid your hair for your invisible part is that you will part your hair down the middle on this side of the section will have braids that go away from one another. So from the part that will be in the middle on this side, where your part is all your braids will go in this direction, the braids that will be on the side of the part, all the braids will go in this direction. So on your part, all your braids will be braided a way from one another. So to begin, take your comb part your hair down the middle and keep both sides separate for your braids. Now that I have created my part in the middle, I'm simply going to concentrate on one side at a time someone to concentrate on this side of my invisible part style, and I am going to flat twist this hair out of the way. Now, with this section of hair that you see here, you are going to braid small French braids that come away from the part for your invisible part style. To clarify a little bit more, I will explain what each section of hair is for this class was that you see here, will compose of French braids that go away from the part right here for all of these French braids. That will be from this flat twist. Will flow in this direction. This will be your visible part that will show once your entire style is complete on the other side of the part with this hair. Here you want to have French braids that flow a way from the part. So to begin, I will show you how to do your first, French braid your you're, going to take your comb and section of an amount of hair to begin your braid. So with my comb in hand to pull my hair down just a little bit impart a small section of hair for my braid. So this is about how big my section to use my comb to hold the rest of the hair of the way. And then I am going to begin braiding the section you want to make sure that all of your hair is out of the way so that other pieces of your hair does not get tangled within your braids. So now the braiding process begin. I am goin gto pinch off a little bitty piece of hair - that's closest to that part here, because braid needs to flow a way from, apart from the pinch off a little piece. There divide this piece into three parts and then you begin braiding your right hand with your index and middle fingers going to be a one stream and with your other hand, you have a strand in between your index finger in your middle finger and yell shirtless in Between your index finger in your now, what you want to do, since you left hand, has to strands, is to take your right hand, index finger, but behind the two strands and insert it there to grab that outer edge sections once you do that, you can scoop Up a little bit of hair from your scalp as well, so now my right hand has to strands of hair. My left hand has one going to take my next finger, but behind two strands of hair and hook this bottom piece of hair. With my index finger and grab a little piece of hair from my scalp continue to braid down until you reach near the bottom of your braid, I like to braid down probably about two thirds of the way a little bit more and then you can leave the Hair as is, or continue to braid, these braids will be added into another braid. I like to just leave the ends a little bit. Undone to help me take down my hair later, as you can see here, are your two small braids that you braided thr rest of this hair here will be braided away from this part, as you see what these two braids and then once you are done with This side, you going to start where you have your twist, take that down and part these braids a way from this middle part as well. This area serves as the base of your invisible part style and once you're finished in the hair is actually sewn on. This. Will be your visible part that will shows through your style here now that I finished braiding my praise or my actual invisible part section. This is what they should. The part that is in the middle of your braids will actually be your visible scalp that will show through years I'll. You want to make sure that, on both sides of your part, the braids are be braided away from the part, this house to lay your braids extremely flat as you so on your extensions to each braid and as it forms your invisible part style. So now that you have your braids actually braided on your section for your invisible part, next will be braiding. Your perimeter, braid to braid your perimeter to break perimeter break consists of two braids, but is actually like one braid. You simply want to start where your hair is on your hair line and braid entirely all the way around the hair line of your entire head, as you braid as far over as you possibly physically. Can you going to start right back up top here where your hair line is in your going to continue to braid around the rest of your hair line and link the other braid in the back with that braid as well? So this process is certainly easy and not confusing at all. You are simply going to have a perimeter break that has two starting points here, where your hair is on your hair line and they are going to go around your hair line here. Go around your hair line here in those two braids will meet up at the nape of your. So what I like to do is go ahead and take my spray bottle, give it a shake, and then I mist the section of hair around my hair, my to help me part a medium to medium size, braiding from my entire hairline. So now I am going to focus on the side and what I like to do is part hair around my hairline. So now I will be using my clips to keep my hair out of the way as I braid my perimeter, braid, now that my hair, the sectioned on the right side of my head to begin my perimeter braid. I like to take the first braid that serves as the base of my invisible part and braid that into my perimeter braids. This helps to keep the braids in a direction that it's supposed to go and keep the style extremely falt. As I get to the side once I cannot braid this site any longer around my airline. I will take the first braid on this side of my head and braid that braid into the perimeter braid on this side of my hair as well. So, to begin, I'm going to start on this. I am simply going to just start braiding it from my hairline until I can't braid back any further now to recap on how far you should be in your braid pattern process. As you see here, I have my braids here that serve as the base for the actual invisible part. I have my part here that will show, through my style and I have braids going away from the part on both sides for my perimeter braid. I make sure to braid it around my entire hairline. I started on the right side of my head and continued with the first braid that serves for my invisible part base and I continued to braid all the way around my entire hair line. Once I reached the left side of my head, I did the same thing and I took the first braid on the other side of my actual invisible part where my scalp is, and I braided around my hairline as well. Next, what we will be doing is taking all of the rest of our hair and French braiding. It all the way to the back. Once you have finished your braids. This is what your braid pattern should look like that. I showed you how to braid your braids. What the base of your invisible part style in this step, I showed you how you want to braid your braids for the base of your invisible part hairstyle. Then I showed you how you want to braid your perimeter braid and then to French braid. All of your hair to the back as well, when all of your hair is braided. You want to make sure that you connect each braid to one another. When you finish, you should only have one braid that hangs down on the side of your head in your hair is short. You can simply take a break and talk underneath. Another braid in your hair is longer. You can actually use your needle and thread and sew. Your braid flat down to your head in another step. I will show you exactly how to so with your needle and thread. So now that your braid pattern is finished in the next step number three, I will show you how to sew your wig cap down to your head and how to sew on your hair extensions.


Comments
Breanna Rutter: YOUTUBE HASN'T Been Showing You All My New Videos?? CLICK THE BELL ICON Next To The Subscribe Button to Turn on Channel Notifications To Never Miss A New Video Again!
Angela Shaw: I love your videos!!! I practice on my daughters hair, she's 16, and she loves it because she gets a free hair do. You are so detailed in explaining each step and it's very easy to follow. Thank you so much for being an excellent teacher!!! P.s.... I still can't do my own hair lol!
egbutterbean2235: You are an excellent teacher. Thanks for taking the time to explain this so clear and concise. Your instructions are dummy proof.!!! Keep up the good work and I look further to learning more from YOU.:::-)::
Dynisstee love Lady jay jay: Omg thank you so much this is my second attempt to do a sew in on myself. The first time I did the wrong braid pattern and had to take it all down this looks great and like it will work thanks
Nicole B: I absolutely love your videos, they are very detailed, exactly what I've been looking for..........thanks.
Genesis Ginyard: girl you are wonderful!!! thanks for explaining sooooo well...
LadyShip: You are an awesome teacher, so detailed and time spent , you should own your own beauty school if you dont already
Nyasia Chambers: i Really Love your videos , this is a phenomenal tutorial of how to do this style .
busola: i love ur step by step instructions. gr8 job!
Couponinwit GiaMarie: I dont think I have ever seen a video so detailed. You are a wonderful Instructor I am really learning from you. Thank you for the video!
Tracey Anne Kimball: Thanks for the in depth steps... You made me get creative and it looks real and very good!
sibongile soko: i never Thought I would be able to plat ever until I landed on one of your videos by mistake and now I can conrow my hair, thank you so much. continue teaching us.
sibongile soko: i never Thought I would be able to plat ever until I landed on one of your videos by mistake and now I can conrow my hair, thank you so much. continue teaching us.
sedia foday: Love this lady. You are awesome! ! Thanks for sharing.
Marie Smith: You did a amazing tutorial for beginners I am learning
Lynnett Love: Thank for sharing your skills with the rest of the public
Lateisha Addison: I love this video this video showed me for the first time how to do a sew in from the beginning to the end
teresa: Love this going to try it
sasheen malcolm: Thank you for taking the time out for us
Chandra Walker: I enjoy your tutorials. Thank you B
shanshan391: I love your videos, they help a lot. Would be okay if I use braiding hair when braiding ?
Meditate, Relax, Repeat: I love your videos! You're so great with hair
Lovely Debbie: excellent tutorial
fayefaith1: You're simply awesome! :)
Ralie Joseph: does it matter how long your hair is? mine is about down to my bra strap when wet, will that effect the style?
Jackie Olio: When you braid around the perimeter and have extra hair left, what do u do
Olga Martinez: Hi tanks you for this video to me is amazing how. You explain. Is so simple to follow i all ready apply to my friend hair she loved! Tanks a million
alexandra herisse: You Help Me Alot About Doing Hair !
Porsche Matthews: Can i ask why you french braid instead of just cornrows?
Blaqueberry12: I love your videos, do you have a video on French braiding
Laura St. Thomas: Can this braid pattern be used for crochet braids??
AKIYIAKELLY: all I can Say is Excellent!
Breanna Rutter: Thank you and yes Copy and paste the link in a new Youtube search box. The first link is with weave, the second link is without weave. watch?v=SLxvuh4Gl88 watch?v=q5afbOfeR3A
Breanna Rutter: Thanks!
jankie singh: You are a pro like watching you..
DLSea Studios: OMG, is THAT what a "weave" is...??? That looks terrifying!!! (and painful) ... To clarify, I mean all the sewing that comes after this ( I saw it all) Holy smokes, how do you not hurt from that? D:
Maureen Gordon: is it the same routine as doing the center part i like center part show me how to do center part
Nadia Nelson: Nice
sasheen malcolm: Kool!
Shamai Ammons: Did you go to school,to learn how to do hair?
D,Weeks422: She's sounds and looks very cute
Shaddai Simmons: Yea did u go to school u Sounded very educated
Shira Womack-Leatherberry: I totally did not understand.