Natural V Part Sew In Wig | Beginner Friendly Install | Unice Hair
- Posted on 25 April, 2022
- Braids Hairstyles
- By Anonymous
What's up my A Team, this video is showing you how to do a natual V-Part Wig Sew in on yourself. This is beginner friendly and I'm sure anyone can do this!
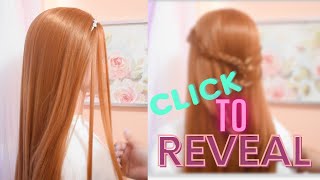
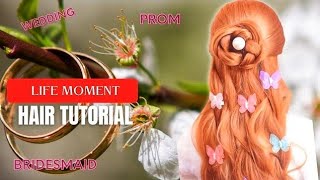
Oh, what is up my a team? This is ashley with another video for you guys and in today's video we are doing a natural v part sew-in, beginner-friendly installation, guys this turned out amazing and i'm loving every bit of it. So if you guys want to know how i did this whole entire process, then just keep on watching. Okay. So, to start with the install, i did leave some leave out on the top of my head because i am doing a middle part and then i also want to put my hair up in a ponytail. So i did leave the perimeter of my hair out so that when i do put my hair in a ponytail, it is nice and seamless, and then i also have my mom braid, my hair, because your girls nails was way too long to be braiding. My hair and y'all know that i cannot bring my hair with my nails on, so my mom was the only person who did not have nails at that time and i asked her to braid my hair and she did a really good job, so yeah. So pretty much what she did was she did two anchor braids and then she braided the rest of my hair back and then i just pinned up all the braids. So here i have a wig cap on and i took a white eyeliner pencil to map out pretty much where i want the cap to be sewn on. So i do want the cap to be sewn onto the perimeter of where my mom braided my hair um. The lines don't have to be perfect, you guys, because we are gon na put this cap on a mannequin head and straighten out the line. So it's gon na look a little wonky right now, but it's all good, don't even stress about it. It'S still gon na come out perfect, so this hair is from you, nice hair. This is how the bundles look in the wrapper. I got four bundles 24 inches for all of them. I only wash two bundles because your girl has a really tiny head and only two bundles, not even only a bundle and a half really fits on my head, but this is how the curls look when it's washed super beautiful and the wefts are super full. I love you, nice hair. They have really good quality hair and, on top of that, it's affordable. So this is what i was talking about when i put the wig cap on the mannequin head here is where you're going to like pretty much straighten out the lines. So here is where we get to the fun part, which is sewing in the tracks. I hate this part guys. This is a beginner friendly tutorial. If you guys are not good at sewing, you guys can honestly just glue the track to the wig cap. The reason why i sewed my tracks on is because i knew i was going on vacation and there was a possibility of me getting in water, and i really didn't want to take that risk in any of my tracks like slipping off or the glue coming off Or anything like that, so i sold on my tracks. If you know how to sew - and you prefer sewing - go right ahead, if you're not good at sewing girl glue them tracks on and call it a day, because even with the glue that, like the glue that you get from like the beauty, supply store or like Sally'S they're still really good and they still hold the checks really really good. So but yeah, i sew through the actual width about two to three times and i make uh. You know two to three knots and then, after that i sew underneath the wet and also putting making knots through um every time i stitch so guys. If you hear background noise, there is a truck outside doing something and they're just making so much noise right now, but you need help with sewing. There are so many videos on youtube on how to sew i'm not going to get in depth into how i sew up because again, there's just so many videos on how to sew, but pretty much like. I said i just sew when i first put the track on, i just sew through the actual wet two to three times making two to three knots and then i sew under the weft making a knot every time i stitch and i cut, i also cut the Wefts, i do not do the fold over method with the wefts me personally, i'm not good at that, and on top of that, i don't like the bulkiness of folding over the tracks um. I know people don't like cutting the wefts uh because you lose the longevity of the wefts of the bundles, but in my opinion i've never ever felt that way, regardless whether i fold over my wefts or cut my webs, i feel like i still get the longevity Still the same longevity of my web, so all of this is a personal preference. Okay, so do whatever you're comfortable doing do whatever you're good at doing um. If you want to cut wefts, you can't, if you want to fold over the wraps, you can it's up to you. So i'm just going to speed through this process because it's going to get extremely repetitive and i really don't want to board you guys with me talking, because i can talk your ears off all right. I'M a very talkative person and i can talk - talk, talk talk talk, so i don't want to do that to you guys, i'm going to put on some music and just let y'all watch me finish doing the sew in. I guess i'll get back to you when i start sewing the tracks on the top of the um wig cap. I guess to show how to do a v part. Or, u part, it really depends on how much hair you leave out. So if you want to leave out a small amount of hair, your wig cap will mostly look more like a v part. If you leave a lot more hair out, it's going to more look like a! U part, but again, it all depends on how much hair you leave out and so i'll just show you how i make the tracks, on top of the wig cap, like really seamless and very flat whether you do a v part or you person i'll, be back When i'm trying to build it up, i wish i could make you stop cause baby. I love you, i guess i'm gon na dance, so for the top of the wig cap, all i'm doing is taking two small tracks and sewing it into a v-shape. This to me just gives me the most seamless insulation when it comes to the top of my head, because i have thin hair. Sometimes it's hard to blend thin hair with you know a lot of extension. So this is how i do of my it give me that give me that give me that good girl love. You give me that give me that. Give me that give me me that give me that give me that give me that give me that give me that give me that give me that give me that good, don't be a without you. You bring up the sweetness of my life, come on all right. So we are now up to where we are sewing the wig cap to our braids. Sorry, i do not have a lot of clips of this. For some reason, most of my clips are either missing or glitching a lot and i'm not sure why that is happening. But pretty much just take your sweet time. You want to feel for your braids and just sew your wig caps on top of your braids, and then i end up, obviously cutting the excess wig cap. Also you guys to make this more beginner friendly. Instead of you sewing it to your braids. If you're, not a good sewer, you can always just add clips. You can either glue the clips or sew on the clips and then just clip them to your braids and you're good to go. It'Ll give you the same result, trust me but yeah. This is pretty much how it looks: um any excess, wig cap that you still see. I am going to cut that off and then i do get rid of the white line that you see there but yeah. This is a preview of what looks around my head. Um and then i do put my hair in a ponytail just so that you guys can see how flat and how seamless everything looks. But this is before i straighten my hair and then i'm going to straighten my hair and then you guys can see how. Well, my hair blends with the uh v part wig, so yeah guys. I really hope you guys enjoyed this video. If you did, please give me a thumbs up. Please subscribe to my channel and please hit that bell notification so that you get notified every time. I upload but yeah. I really hope you guys enjoy it. I will see you guys in my next video bye guys come on give me that give me that give me that give me that give me that give me that give me that give me that
Comments
The Tessa Stewart: How long does it take just for the sewing?