Easiest Way To Make A Braided All Back Ghana Weaving Wig/How To Make An All Back Wig With Expression
- Posted on 09 December, 2020
- Braids Hairstyles
- By Anonymous
Hey guys please don’t forget to subscribe like and ask any questions
❤️❤️❤️❤️❤️❤️❤️❤️❤️❤️
Follow me on my social media pages
https://www.facebook.com/RuthyIz/
https://instagram.com/ruthie_iz?r=name...
❤️❤️❤️❤️❤️❤️❤️❤️
Email: [email protected]
❤️❤️❤️❤️❤️❤️❤️❤️❤️❤️❤️❤️❤️❤️❤️❤️❤️❤️❤️❤️
How to make a Swiss lace frontal wig cap
Hey guys don’t forget to subscribe like and comment and also don’t forget to smash that bell.
I used......
HOW TO: make Ghanaian braids for a quick weave and for your braided wigs caps. https://youtu.be/7hCGsZW2Q1s
An expression braiding hair color BG(deep whine)
Wig cap
Crochet pin
Hot glue
Wall pins
Mannequin head.
❤️❤️❤️❤️❤️❤️❤️❤️❤️
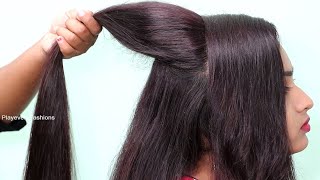
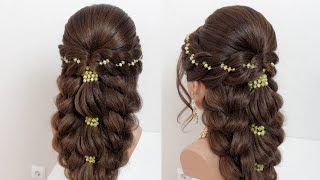
Hello guys welcome back to my channel it's a girl again ruthie and on today's video i'll, be showing you how i made this all back: braided gon na weave in hair or wig, so guys, i'm using this hair color bg! That'S what i saw on the paper, but this is actually a very deep wine. It'S not red, it's close to red, but it's a deep wine, so guys i'll be dividing it into three parts. But before then you saw me brushing it earlier. You have to brush the tip so that when you're actually selecting it or fishing it out, it doesn't get tangled. So i combed it. First then divide it, and this is exactly how i made the braids. I started with these very very small parts and then continued with the other one, the first hair you're, seeing then the next strands of hair. Then i stepped up a bit and added more hair to the third part and that's how it keeps going on i'll be leaving the link of how to perfect your braids for your extra wigs or your external braids, for your wig caps in the link or in The description box below or i'm also going to be, leaving the link at the end of the video. So you can just click and just go straight down to the video. It'S self-explanatory. Guys, trust me so guys whenever you're braiding do not break loosely always break tightly. So that it comes out nice and cute because it's not the hair, it's not a real hair or you're, not doing it on the person's hair. So, whenever it's for a wig, you make sure you braid tightly so that it comes out firm and cute. So guys. I'Ve already marked out my hairline, and this is the wig cap i'll be using for today's tutorial. It'S a half lace frontal and have normal wig cap. So, first of all what i did for the whole hair before i started, i made sure i did this or i put the extra braids at the two sides, that's close to the ear sides. I put them because i wanted them to. I wanted you to have this forehead kind of look. So whenever you want to be you want to do it, you always make sure you put it at the sides first, but if you find doing it the way you know you're comfortable at doing it. Please trust me just keep going so i did that and then i went to the middle to do it again and that's where i'm gon na start from i'm gon na definitely start from the middle. Some people actually can start from the sides like where i started from first, but i wanted it to have this straight look, and that was what i did actually, when i'm even braiding, i usually start from the middle. So i have this long straight finish like it has this um nice ending the sides, all the back ends are always lapping. They are always looking natural. So that's what i did and i think it's gon na help you too, when you do it, but if you have a good way, you do yours, it's fine, so guys. This is how it looks like, and i'm still doing it though, and while doing it, you want to measure like you, don't want it to be too close. You don't want it to be too far. That'S the style i'm actually doing, though, so that's why. So, what placing your already braided hair on the recap make sure you're using your eyes to measure while you're putting it and you know just keep doing it, keep looking at it guys when you want a good job. You have to take your time, like i always say, take your time and just keep doing it. Trust me when you finish, you would love your work and you'll be proud of it, so this hair actually took me about three four hours yeah. It took me four hours because i started at two and i ended up finishing at six and what i usually do is i braid this already braided hair a day before i make any video or i want to do any style. So i already have a plan and okay, i'm gon na do this style and then i make the braided hair. I braid the hair down, and then i film the next day or record the next day. So right now i'll be taking off that braid. I used as a mark out i'll be putting it to the other braids just to make it look like a normal braid and then adding extra braids to the remaining part of the hair you're, seeing right now or the wig you're seeing right now. That'S what i'll do to the other side so now guys i'll, be gluing each of them down before sewing and i'll be telling you the reason, but before i do that, if you haven't subscribed, please subscribe to my channel like and drop a comment or ask me A question if you didn't get any parts correctly now the reason why i have to glue them first is because when sewing it, you might end up moving it to another position or not even sewing it straight. So this glue would stand as a temporal hold for the individual braids, because the braids are so thick and the glue can't hold it for a long time. Trust me it won't. It might actually hold it for the beginning, but it won't hold it for the long time. If you don't have a glue, you can use a bonding glue and even you can actually just draw a line with your marker or your crayon, just something that can show color and then you sew towards or you sew in between that line. You marked out i'll, be sewing it down now after i glue it so i'll. Have that perfect? Look that i always wanted and for beginners this style is actually for beginners. If you don't know how to sew straight, you could just use a glue glue it down or you can use like a pin, pin it down, and then you sew and the reason why i like the glueing method is because you can glue it down and then You so well like you, don't have to shave or move or like, oh or, like you know, being in too much pressure. You know it just makes you so smoothly. You can sew from beginning to the end left right. You know just make sure the thread doesn't show and if you don't know how to sew very well make sure you get the color of the hair or the thread. So you don't end up using um like some awkward color. Is it that you use the color of the hair or just black, do not use any other color to sew your hair, so this is a zoom in picture or a zoom in view of how to sew your wigs down so guys, that's how it looks like So beauties, like i said earlier, if you haven't subscribed to my channel, please subscribe to my channel, give this video a big thumbs up subscribe to my channel again, and just ask me whatever question you don't understand, or whatever thing you don't i'll be here to answer You guys so i'll be adding the baby hair and on each strands of braids i'll, be adding each baby hair. I'M not going to be filling all the fronts with baby, hair or extra hairs. No i'll just add on each of the already braided hair i made i'll just add the baby hair in front of them, and that would be it so, after applying baby hair, i'm going to be installing this hair and you guys watch me install it and you Just tell me what you notice or, if you want me to do a video whatever you want me to do. Just let me know in the comment section below and i'll be glad to do that with you guys. Thank you for the support so far. Thank you for the comments. Thank you for the likes. I love you all. I still love you i'll still keep doing more and keep showing myself and keep being there for you guys. Just let me know and trust me whatever question you have and i'll be here and if i don't know you can tell me nobody's above mistake, nobody's above correction. I am not perfect, i'm still learning and i'm still striving hard to do more. So if you have any idea any suggestions, you can tell me in the comment section below guys, trust me, i'm welcoming, or i love, overcoming other ideas so guys. This is what it looks like, and i've not added this hair in hot water. You can add it to the hot water whenever you have done, but for this video i just didn't want, like i told you, i finished around six and i just wanted to film this that same day, so i didn't put it in hot water yet, but guys You have to put it in hot water so that mouth or the ends would not be looking all standy and strong. It will all relax and feel free like a normal hair. So after i, after you're done putting it in the hot water, also don't forget to apply your foundation or your concealer on your wig nets. That'S the closure you're seeing so it has that natural look at last whenever you're wearing it and that'll be all for today's tutorial. That'S me installing it and, like i said earlier, please guys don't forget to give this video a big thumbs up subscribe to. My channel hit the notification bell to get notified whenever i upload a new video and i'll be seeing you all on my next video. I love you all so much stay blessed, stay safe, stay out of trouble and stay beautiful. You


Comments
Ife-chi Dora: You videos are really educating and informative...I love your effort girl..thumbs up.. New subscriber
Nicholas Williams: That Looks Amazing! Great Tutorial
Otto Sean Christopher Mastuh OSCG 8845 Grimsley: Your cornrow wig looks absolutely gorgeous, ma'am.
Young stars entertainment recording studio: Am enjoying your work, because you always take time to explain very well to your viewers, thanks
belle_graciaz: This came out so beautifully and suits you well
Young stars entertainment recording studio: You always make a perfect job, wonderful experience watching your videos
Aleena Abdul: Looks sooooo good
Peace Reigns: This is really beautifully done
Lilian Arihi: You did a very good and neat job dearest sis keep it up. I just subscribed.
Sandra Eggleston: Beautiful ❤️
God Disanka: Amazing work sis
tamika jennings: Omg u made that from scratch u did a amazing job but it looked like a hump that’s the only issue
Blessing James: Kudos to you
Betty Nicy: Look very beautiful, please how many lines of hair do you have and how much attachment do you use, and plaiting it on thread please how Ghana weave did you add to get the size of the hair
Grace Ateji Oluwole: Big kudos sis. How many strands (baby hair) of hair per braid?
Ajini Amope: I love these
Julie Mills: When you sew it dnt take up the space on the lace?
The WICKED: Love that, it would take me an hour tho... Lol .. it's very creative
Tricia beauty: Its fantastic
Tanesha Wright: It looks good how much pack of braid u use
Loveday Sandy: Nice one dearie. Please this gum, is it the same one Tailor's use? If am going to buy it what will I tell them that I want to buy?
Verababy Vera Erese: Nice one
Motunrayo Ola: Very educative
Victoria Hinidza: Good job my dear
Neisha Blakesanderson: First time here good job
miss spicy fashion home: Wow
SALAUAYO ZAINAB: U just won my heart new subscriber
miss spicy fashion home: Please do a video on how to make this cap
Oblitei Benjamin: It's look good
sonyapruitt75: So cute
Tricia beauty: Where can I buy the wig cap with lace on it please
Sharon Naa Yaborley Mensah: I want to buy one from you
awunglefac Mariana: Wow so beautiful my dear but the part you put baby face I didn't get it well
joy. go: ♥️♥️♥️♥️
Ogunsola Abass: ❤️❤️❤️❤️❤️❤️❤️❤️
larnelle clyde:
Mihz Naomi: How I can get this net
Nadia Hair Styles TV: Hi I need one please
Chibabe Rosemary: Where can I get the exact net, can't find it
Oreye Prosper: Pls can u refer me to a good glue gun pls i realy need it urgent pls
tamika jennings: Girl no