Fulani Braids With Crochet Curls (Trending Hairstyles) Protective Styles
- Posted on 23 September, 2021
- Curly Hairstyles
- By Anonymous
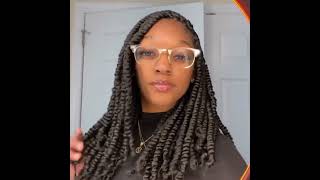
Hey yall!! This video is a tutorial on how to achieve the Fulani or tribal braids with Crotchet curls in the back hairstyle. This hairstyle was trending for a while. So many people did this style with wigs and synthetic crotchet hair. This is considered a protective style which is great if you are wanting to grow your hair out and keep it healthy. Please subscribe for more videos and turn on your post notification bell. Thank you!
connect with me on Instagram: https://www.instagram.com/maryssa.w/
Products used in this video:
--Shine n Jam-- https://amzn.to/2W1Hbnh
Hair used in this video:
--2 packs of Zury Kanekalon braiding hair (color 2)
--2.5 packs of Freetress Joyful Curl Crotchet Hair (color 1B)
Click here... How I prep my hair for protective styles: https://www.youtube.com/watch?v=p0XE0F...
Click here... Nigerian Fiancé does my VoiceOver: https://www.youtube.com/watch?v=7mRGZ6...
My so hey y'all, welcome back to my channel. Welcome. If you are new, my name is marissa rae. Thank you so much for tuning in in today's video. So today's video is all about this cute adorable hairstyle. I think they call it the fulani braids plus crochet. In the back or tribal braids and crochet in the back, whatever you want to call it, but i just have one two: three, four: five, six, seven little cute triangle, braids in the front; and yes, this is some crochet synthetic hair in the back - and i saw This actually on um like an instagram reel - and i was like oh that looks cute. I want to try it so this was my take on it and i think it turned out really good. So the hair that i went ahead and used for this video, the braids i did in the front. I actually just used some hair that i still had left from an old brayden hairstyle, and this is zuri hair, the um color too, and it's just the um kanekalon braiding hair. You know that everybody uses when you're doing like box, braids or knotless braids and then for the curls that i have the crochet. I actually use this freetress braid, it's a um, a three bundle pack in the color 1b and it's 20 inches, and the curl pattern is joyful, curl and yeah y'all. This style was actually pretty easy. Of course, you will need a crochet needle which i have right here to do this style. Everything else is kind of like optional, like the products you use and all that. But these three things that i just showed y'all is pretty much the most important things that you will need for this hairstyle. So, if y'all already like how my hair is looking, then make sure you go ahead and like this video comment down below and subscribe to my channel now, if y'all would like to see how i achieve this style, then make sure you keep on watching all right. Y'All, so i'm starting off with my hair freshly blow dried. I did do a prepping, my natural hair for protective style videos. So if y'all want to see that video then make sure you click the tags above so that you can see how i prep my hair and make sure it's nice and healthy before i do any protective style. So, first off i want to go ahead and section off my hair so that i can do my braids in the back, and you know this is time to be able to crochet that hair in in the back of my hair. So, first off i'm starting with a braid like right in the middle of my head, i'm going to braid that braid, like all the way down to the side as y'all, going to see here in a moment and the reason i'm doing. That is because, as i'm going to crochet the hair in, i want it to look very seamless. I don't want, like my parts to show. So that's why i'm doing this one braid straight across then the rest of the braids are going to be larger in the back and they're going to just be straight back, so i can crochet the hair in oh. So now i'm just going to take a section in the back part of my head, so i literally just parted kind of a large section. I ended up having like five braids back there, but i just parted a section and now i'm going to add that braid that i did like across my head to this braid. So they can kind of just you know, feed into each other, and i'm literally going to do this for the whole entire rest of my head, um, at least in the back. So i can crochet all this hair in mind. You, this part is really not important. Like it doesn't have to be neat, it does not have to be perfect because um it's going to be covered by that big curly hair. So as long as you, you know, feed in or crochet in enough hair, and you make sure that is put in you know in unique spots. So it covers everything that you really don't have to worry about. Having tiny, tiny braids in the back of your head and plus that's two time: consumers, though this was perfect for me, and now that that's all done, i have my crochet needle and instead of like sewing my braids down, i'm going to use the crochet needle to Crochet my hair into my hair, so i literally just stick the crochet needle through my braid through the you know, root of my braid and then place the end of the braid through the little latch and then pull it through and close. The latch - and this was so easy y'all - this didn't take um like a whole bunch of time, because i mean, of course i was trying to be neat and like not pull my hair out and stuff like that. But literally all i did was crochet these little braids into my braids just to make it easy for myself when i'm crocheting the rest of the hair in. I forgot to mention that i did add rubber bands to the end of each of my braids so that they wouldn't unravel okay y'all. I have just finished braiding this now we're about to just go ahead and get started with braiding the front part, and i'm going to use this shiny gem y'all know i always use this in all of my videos. Okay: okay: now we about to do the braids for the front part, which is my favorite part, because they are neat and crisp and looking all good. So i'm about to use my red tail comb y'all know my handy dandy, rat tail comb and i'm placing the shining jam on my part and, as you all saw in the beginning, my parts are like very triangular, very diagonal, very asymmetrical, very geometrical. So i decided to do those type of little braids or those type of parts and then place the shine and jam on them and start braiding. So i have not like given y'all a full, like you know, detail tutorial on how you braid and how you do feed in braids. But it's really not that hard. If y'all want to take a look at like one of my feed in braid videos or one of my um like knotless, braid videos, it's kind of the same concept, but i'm literally just you know, cornrowing my hair and then adding the braided hair into my hair And i did add in probably like three or four pieces of braided hair and just try to make sure it was as neat as possible. Of course, because you know this is the most um tricky part of this hairstyle and obviously the most like, visible and obvious part of the hairstyle. It'S like everybody, can see the beautiful braids in the front, so yeah and those sections of or the little pieces of brandon hair. Like i said, it was about three to four pieces that i added in, and they were all small and i just added in those amounts to pretty much just get me to the size of braid that i wanted. It kind of wasn't no special number for each braid. I mean on the sides it was, i did add, a little bit more hair in only because you know the sides of your hair are typically thinner but um. For the most part, it's like the same amount and then they ended up all being pretty much the same size. So i'm just gon na do that for the rest of the braids. Just make sure the part is on nice, nice and crispy and then add in the braided hair. As i go down - and i add a rubber band at the end of the braids to secure it until i'm gon na, you know curl it and make it look nicer later on, so so so, okay, so now we're done with the braiding part. Now it's time to crochet this hair in i've already done like three fourths of my head. So now i'm just going to take a piece of the crochet hair out of the bag, separate it into two and then apply that shining gel to that piece of hair. The only reason i did that is because the hair would kind of get tangled and then it would kind of lose this little curl. It would kind of get a little bit fuzzy, and so i put the shiny jam on there. Excuse me put the shiny gem on there so that it can um. You know like put the curl back together. So now, i'm just going to crochet this hair and y'all saw exactly how i did it. I just opened the latch of the crochet needle put it through my hair, pull the crochet hair through and then i'm gon na tie it around one piece of the hair that was at the other side about three times to make it secure. Okay and then here i'm just cutting off like any pieces, like i told y'all that get a little fuzzy get a little frizzy. You want to cut those off, because this is crochet hair. It doesn't last long anyway, so you want to make sure it's neat as possible because it will get messy. Synthetic hair always gets messy, okay, so yeah every time i do this y'all. You definitely want to make sure that you knot your hair at least two to three times actually three to five times, because with the hair being a little bit silky, it can definitely come undone or you can. You know it'll just loosen up and you don't want it to do that. So it's really self-explanatory. Y'All can see it right here and once you start doing it on your own head, it's very very easy to do you just you know, put the crochet needle through pull the hair through and then tie it to secure it. So very very easy, not very difficult at all, and i think this was a really good choice of curl pattern. I'Ve seen people do it with like kinkier hair. That'S, like you know, a lot like a tighter curl than this, and i've also seen people do it with a looser curl than this like more wavy. But i think this curl pattern was perfect, so that's just that y'all we almost to the end. I think it took me maybe about five hours to do this style. I don't know what took me so long. It'S really an easy style. Maybe it took about five or six hours. Honestly, i couldn't even remember, because i wasn't even able to keep up with this one, but it wasn't difficult y'all, it's just that the hair um after about a week and a half or two weeks, it's definitely time to take it down. You know crochet hair does not last long at all. So if you plan on keeping your protective style in longer than two weeks, i would suggest doing maybe a different style or switching the hair up. But if this is good for you just two weeks for a little style, then you want to do something different cool you in the same boat with me and that's exactly what i did so that's it. For that part, i'm gon na let y'all continue to watch until you see how i get the little curly ends on my braids now for the ends of my braids, i'm just taking this little razor comb that i got from the beauty supply while back and i'm Just razoring the hair in to thin it out. Okay, because i want to use a flexi rod at the ends to curl the ends and um. I needed to make the hair thinner, because if it was thick how it was just when i did the braids it, wouldn't it wasn't going to look right like it just was not going to look good at all, so i'm just using my flexi rods. I also got these from the beauty supply like years ago and um, i'm just putting them on there and now i'm going to dip these in some boiling water, of course, to you know, tighten it all up and make sure it stays curled, and it literally did Stay curled the whole time. Another thing you can do instead of these flexi rods, is, if, like, when you're doing your your braid, your actual braid feed in the crochet hair. That already has the same curl pattern that you're using for the back of your head. So that would save you a step. You would just use that same hair instead of actually um like doing what i did, which is use the flexi rods you can just braid in the curl pattern, the curly hair, that's in the back, so that you know it all, looks uniform and now i'm taking Them out, and as you see, you got your nice little curl and that's it y'all. It literally, you know, matches the back of the hair. It looks real cute and good. So that's that - and i hope y'all can do it too, all right y'all. That brings us to the end of this video. I hope you enjoyed and i hope you learned how to achieve your very cute style. Okay, that's kind of trending. I know i've been seeing a bunch of people do this, but this is it on me. So yeah, that's that hope you all enjoyed and make sure you stay tuned for my other videos that i have on my channel. Of course i do natural hair videos, a lot of protective styles, which i also consider this a protective style and um yeah. That'S pretty much it so again like comment and subscribe turn on your post notifications. Follow your girl on instagram marissa.w is here on the screen and down below in the description box. With all that being said, i hope y'all have a wonderful day or night, whatever time you're watching this video and make sure you stay tuned for my next upload, okay, bye, you


Comments
Shauntiffany: Wow it came out so pretty!! You did that!
Germary Urena: yes this look is so satisfying and beautiful
Shannon2lavvish: This deserves much more recognition
Jasmine Edwards: You are amazing ! I wish I knew how to braid hair
Scohair: Beautiful
Shannessia K.: So PRETTY!!
raundertaker: How long did the hair last. This is beautiful
LaJoia Fox: Beautiful hair
Naffie dibba: It's gorgeous,did it tangled,matted easily?
Ms. C: Great job
Bia: How does this hairstyle last?
PewdieFarts: do you think i can put this in a high/low bun or even a low ponytail? asking for my job purposes
Zoyà Paris: How long does this style last