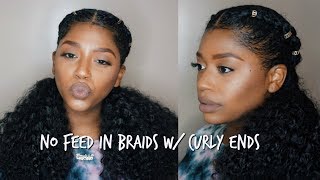
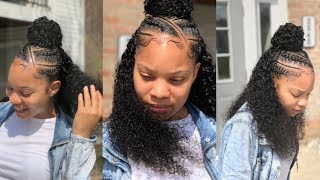
How To : Half Feed In Braids Half Sew In Tutorial | Trendy Instagram Hairstyle 2021 |Ula Hair
- Posted on 30 July, 2021
- Curly Hairstyles
- By Anonymous
Social Media
* Facebook : londoncurlstyles
* Instagram: @thelondontayy
* Business only email : [email protected]
Location: US -Columbia, SC
————-
Products used:
heat protectant https://amzn.to/3fIhOgV
scalp oil: https://amzn.to/2VC7oIm
☆☆☆☆☆☆☆☆☆☆☆☆☆#ULAHAIR☆☆☆☆☆☆☆☆☆☆☆☆☆☆
♥$10 Coupon code: TAYY
Product information : High quality 100% human hair bundles Deep wave 24inch
♥Video hair link: https://bit.ly/3qNn1rX
♥Highly Recommend Hair:
High Density And Beginner Friendly Wigs:http://bit.ly/3nJeHqc
HD Undetectable Lace Restock:http://bit.ly/3igtVSi
Wholesale Promotion Bundle Deals:http://bit.ly/2KiCXla
♥Check all items in Ula Store: https://www.ulahair.com/
♥Follow ulahair for giveaway:
Instagram https://www.instagram.com/ulahair/
Facebook https://www.facebook.com/ulahumanhair/...
Youtube https://www.youtube.com/@ulahair
Tiktok https://www.tiktok.com/@ulahair
♥Contact for promotion:
Email: [email protected]
Whatsapp: +8618924029739
——————————
half up half down sewin,half braids half sew in,feed in braids with sewin,half feed in half sewin,half up half down tutorial,feed in braids with curly weave,half up half down sew in,feeder braids,half up& half down,sew in hairstyles half up half down,half braids half sew in hairstyles,half braided hairstyles with weave,feed in braid with a sew in,partial weave with curly hair
Do you love me matthew, no, more secrets, hey y'all! What'S up welcome back to my channel, this is london tay coming to you today with another video girl. Today'S video, i'm going to show you guys how i got this style. It is the four braids with the sew-in in the back. Okay and i do have a little bit of leave-out, but it's just like right here, all the other tracks. I basically fold it into itself. So that way, you don't have to have like a whole row of leave out. Okay, i mean i have maybe like a centimeter of leave out the smallest leave out that you can have so that way it blends in perfectly. You don't have to put any heat to it or you don't have to do anything to it to kind of really make it blend and what i ended up doing was i had the curly ends. Yeah, this hair is pretty long. This hair is like 24 inches. When i stand up, it comes to like yeah. It comes to my lower lower. It comes to my lower back okay. This is the perfect summer vacation vibe. So i'm about to go to greece for a week and i just decided to do the style girl. I got big ears, so i need something to kind of cover up these things a little bit because it made me look childish, okay, so yeah guys. So this hair came from ula hair ula hair sent me this hair. It'S three bonus of 24 inch. I think it's like deep, wave or water wave, i'm not really sure exactly which one which one it is. So, if you guys do want to know the details of this exact hair, i will link it in the description box below. So it's three bottles of 24 inch. It'S not like. 20. 22. 24.. It'S all three bonus of the same inch. It came with like an instruction package to show you how to take care of their hair. Also comes with some lashes. You know all the bundles and wigs and closure wigs and all that comes with a pair of lashes, yeah and then also it came with a wig cap. I don't really know what that's for. I guess they just it's like a standard type of things, and also these bundles came with the rat tail comb and on the rat tail comb. It says oola hair. This is a perfect rat tail comb. I can definitely use this okay, because i do hair and girl these rat tail combs come in handy, it's a really good sturdy, one too. Oh, that's good and sturdy other than that. This is how you do the style, so go ahead and continue watching. Do not forget to like comment and subscribe in this video love, y'all thank y'all, so much for being here and i will talk to y'all later all right y'all, so i am starting off with hair that is freshly washed. I literally just put a little bit of leave-in conditioner in and then braided it down and went to sleep and woke up and my hair was dry. So now i'm just going to take it out of the braids and i'm just going to blow it out with a blow dryer with a comb attachment. Yes, i know um. Okay, guys i meant to mention, make sure you do use heat protectant. I use ion solutions. Heat protectant, it's like a smoothing heat protectant. It works perfect. Okay, so here i am it's going to part from ear to ear. Now i do notice that some people do this half half sew in half braids. They put the braids like kind of going too far. Back and it just gives it like a dome look, i don't know, i don't like the look i like when the hair is kind of full in the front too, so i feel like you should have as minimum amount of hair at the front as possible for The braid, so that way they can flow into the sew-in really really good, and you have volume at the front. You get what i'm saying so, i'm just sectioning off here, i'm just going to use a blue magic conditioner, it's not a like conditioner! You have to rinse out it's almost like a petroleum base, type of hair moisturizer and i'm just going to put that on the hair that i'm going to braid up and then i'm just going to start braiding. So i am going to have just a little bit of leave out. It'S not going to be from ear to ear, though it's just going to be at the very very top just to cover those last little bit of tracks all right. So i'm just going to part from the middle of my crown, the middle of the top of the head to the ear on the left side and do the same thing on the right side. And i'm going to do like a little braid braiding from that center. To all the way down to the ear, just a small braid and then i'm going to continue that same braid behind the head and to the back and i'm going to do the other side the same way. This is more like an anchor braid. So, whenever you do in the tracks, you're going to want to make sure that you are angling, the tracks at a curve, so that way you don't have to have leave out in that spot. You get what i'm saying so that way the tracks are going on. Top of each other - and you don't really have to worry about all the tracks showing and having to cover every last bit of track. Okay, now i really could have did this style with no no level at all, but i'm going to grease - and i heard it's really windy over there, so i just kind of wanted to just secure myself and just do a little bit of leave out honestly. I could have just did nothing because i literally have the smallest my leave out in the world girl like a half a centimeter of leave out all right, but yes guys. So i'm just gon na go ahead and just continue braiding everything down since you're doing it. On your own you're going to want to not really do a beehive just make it simple for yourself: do a few braids going down, connect the braids together and just keep on moving that way and make sure you don't forget to moisturize your scalp, because my scalp Was super itchy under here after, like day four, i know see my i'm you all right so now that i'm done braiding everything down, i'm just going to get the crochet the hook and i'm going to hook it through the hair and just pick. You know a braid to just crochet it through just to make sure that piece is flat right and i'm just going to moisturize the root girl. I don't care about a little piece that was left out all right because my hair curly and i'm using curly weave, so it don't matter so. Here'S a hola, hair, okay, it's three bundles guys, so i only use two bundles for this style. Now, if you want it super super full, you can have more bundles, but i feel like i gave it a super super natural look and i really liked how all the pictures turned out when i was out of the country, and it just gave it a more Natural look alright, so here i am going to start sewing the tracks. I am double wiping the tracks now, if you want more security, use a net guys a net under the um under the sew ends. I did not have a net and i really wish i did, because it would just give it a more secure style and it just would have lasted longer and helped the braids not move, especially since i didn't do a lot of braids and i got away. So i am going to start sewing the tracks at a curve. You guys see i'm doing it at an angle, i'm not doing it just straight left to right. I am doing it at a curve you're going to want to do all your tracks. This way until you get to the top, because it's going to help your tracks not show on the side, because i'm not going to have any leave out on the side or anything like that and yeah. So i'm just feeling my way through and i'm double knotting. The wefts, as you can see, i'm putting the thread over the needle twice like rolling over the needle twice and then pulling the needle through i'm just feeling my way around guys. I feel like that's the most important thing to to just think about when it comes to sewing your own hair, just for your way around and be careful not to poke yourself um, i do hair, so i kind of am familiar with not looking at my hair, While doing it so um, you know but, like i said, just be careful since you're, using a needle, especially if you're like a new new stylist or you're, not really just used to doing your own hair. Okay. So, like i say here, you go you're going to see me guys, curl curve, this track again um up and then i'm going to fold it going back the other way and i'm just going to do the other side the same way. But you guys see. I'M still on the first one and i'm just curving all the way up past the ear and then i'm just going to fold it and sew it in the opposite direction. And that's literally, what i'm going to set out the whole time, guys um and then, when i get to the front top i'll, be back yes, i know baby. I don't know why you treating me is oh, no more y'all. My phone will not. Let me be great, so my camera broke, so i'm just like filming on my phone now and i can't see what i'm doing so. It did cut off some of the part when it got close to the top, but you guys gon na be able to see it. So i you see, you have that little slither of track right there at the top, and that is the part that i'm gon na have a little bit leave out. Okay, um, but i'm just making sure i'm sealing everything and make sure everything is close together. So what i ended up doing was, i ended up flipping that front track over and it's filling in the gap pieces that i felt okay, um and that's what i'm doing with the other tracks. So, basically, i'm just filling everything in so that way, i don't have like gap pieces and here's how everything look on the side, all right guys. You see that slither of sewing at that front, and that is what i'm going to use for the leave out so guys. I do like a lot of edges and everything. I have big ears girl. I like a little each game. Okay, so i'm just gon na pull out my edges and i'm literally just gon na do four braids guys it is nothing special um. My like i said my phone like girl. I could not see what i was doing. Okay in this phone, because i didn't have a mirror um like for my camera, so i did those three braids already and i was going to show you guys a little bit how i'm doing it as you guys can see like that front little piece i just Pulled some hair out and then i end up braiding it. I don't know if you guys need a feed-in tutorial girl. I literally just added a few pieces of braiding hair as i was braiding girl and that's it. So what i end up showing was this part. So some people braid it all the way to the end as a braid. I didn't really like that look. So what i'm doing is i'm just braiding braiding braiding and what i did was. I got the third bundle and i cut some hair off of the track and what i'm going to do is i'm going to feed that hair into the braid. So that way i have the curly ends and it matches the hair texture if that makes sense. So here i am feeding that that curly hair in guys that blunt piece girl you can just cut that cut, that is off all right, um yeah, so i'm just gon na keep on adding like curly pieces. So that way my ends be curly like i just feel like it gives it a more natural look. You know, i don't know. I just feel like it flows better when you just add the curly pieces and then, after i'm done adding the curly pieces when i'm ready to end the braid, i'm just going to get some of that braiding hair, that's already in the braid and i'm going to Just knot it a few times and then cut it off and then cut any remaining braiding hair off guys, but i didn't want to make this video super super long. Um yeah, like it was a struggle doing those feeding braids because at first i did a whole different design and i did not like it so i took it out and then i redid it and i realized it wasn't recording. So i was like you know what girl i ain't even about to stress. I'M just gon na still upload this video because it still may help somebody, especially with the track part. Okay, so yeah four feet in braids. That'S it nothing crazy! I did not stitch my own hair girl that is super hard to do. Okay, um yeah, i just did regular braids and then whatever you mess up on, you can always just go back and put some of that shine and jam and then smooth it into each other and it just kind of works out that way. That'S the luxury of not having stitch braids because the regular feet in braids girl. You could just put some of that shine in general product on it and smooth it and then make it look like you knew what you was doing. Okay. So when i got done what i did was, i ended up just really wetting the hair. All together, like the curly hair in the back, i wet it all the way down and put some suave coconuts, naturals conditioner in so for curly hair, guys i like to use regular conditioner. I do not like to use leave-in conditioner because it gives it a more hold, so this is basically how it looks. Once i take everything out, you see my little sliver of hair right. There girl, i just put a little bit of water with that, and then what i like to do is i like to put a little bit of gel on my hair, like some got to be glue, gel some strong, gel and just brush it into the other Hair, so that way it stays but guys. I hope you enjoyed this tutorial. I did my edges with the got2b glue and i have an edge tutorial if you guys are interested in my videos so, like i said this is how everything turns out. I think it turned out really really good so hope you guys enjoyed this video, we'll talk to y'all in my next video bye.


Comments
London Tayy: Hey tutorial starts @2:50 so you can skip through the talking lol. Also sorry about the quality!! Both of my cameras broke !
TheSerenityCeleste: Ive trying to figure out how many braids to get with this style and you definitely made me decide on 4!
Nadiaa F.: Definitely doing this style this week. Love it !
Chaka Starkes: Love this style! Looks so bomb!
Shakarria Evans: This is soo beautiful
Marcus Fair: Love it
Maya Cammon: How do you maintain this style ? And the braids from getting too puffy/frizzy. Should I wash my hair if I’m going to wear it for like a month or more ?
Saquora Potter: How long does this style last on average ?
Alyssa Jordan: How many bundles do you recommend getting?
Brenna Washington: Hey girl! How did the hair hold up? I’m trying to find some hair for this style.
PewdieFarts: do you think i can put this in a high/low bun or even a low ponytail? asking for my job purposes
Cossy Queen: Baby you got some hair hair
Shanique Richards: Good job
Samone Williams:
Tyra Wallace: What gel u use??
shorti_bang_bang: All this hair you got you dont need no sewin
Je'wel Castleberry: How long was shipping ?
Princess Life: Is this deep wave ?
Anazia Boyd: What length hair did you get ?