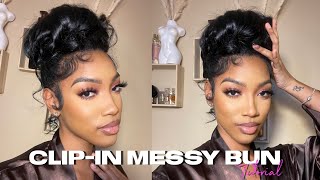
How To Do A High Curly Bun Hairstyle - Classic Bridal Updo Prom Tutorial
- Posted on 03 May, 2019
- Curly Hairstyles
- By Anonymous
Learn how to recreate this intricate high curly bun hairstyle. This classic updo is perfect for a bridal hairstyle as well as Prom and other formal occasions
Want to know what products i used? Then just click on the links below:
USA Viewers click here: https://www.amazon.com/shop/hairangels...
UK Viewers click here: https://www.amazon.co.uk/shop/hairange...
We are a participant in the Amazon Services LLC Associates Program, an affiliate advertising program designed to provide a means for us to earn fees by linking to Amazon.com and affiliated sites
Hi guys today, I'm going to show you how to do this. Hi curly updo. First of all, we're going to curl the entire head and I've done this using my GHD straighteners. You once you've curled all the hair, we're just going to take a small section of hair from the front we're going to go from around about the end of the eyebrows working diagonally back to the crown of the head. So you're left with almost a triangle, shape section and just clip this out of the way until later, next we're going to put the majority of the hair into a ponytail, but you want to leave an inch or two around the hair outline just leave this hanging Down for now, you you once you've got the hair into a ponytail, just pull it all the way forward and keep it out of the way and then we're just going to take some hair padding and place that over the elastic band and just pin this to The head, using as many bobby pins as needed, you you take that ponytail and flip it back over the hair padding. So it covers it. Next, we're going to use the hair to cover all of the padding, so take a small section of hair and let the curl help you decide where to place this so give it a little twist and just pin it into the padding. If your hair's long enough grab those tail ends and make another loop and just pin this into the padding, then all we're gon na do is repeat this step with the remainder of the hair. Until you cover as much of the padding as you, can you you you you you you you you next we're going to work on the hair that we left hanging down around the perimeter of the hairline. I'Ve split this into four sections, so I did one on either side and then split that bottom section in half and all we're going to do is bring this up to as close as the padding as we can get it and pin into place you you you, You once you've got all that hair pinned into place, we're going to do exactly what we did before so take those tail ends, give them a little twist and pin them into the rest of this style. You you now that we've got the padding covered completely in hair, we're going to move on to the front section, so just release the hair from that clip and lightly tease the hair just to give it a little bit more volume. You you you you you hold! This section, as close to the padding as possible and pin into place you can gently loosen this up and give it a Messier look by pinching and pulling at the hair and then just as we did before, we're going to use the tail ends, looping and pinning Them where it's needed still you you you, I left a few tendrils down at the front and I'm just cutting these away from their faces, and my strainers you and here's the finished. Look if you liked it, please give it a thumbs up and don't forget to subscribe for more tutorials.

Comments
Cherry Day: Thank you so much. This is what I’ve been looking to learn! Perfect, helpful video.
adriana gordillo: Muy bonito y lo haces ver súper fácil, gracias x los truquitos. Saludos!! ☺
Kandance LaRoy: Beautiful
Aria Stavrou: One million pins !!!! No no !!!!