How To Draw 50+ Hairstyles [Part 1: Ponytail, Bun, Half-Up-Half-Down, Fringe/Bangs, Hairline, Etc.]
- Posted on 22 February, 2021
- Easy Hairstyles
- By Anonymous
Part 2: https://youtu.be/nXNkqbYGX34
How I Paint Hair With Watercolor: https://youtu.be/_kXwgQGzSV4 (my first hair tutorial)
This video shows and explains how I would draw hairlines, bangs/fringe, ponytails, pigtails, buns, and half-up-half-down in various hair textures. As usual, I've gone overboard trying to cover every single possible thing and overwhelmed myself, and ended up making the video into 2 parts. These videos took 2 months to make so I really hope you like them!
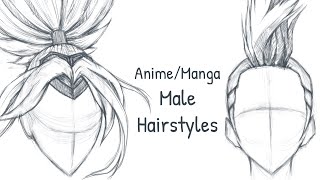
The 2nd video covers braids (single, double, French, Dutch, box-braids, corn-rows), twists, locs, finger-waves, and short/"men's" hairstyles - which include more hairlines, necklines, high/mid/low fades, short styles like side-part and crew-cut, and medium to long styles in straight, wavy, and curly textures.
✨C H A P T E R S: ✨
0:00 Intro
0:53 Hairlines: Slicked-back
2:19 Parts: Center-Part
4:35 Parts: Side-Part
6:35 Parts: Close-up and summary
7:18 Coloring it in with watercolor
8:32 Bangs/Fringe: Classic
10:45 Bangs/Fringe: Side-swept
11:26 Bangs/Fringe: Curtain or Center-part
12:22 Bangs/Fringe: Baby-Bangs/Micro-fringe/Pixie-cut
12:47 Baby-Hairs/Edges
13:43 Coloring it in with watercolor
14:15 Ponytails: Straight hair
16:25 Ponytails: Wavy hair
17:33 Pigtails: Wavy hair
18:37 Ponytails: Tightly-curled hair (alternate hairline shown here!)
20:36 Pigtails: Tightly-curled hair (alternate part style)
20:52 Ponytails: Short Mid-pony
21:10 Ponytails: Loose and long style
21:30 Coloring it in with watercolor
22:25 Buns: Ballerina style
24:00 Neckline/nape styles
24:27 Buns: Loose, Messy bun
25:44 Buns: Tightly-curled space-buns
27:40 "Bun shapes" explanation
28:35 "Hair Direction" explanation
29:08 Buns: Box-braids/braided bun
30:12 Buns: Locs in a bun
31:57 Coloring it in with watercolor
32:34 Half-up, Half-Down: Low-part, wavy ponytail
35:13 Half-up, Half-Down: Mid-part, tightly-curled buns
37:13 Half-up, Half-Down: Space-buns
37:33 Half-up, Half-Down: High-part, straight hair top-knot
39:08 Half-up, Half-Down: "Belle style" loose style
40:09 Coloring it in with watercolor + what to expect in part 2
Music courtesy of YouTube's royalty-free music library
Song is: "Papov" by Yung Logos
❤❤❤ Ways to support this channel ❤❤❤
• Share my videos with your art-loving friends and followers
• Buy me a "coffee" through Ko-fi: https://ko-fi.com/m3lart
• Buy my digital products on GumRoad: https://gumroad.com/m3lart
• Use my affiliate links or shop my lists: https://www.amazon.com/shop/m3lart
• Sign up for Rakuten's Cash Back Program using my link: https://www.rakuten.com/r/SUSHIH26?eei...
• Shop my Etsy store: https://www.etsy.com/shop/m3lartco
Thank you!
❤✨♡❤️
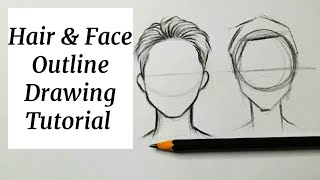
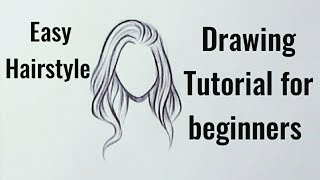
Today I'll be showing you how I would draw about 50 different hairstyles., This is a continuation of my first hair tutorial, where I showed how to paint the four most common hair types, which are straight wavy, curly and tightly-curled.. This video will focus on drawing the shape or outline of specific hairstyles, while the other video tells you how to fill them in and what shading and brush techniques I use to show different textures., I'm going to draw a front view, three-quarter view and side-profile view for Every hairstyle. Feel free to skip to whatever style you want to know about or watch all the way through to get all of the hairstyle knowledge that I have to offer.. This first part of the video will have some foundational knowledge for all of the other hairstyles that I show so be sure to stick around for that.. First, let's talk about hairlines and parts. If you're drawing hair, you're, probably drawing a head too so the hair and the head need to connect. Somehow. You'll most often see the hairline at the forehead and you'll usually only see the rest of it for short, hair or hairstyles that are pulled up. For straight and wavy hair. I draw it like a zig-zagged line, not too detailed, but enough to imitate the look of hair. For short, hair and hair that has more texture. I'Ll sometimes show the hairline as smaller broken-up lines to show that the hair isn't just straight. I'll, show you what I mean in a bit.. When I draw the zig-zagged lines, I'm taking into consideration the direction that i want to show the hair going. For this style. It slicks straight back, so the zig-zags will point in that direction. Hairlines can be lots of different shapes and they're, not always symmetrical.. Sometimes the hairline will come to a point on the forehead called the widow's peak, and some people's hairline will go further back at the temples or top corners of the forehead if their hairline is receding. I'll show more hairline variations. When I get to the short hairstyles., I'm keeping my sketches on the loose side to keep the video as short as I can, and also because I know I'll, be adding details with paint (, watercolors, ) later.. If you're doing a pencil or ink drawing, then you'll want to add more detail at this stage. Give the hair the same level of detail that you do for the rest of the drawing, so that everything looks balanced.. The next important foundational thing about hair is how to draw parts.. A part is a place on the head where the hair goes in different directions.. If the hair is fine or pulled tight, you'll see some of the scalp, and if the hair is thick or styled loosely, you likely won't see the scalp.. The most common parts are center parts and side parts. A center part will start in the center of the forehead ( shocking. I know ) and go straight back., You'll notice. I didn't just draw a line for the part, because to me the part is the absence of hair, so I want to actually draw the hair going away from that. Area. Usually I'll, show the part by drawing little lines angling up away from where the part is.. I do this to show that the hair has some density and isn't just flat across the top of the head, although sometimes it can be for some styles.. For the part, the hair isn't necessarily cut to go in a particular direction like it is with bangs or fringe it's just styled or falling in that direction.. When I draw the part I like to vary the lengths of the lines to help to divide the hair into sections., As you can see, i did two longer lines near the front to show the hair that is going forward.. I'M going to alternate my three quarter and profile angles: to keep things interesting.. If you want to draw a hairstyle at a specific angle, my advice would always be to find a reference image to at least understand the basics of what the hair will do. From that angle, especially if you're still new to drawing. The more you draw, the more you'll be able to envision how things might look from different angles without relying on references., When you show a center part from the side, it won't be perfectly visible, but I'm going To draw it as if it were visible, ( viewed from a higher angle, ), You can see how this hairstyle incorporates just a little bit of that zig-zagged hairline that I showed you at the beginning.. Remember heads are three-dimensional, so everything will be slightly rounded, especially any directional lines showing the hair laying over the scalp.. The other most common part is a side part where, as you might guess, the part is further to one side or the other.. First, you'll choose the location of your part, draw where your hairline will show and then start drawing those upward lines.. I'M doing this one a little bit differently and it's to show thicker, hair or a messier part where maybe the line isn't perfectly straight or the hair is overlapping on itself a little bit. To do this I'll draw my line and then start my next line about Halfway up the first line to create that overlapping effect., If you're into character, design, switching up your hairstyles like this, can be a great way to show someone's personality.. For example, the center part that we did above is very neat and straight, which might imply that they took time to fix their hair and are likely more organized and meticulous.. This part is a little more loose and imperfect. So maybe we want to show that this person is a little more carefree than the first person.. You might be. The only person who notices it but adding little details like this to your drawings, can add to the overall story that you're trying to tell and people will pick up on that. Here. You can see that I'm bringing my hairline up to meet where the hair falls over the front of the face.. This is to emphasize the volume or height of the hair, since it's very thick and wavy.. Of course, fine hair can also be wavy.. There are so many variations of hair, which is why it's a lot of fun to draw. I'm trying to cover as many variations and styles, as I can in this tutorial, but I'll probably still miss a lot of things.. I really liked the way i showed wavy hair in my previous video so definitely check that out if you want to know more., But to sum it up. For the sake of this video, I would say that I do wavy hair by drawing alternating ``, C'' or `` S'' shapes in different sizes. Depending on how tight or loose i want the waves to be. (. I refer to `` C'' shapes for waves and `` S'' shapes for curls ). Going back to talking about parts. You can once again see how it follows the roundness of the head and I sectioned off the front portions with longer lines.. I'M just gon na show the part in detail one more time, so you can see what I'm doing. So you've got your hairline and then from that (, wherever your part is ) to do a really neat one you'll just do little tight lines, close together., Maybe The scalp is showing maybe it isn't. And they'll just kind of sprout up from that center point. To do a more loose part, you'll again start with your hairline and then do your lines coming up sprouting out of each other about midway up in little tufts. And That was the basics for parts and hairlines.. I am going to show how I'd fill each of these styles in using watercolor, but only this first one will be in real-time, because I just want to show you the basics.. All I'm doing is painting short bursts of color in the direction that the hair is going to create the look of small sections., I'm stopping at a midpoint on the head, because that's where I'm leaving the impression that there is a highlight or shiny area on the Hair in various locations., You can do this, however, you want and add as much detail as you want.. I know I've mentioned the other video a lot already, but that video goes into a lot more detail about how to find where to put your highlight and where to put your shadows.. So, if that's something you're, not sure about definitely check out that video. When it comes to painting the part itself, I like to paint the hair going in the direction that it's growing that way it emphasizes the shape a lot better. I like to start painting the Hair at the part or the top of the head in general, so that it establishes the way the hair will go and all looks connected, and also because it helps to keep me from smearing the paint.. Next, let's draw bangs or fringe., Depending on where you're from you'll know them as one or the other of those words and I'll probably use both terms interchangeably., They mean the same thing.. Basically, it's just when the hair in the front has been cut shorter than the rest of the hair to cover part of the face in a particular style.. There are lots of different styles of bangs or fringe., I'm going to cover what I think are the three most popular.. I would say the most classic. Is this style, where it's brushed straight down and cut straight across.? To do this? I marked a place at the top of the head in a similar way to how I did the part with just some upward lines., And then I did lines coming down almost like parentheses or loose `` C'' shapes to indicate the sides of the bangs or fringe. You'Ll see me do all of it again on this second angle.. So first, I'm establishing where the bangs start on the top of the head. And then I'm bringing the curved line down and then I'm going straight across in a kind of zig-zag line.. I could go straight, but that would, I think, be very rigid. Looking so I like to have some zigzags in there.. I think it helps to show that it is hair and not just a piece of paper across the forehead.. It looks more natural and adds a little bit of movement.. You can play with the length of the fringe and make it as short or long or as choppy as you want and it'll just be. A different style. Bangs like this require a lot of maintenance. So that's another thing to consider when you're doing your character, design. Somebody who's kind of lazy, probably wouldn't have this hairstyle for very long. (, Using myself as an example, ... ) There's also a variation of this style where, instead of drawing the bangs straight across you Draw face-framing layers around the sides so that it curves down at the edges, instead of going straight, across., Side-swept or side-parted bangs are next.. This is like the side-part, except it's cut to go in certain directions.. Often it will appear shorter at the part and longer, as it goes down towards the side of the face.. You can draw this as a choppy line or smooth. Line. Just depends on the style that you're going for. And, of course, you can adjust the length of these bangs as well.. You could do them more straight across with a slight side, part or you could have them be even more layered and more face-framing. If you make them a little bit. Longer. Next I'll show you a long, center-parted style known as curtain bangs.. These were very popular in the 70s and have been popular again over the last few years or so. They're very long and soft, and sweep to either side with that layered effect., Sometimes they'll, be in different pieces and how much they flip out on the end can Depend on the style that you're drawing. They're, often paired with a shag or `` modern, mullet'' kind of style, but not always. On this one, I'm not flipping the bangs out so much at the side, so this can be considered more of a modern version. [ of this hairstyle ] And then for this one I'll flip the hair back away from the face, which I think is more of the classic version of this style. And over here, I'm doing just a shorter, more childlike version of these bangs. And over here. I'M just gon na do a quick example of what you might call ``, baby bangs'', or'' micro fringe''. It'S kind of my version of it which is really short and choppy looking., I'm gon na do it on a pixie cut. And I'm actually going to draw a face on this one. Just so, you can see the location of where the bangs fall on the face.. I'M also going to give you an example of ``, baby, hairs'' or `` edges'', which probably should have gone on the hairlines page, but oh well.. I guess it works here as well, because it is technically hair that is covering the face in a way.. So I've drawn a basic hairline and to that I'm adding little sections of short curved hairs.. There are lots of ways that this hair can be styled.. It can be left soft and wispy or it can be combed into different shapes with hair gel, which usually depends on the ethnicity and culture of the person wearing the style.. Next, let's draw ponytails. For this first one I'm going to do just a simple pulled-back hairline, with long straight hair.. So first I'll draw my hairline. And then, since the hair is straight, you don't have to get too creative, with figuring out how it looks pulled over the head. And then you'll draw where the ponytail sits. This one's high up on the head. So it is visible from this angle. And I'm just doing a few directional lines to show that the hair is going in certain directions.. The thing to remember, with straight hair, is that it does follow gravity pretty often unless you're showing a lot of movement or maybe the wind is blowing or something.. Otherwise, the hair is pretty much going to go straight down and drape over whatever surface it. Lands on be that a collar or the shoulders.. As far as detail goes, I like to have my directional lines: (, which represent strands or sections of hair, ) clumped together at mainly the beginnings and ends of the hair. In the middle. I don't do quite as much because I think it can look a bit cluttered. And also, as I've said, I'm filling these in with watercolor. So I'm letting that handle a lot of the texture. Remember to make your directional lines over the scalp a little bit curved.. If they're flat, then your head is going to look very flat., I'm noticing that I forgot to draw a hairline at the neck for this one, which is sad because this is the best [ angle ] that would show it.. What I should have done was come out from behind the ear and find the place where the circle of the skull meets the neck and just draw some zig-zag lines similar to the front. But a little smaller. Here, i'm showing an example of a lower ponytail. And it looks like I didn't draw that lower hairline for this one either. So sorry about that Next, I'm going to show you a kind of mid-height wavy or curly ponytail., This one's going to include bangs, which I'm making a little bit curved and with a little bit of a side-part. And then behind the bangs. We still show the hair going back into the point where the ponytail starts., And for this one I didn't really mean to draw it as a side-ponytail. It just kind of came out that way., But generally, the idea with curlier hair is that it will be a lot more visible because it will stick out a lot more because of how it's holding itself up and not falling straight down. The way that the straight hair was. My other mistake with this hairstyle after the accidental side ponytail, was that I drew this head way too close to the first head. So you can see me here kind of struggling.. I would have liked to draw this ponytail sticking out a lot more, but, as you can see, I had to kind of make it compact.. So we'll say this is more fine, wavy hair than the first one.. What I'm hoping is that by showing you these different options for fringe and for styles, for the longer parts of hair that you'll be able to mix and match them to draw whatever kind of hairstyle you want., Since I left all of this room on the side. Let'S do pigtails, which are like the ponytails but just split onto two sides., So here we're doing some little bangs that are parted in the center and then on the head. I'M just doing two places where the hair comes out and doing that same curly/wavy, hair pattern that I like to do.. There would definitely be a visible center part on this head, but I forgot to draw it. To draw waves very quickly. What I'm doing is just doing alternating `` C'' shapes like this. Next, we'll do a ponytail with very tightly curled hair., And this is that hairline that I mentioned earlier in the video where, instead of doing zig-zag lines, I do small dashes that are broken up in Different directions to show that the hair isn't straight, it is curly.. I also use a similar technique to show the hair being pulled back into the ponytail, although it can be styled flat if you want. And then, since the hair is curly, I like to show it as these kind of loose curvy lines. And since the curls are Very small and tight, i'm keeping my curves, also very small and close together. Tightly curled hair also holds itself up sort of defying gravity, which is why it has so much height compared to the other ponytails.. As I mentioned earlier, there are so many variations of hair types and textures and levels of waviness and curliness. So obviously everything I'm saying isn't going to apply to everyone and every type of hairstyle.. But hopefully this will be enough information to help you get started and get curious about drawing hairstyles. That might vary from what you usually draw.. Here is a quick visual example of what I mean when I say that curlier hair can `` defy gravity'' and hold itself up.. Imagine this as a side view of the hair growing out of the scalp., So it doesn't fall down on itself because the density of the curls actually hold each other up. And then imagine several rows of this all side by side., But keep in mind. Curls are stretchy and can actually be styled in any of the other styles that I've shown. Here I'm doing another example of pigtails this time with very curly hair., And this time I've included a center part that is pulled tight. So a little bit of the scalp is showing.. I realized I did a lot of high ponytails, so here's more of a mid-ponytail with some straight across bangs. And i remembered to do the hairline as a nape this time. So that's nice., [ Hairlines at the nape ] can definitely vary in shape and size.. This one looks like it comes to a point at the center of the neck (, the back of the neck, that is ), And then this is an example of a more loose ponytail, where the hair at the front kind of swoops down and then back.. I think it's a lot of fun., Probably one of my favorite ways to draw ponytails.. Once again, you can see that I'm filling this in in the direction that the hair goes. So where the hair is pulled back over the head, I'm going towards the ponytail and then when it comes down, I'm going down. For the tightly curled hair. I switched this up slightly, but I do still go in the direction. The hair grows. I'm just doing very small circles as I go rather than my straight up-and-down lines., Keep in mind that there's no right or wrong way to be doing this., I'm just showing you my way for the sake of the tutorial, but you can do whatever You want and experiment with different styles and directions of painting and techniques that way you'll develop your own style.. Next, let's draw a few different styles of buns.. It'S the same basic concept as the ponytail, where the hair around the scalp is pulled tight to one specific point.. However, instead of letting the hair fall down, naturally, once it's pulled up, we instead twist it into a shape. And the shape that we draw it. In will depend on a few things like the looseness of the hair, the texture of the hair and things like that.. First, I'm drawing a very tight kind of ballerina-style bun.. So it's very circular and there aren't a lot of loose hairs from the bun itself.. I did include a few wispy hairs in the front just because I thought it would be interesting and I've drawn a lot of just plain hairlines already. When you're drawing hair. That'S pulled up tight like this and also very short, hair you'll notice that you can see a lot more of the shape of the head so be sure to pay attention to that. If you're using a reference. Or just remember that [ the head is ] 3-Dimensional. So it's going to stick out in various places and [, so ] make sure it's not totally flat. You'll see that I rarely draw buns as perfect circles.. I find that to be a little boring and unnatural. Looking so usually I'll go for more of an .... I don't know like a rounded square. I also like to do random directional lines on the bun to show that the hair is wrapping around itself. And then here I'm showing you an example of a lower bun, because, as with ponytails, you can also draw them pretty much at any point on the head. And that time I did remember to do the hair at the bottom of the hairline.. I don't know why I keep forgetting that .... I even added some little wispy hairs, which could just be there or maybe they've, been wearing their bun too tight who knows.? Oh here it looks like I remembered it for this one., So this one has little curly hairs at their hairline.. That'S fun.. Some people can have different hair textures at different points on their scalp. And also depending on the length of the hair., because when it's long, it'll weigh more, whereas if it's short, maybe it'll be more springy.. Next, I'm drawing a more loose bun.. You might know it as a messy bun. And to do that. I'M drawing an even larger and even more obscure shape for the bun and I'm also including some hairs coming out of it, to show that they're not all perfectly in place and perfectly pulled back.. The hair that's pulled around the shape of the head also doesn't have to perfectly match the shape of the head.. For instance, it can be looser in the front like I've drawn it there. And it can also droop down at the base like I'm showing here.. It all depends on how loosely the hair is. Styled.. I'M also going to draw a very high messy bun for this one.. So, as I said, you can put them pretty much anywhere on the head., And here is our tightly curled version.. Again, I'm going to do that very fine hairline. And for this one I'm going to do double buns or space buns. I don't know ... Sailor, Moon buns, Whatever you want to call them just because I feel like I'm getting bored of the single bun.. So I'll do my very small, `` C'' shapes to show the curls. Instead of leaving loose ends on the bun, I'm going to keep them all in to show that it's a bun and not just a very short ponytail.. I'M also adding little loose hairs around the edge. Inside of the buns, I'm doing delicate squiggly lines to show that the hair is indeed wrapping around itself to differentiate it from the ponytails.. Hopefully, these demonstrations aren't going too fast and you're kind of starting to get the idea of what I'm talking about. It's important to maintain the same technique throughout the whole style.. So if you're going to do those tight, squiggly lines, make sure you do them the whole time, don't get lazy and switch to straight lines [ unless that's the style, you want ], Sometimes when I'm drawing the lines inside of a bun I'll. Think of like a pastry or a flower, the way that the petals or the bits of dough will kind of overlap over each other. That might be kind of silly, but maybe it'll help somebody.. Here, I'm going to do examples of the different shapes of buns that I tend to do so: there's kind of the loose circle and then maybe a pentagon like a rounded pentagon, shape I don't know. And then the hair wrapping around itself. Here's the big obscure shape. I don't know maybe like a hexagon And then the hair, just overlapping within it., And sometimes the hair, where the hair tie or where the hair is pinned might show. Sometimes it might not.. It all depends on the style that you're doing. There's also kind of an overlapped, ( ) bun, where you've done a ponytail, but then you tuck the hair underneath so it becomes a bun and the underside will show a little bit.. That'S another fun style of bun. That you can do. And here's a quick example of what I mean when I say the hair is wrapping around itself., So this one's wrapping kind of horizontally around itself., This one is going to go kind of vertically, so the direction of the hair is vertical.. This one's going gon na be kind of a twist, so we see the hair coming up and then back down tucking under itself or over itself, depending on which way it goes.. You can also make hair. That'S been styled in different ways into buns.. So, for example, this is going to be box braids, which someone has twisted up into a bun., So to do that, I'm just drawing each individual little braid and I'm alternating the directions that they go to show that they've been twisted around each other. And then I Decided that I wanted to draw it on an actual head, because that would make more sense and look a little nicer.. So here's the hairline and then here I'm drawing the braids coming up from the hairline it's a little messier than I would normally do it. But just for the sake of keeping the video short I'm trying to go fast. I'll get more into braids in a moment, but here's just a quick visual example of what I'm doing in one single line.. You could also do the same thing with locs or you may know them as dreadlocks.. A friend of mine told me that they prefer to just call it `` locs'', because `` dread'' has kind of a negative connotation. You know when you dread something bad happening., So yeah, so I'm just going to be referring to them as locs, for this video. Locs can be done in all different shapes and sizes. So it's a lot of fun to play around with when you're drawing.. The act of the hair locking in on itself creates a very interesting texture which I'm trying to show by drawing kind of squiggly staticky-looking lines almost. And I'm thinking of them as almost like tubes or pipes, so that I'm thinking of them in a three-dimensional way.. I'M basically drawing exactly the same way as I did before, except instead of showing individual strands as lines showing the direction that the hair is going, I'm using these tube-shapes to show the direction that the hair is going.. The next thing I'm doing for this particular style, is adding on horizontal squiggly lines at the ends of each loc, or at least at the end of what is showing of each loc. To add both texture and dimension to the hair. You could really draw it in any direction that you want to, because what you're showing is the way that the hair has locked around itself.. But for the sake of contrast, I like to do it perpendicular to the direction of the locs.. This should go without saying, but obviously try to only draw hairstyles like those last ones on people and characters where it culturally makes sense to do so.. Unfortunately, we still live in a world where there are a lot of negative stigmas associated with these types of hairstyles. So it's important for us as artists to portray these hairstyles in a way that is both respectful and culturally appropriate.. Next up is something called a half-up-half-down hairstyle.. I looked it up to see if there was another name for it and I couldn't seem to find much of anything., But basically it's exactly what it sounds like, which is that half of the hair is pulled up while the other half is left down.. So for this style we can combine everything that we've already talked about, just in different ways., For instance, a half-up-half-down can be in a ponytail form or it can be in a bun form.. Typically, the top half is what's up in the bottom. Half is what's down. If you haven't seen one before., So what i'm drawing here is a ponytail version where the top of the hair is pulled up into a ponytail, and it comes down to about halfway to where the rest of the hair falls. (, the hair that isn't in the ponytail ) This one definitely makes a lot more sense when you see it from another angle. Much like how you don't often see the part between the bangs or fringe and the rest of the hair with a half-up-half-down, you don't Often see a part between the part that is up and the part that is down. The only time you might see, that is if the part starts up much higher, but in most cases the hair that is up will cover the part where the hair is split. And I'll definitely show examples of both, so this would be the example of the part not showing.. So right here you can see me draw kind of swooping lines which is showing how the hair on the top half of the style is being pulled up into the ponytail and it's drooping in such a way that it covers the distinction between where the hair goes Up and the hair goes down. You're, probably also noticing that the hair that's being pulled up appears shorter, because it's being pulled up higher, whereas the hair, that's in the lower half, appears longer.. This effect can be even more dramatic if the hair has layers, because, typically your top layers will be shorter than your bottom layers.. So this is something to play around with. Next, I'm showing the bun version of the half-up-half-down.. So exactly the same as doing a bun, except that once I've added the bun, i'm also going to add hair coming out from the lower half of the head.. For this front view, you can definitely do it that way, because there's no line showing the part, as i mentioned before., But for the side views for this style of hair, you would probably need to plan exactly where that will happen. All right. So right here is where i'm drawing that line that separates the hair going up and down. This one I've drawn a little bit higher than the first one. So we'll say that first one was a low half-up-half-down, whereas this one is a medium and then next I'll draw a high half-up-half-down. Once again, sorry for how messy everything looks. Normally, I would be putting a lot more time and care into drawing all these lines. But for the sake of fitting so many hairstyles in I wanted to go as quickly as I could so normally these lines would look a lot nicer. Just for fun. Here'S a half-up-half-down in a double bun hairstyle as well.. You can do any of these styles. I'Ve shown in a half-up-half-down style just make sure that the texture of the hair is consistent for both the top and bottom part [. Unless that's the style you are going for ] Here is the high version of the half-up-half-down that I was talking about. And I'm going to be doing this one with a top-knot style bun.. So you won't see it as well from this front view, but when I get to the sides, you'll see what I mean about how it's higher up.. This bun is on the smaller side because there is less hair in it due to it only being the hair from the very top portion of the head.. So right here, I'm drawing that line. That shows where the hair goes back. And then you can see that I will add little lines coming off of that part.. It'S good to always start with your hairline, because you're framing the area that you're going to work in.. It would be a shame to draw out a lot of detail and then realize you have to erase some of it because you drew too far down onto the face. Here. I'M drawing something similar to the first half-up-half-down style that I showed, except that this one is even looser., So the top layer is drooping down even more over that bottom layer.. The main thing is showing how the hair swoops down and then curves around itself. So it's almost holding itself in place. Here's another angle of the same thing, so you can see what I mean so it swoops down and then curves around., I'm actually deciding right now, as I'm editing this video that i'm going to stop the video here and make The rest into a second video due to how long the video is and how much more there is to talk about.. The next video will show you how to draw lots of different kinds of braids, twists, locs and finger waves and a lot of different, shorter hairstyles. With different hairlines, necklines fades and textures., Thanks for watching all the way to the end, and I hope to see you back in the next one.

Comments
Aeghite: Great tutorial! Very detailed and well explained. I love how you gave examples and showed the hairstyles from different perspectives and with different hair textures. I can see how much work went into creating all these designs. As always it was fun to listen to your voice. I'm going to watch part II now. Thank you for your hard work ^^
A Sayeed: Thank you for taking the time to post such a helpful not to mention enjoyable tutorial! The way you work your pencil is a pleasure to watch :)
BERRY PLAY'S: I can't believe I did it I'm sure that others will find this helpful I'll be in the journey with you
Unnah Shatzie Dela Cruz: tysm this really helped me out a lot thank you!
TheAmazingA.O 1: Your the best truly thank you so much you deserve more subscriber's this is the most I've seen In one video! Thank you
Powerhouse of Trader: Thankyouuu so muchhh❤
Tessa Ann ×͜×: Notification squad
♡- Detective Annika -♡: For me: 4:48
Jaskiran Kaur: which company file is thi?