How To Draw Cute Hairstyles For Beginners
- Posted on 17 October, 2018
- Easy Hairstyles
- By Anonymous
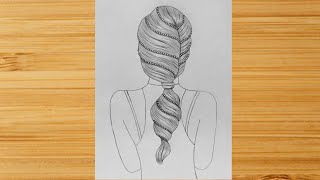
Welcome to my first tutorial video, how to draw cute hairstyles for beginners. In this video we discuss a base sketch and the importance of it. We then focus on creating hair with basic shapes which will transform into a more detailed version of a hairstyle, the way I do it. The first character has a longer hairstyle with bangs, and the second has a much shorter style reminiscent of a bob sort of cut. Stick around for the following videos as I focus on making their eyes, noses, lips, body, hands and clothing!
As always, if you haven't already, comment, like and subscribe, and I'll see you in the next video.
Connect With Me On Social:
FACEBOOK https://www.facebook.com/halalelaart/
TWITTER https://twitter.com/halalelaart
INSTAGRAM https://www.instagram.com/halalelaart/...
TUMBLR http://halalela.tumblr.com/
#HowToDrawHair #HowToDrawCuteHairStyles #HowToDraw
Hey guys Leila here so welcome to my art channel and today I have prepared a tutorial on how to draw hair, so I hope you enjoy it, and I hope you learn new things today. So, basically, right now, I'm just quickly doing a base sketch just working on getting a pose in there just something quick light. This is pretty much the very messy part. You don't really have to focus too much on specifics, you're just working on getting you know a general idea of what it is that you're going to be drawing. So that's what I'm doing here and then I'm going to go ahead and resize it because it came out kind of small. So, by the way, the program I'm using is paint tool Sai for those who don't know or don't recognize it, and basically it just used a selection tool to resize it holding shift as I make it bigger so that the portions stay the same. I went ahead and I copied - and I pasted it in order to make a duplicate and what I just do here is I change it because I am doing two different hairstyles, so I wanted two different base sketches. The second one, of course, is going to be different. Her head is tilted to the side to kind of give us a different angle, so the second character will have a different pose overall, mostly because this is going to be a series of tutorials that will focus on more than just one thing so for this video, Specifically, we're focusing on just each character's hair style, which, like I said before, will be different and then going on from there we'll go into the eyes, and you know both eyes will be different and so on and so forth. The lips, the nose and you know the body, the clothing and you know, etc. So, right now I went ahead and I lightened the first sketch based sketch. I lightened the opacity in order to go in and make another layer where I just put down simple shapes for how I want the hair to look. Then I lightened that one, the opacity of that one and then I go in with another layer and I start putting down detail. You know I've got the fringe going. You want to just do just any kind of strokes that you feel would you know be there, but also have it going with the direction with the shapes that you have already made. And then, if you want this is kind of extra. But you can go ahead and you can lighten that layer and kind of finalize the look with another layer going in and really just getting the overall, I wouldn't say individual hairs, but getting more texture into the hair and making it just look more flowy more alive. I guess you could say: that's, obviously not something you have to do. I do that just to show simplicity so with this next one I'm going in and I I'm creating like an aerial kind of bang. I want it to have like a floating. You know side. Bob, I guess you could say so - I'm just working on a shape here, laying it down nice and thick so that I can really get the idea. I also feel that thicker lines are easier to deal with or create. So then, like the other one, before I'm going to go ahead and lighten that layer, the opacity and then I go in and make another layer. And then I go in and I'm putting down the details of how the hair is going to look, how it's going to basically just form around. You know this shape. So then, I just go in I'm making some little adjustments here to the to the sketch and after which, after I finished tweaking a little bit on the bottom. I go in and I just add extra lines for you know extra little details of how the hair is going to be flowing, and then I just go ahead and I lighten that layer, because this is all just a sketch and then this is where I start. Focusing on my actual lines, so this is where I start actually beginning the line art. So I'm basically just following the lines, and I think one of the biggest things is you don't have to be 100 % exact. So if you notice, I'm going in my lines are thinner, then the sketch - and you know, as you can see in some of the lines, I'm just I'm not really 100 % following these lines to a tee, and that's that's okay, because what these lines do are They'Re just guidelines, and I'm basically just going in and filling in wherever I feel is best. So you know, because I have the guidelines and then I just sort of go with the flow of what I think for a final look would be what would be best. I also think it's important to be sort of loose with your strokes, especially if you are able to do longer strokes than shorter. It'S really just all about you know, training yourself to just if, if you're not used to long strokes, just really train yourself, you know see especially with like the guidelines underneath you can see where you're the line has to go and clearly, as you can see from My line art and my sketch underneath I've mentioned it before it's, not perfect, it's not dead-on and that's okay. You know what I'm looking for with my line. Art is a crisp sort of smoothness to it, and it's the only way that I have found that I've been able to achieve that is by being very loose and making you know the long strokes so like just there. I was able to just make that curve. You know eyeball it, for you know a little bit and just any mess-ups. I just went ahead and I erased on and so now we have basically a bit of an outline of our hairstyle. So then i zoom back in and I go in and I'm putting in you know more detail more lines, just to sort of guide me on where the hair is being tucked in where it's going in places that have a lot of length quite space. This is often good for when you are going to go in and color afterwards. You understand where your flow is, where the hair is going eventually, if you're looking for a more painterly style, you might abandon that technique, but yeah. That was our first here. So so now I'm going in to the second and I'm just going right for the bangs and right there. You saw me do that almost s like line - and you know if I wouldn't say it was effortless, but it was done in a very loose manner. I followed my guideline, obviously not to a tee but enough to just get that little swoop in there and I'm just going through and following the rest of my guidelines, I'm focusing on making this hairstyle very bouncy, very bob like and then just making little flyaways here And there to kind of give a more realistic kind of feel and then I'm gon na finish up that top part. By connecting my line and then after that I go in and I well, this is basically the outline essentially and then I go in, and I add my little details like before, like I did with the other one, where I'm trying to show where exactly the hair Strands, you know the directions that they're going in again. This is important for when I go into color later, and also just to give the viewer the idea of how her hair is shaped. You know what direction are these single? You know hairs going in so this is also important. This is like the under area of the hair, which, in order to get that depth, you know you want to do like several little lines going in the same direction so that you know you know that that is kind of just underneath, and it gives a lot Of good depth through it, which you don't see in the first characters, but that's okay, because she doesn't have really bouncy hair as the second one does. So I hope you enjoyed these two hair stop and I really hoped you enjoyed this tutorial join me in being. Next, video, as we go ahead and start on the eyes and I'll show you the different style of eyes that I give each character. So if you haven't already comment like and subscribe, and I will see you in the next video bye,
Comments
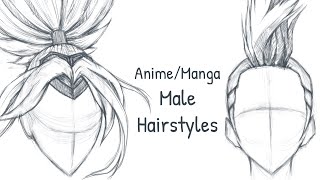
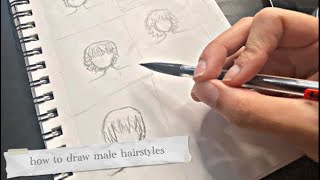
Renée is typing...: This was really helpful! I’ve been trying out digital art recently & it was a lot harder than I thought it would be to do the hair. Will you also be doing a tutorial for male hairstyles?
Androdom Art: This was very informative and helpful! I’m glad that you made this tutorial and I’m happy I stumbled upon it, you have a new subscriber!
QuintonSoot: I hope you do more videos like this! I'm trying to get better at drawing! If you could teach me/us how to draw a basic face that would be amazing!!!
Allydia Margent: Nice, I was wondering when you would be doing a tutorial.
xffectdotcom: your art is always so good
Hex Honey: The line art is so smooth!
Blender Guys: very clear and concise
OneFunnyGuy: nice tutorial
corinna Matute: Beautiful
Breachu: Your art is adorable! Do you use a drawing tablet? If so what is it called? ❤
val: This helped a lot, forgot to comment a hour ago but thank you subscribed
tabeero: These videos actually make me want to draw? Normally I don't have the motivation or want to draw but watching your videos help :D
Nightmare Alpha: You are a really good and amazing drawer
Mysteryman: Congrats on 200 subs!!!
Savanah Jones: they are super cute XD
moka chinno シ: BRO YOU NEED MORE SUBS AND VIEWS!
lcmonade x: Oh this is really good omg! Do one on clothes please
1,000 subscribers Without any videos: YEA! YOU DO NEED MORE SUBS AND LIKES!YOUR AN AMAZING YOUTUBER!
1,000 subscribers Without any videos: And thanks for teaching us how to do hair
No u: Hello i have just seen your channel I must say ur art is an inspiration! I loved this channel and I,still do even tho I just saw ur channel stay positive!
Z0MB13R0T: no curly or coily hair?
Maria Perez: I subscribed I needed more hair ideas and faces ideas thank youu!
artistryrival: So cute. New sub here
cat: Just seeing on how fast I improved watching this makes me wonder why you don't have way more subs
Hellraiser: What app do you use to draw
C. zear: You is good at Art i love it!!!! (From thailand.)♡
harys: woow ✌.
Ham: What drawing app is that?
Notorius Bookworm: they're more like guidelines than actual rules lol
Yara Rivera: The nine people who disliked just don't wanna be blessed by the queen :/
1,000 subscribers Without any videos: YAS YOU HIT 500 SUBSCRIBERS YEYEYEYEY CANT WAIT TILL U HAVE 1 MiL
THIS_Gachatuber_Quit now_leave: What app is this?
Cuong Dang: Whats the app called??
Nonya Business: Where are all of your subscribers at??? Ya need more!
Wolfpaw: How To draw a Wolf Plzz
Momo: Why is this an ad?
1,000 subscribers Without any videos: You know what would be worse SOMEONE UNSUBSCRIBING YOU I WILL BE LIKE BOI SUBCRIBE BACK SHE NEVER DESERVES AN UNSUBSCRIBER :( I GOT U GURL
Jose Patino: who is watching in 2020
MayaahLoL100: WHERE ARE YOUR SUBSCRIBER'S!?!?!?!?!?!?
VARG: Yes
Ruben Garcia: I now you are not her