3 Easy Heatless Hairstyles // Misskatie
- Posted on 24 March, 2019
- Heatless Hairstyles
- By Anonymous
In today's video I share 3 super easy heatless hairstyles that are perfect for spring!! Thank you all for watching! Hope you have a blessed Sunday ♡ xo, Katie
Hair scarf: https://rstyle.me/+tq5orSH5tOUW6c1bifr...
↠ Follow me on Instagram: https://www.instagram.com/themissskati...
↠ For business inquiries please email [email protected]
↠ Love vlogs? Check out my playlist: https://www.youtube.com/watch?v=2ktrpx...
↠ Hi!! I’m Katie & on my channel, I aim to motivate and inspire my YOU to be the best version of yourself by sharing my everyday life, style, and favorite things each week! My videos will [hopefully] make you smile and provide you with the best tips to improve your style, faith, and so much more!
↠ “She is clothed in strength and dignity, and she laughs without fear of the future.” Proverbs 31:25
↠ FTC Disclaimer: This video is not sponsored. Some links may be affiliate but all opinions are 100% my own!
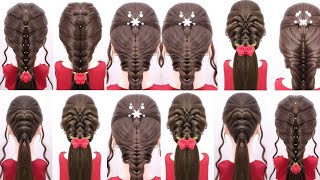
Hey guys, it's KK, what's up everyone! Welcome back to my channel in today's video, I'm gon na be sharing three super easy heatless hairstyles that are perfect for spring. I did a video similar to this during back-to-school season, where I shared three hairstyles that work really well. For back-to-school that were quick to do in the morning and you all loved that video, so I wanted to do a part two of it, but for spring I am no professional at doing hair and all doing these hairstyles I'm able to execute pretty well. So I hope that you guys can get some hair inspiration from this video if you do any of these hairstyles and you post them on Instagram or your Instagram story, or anything like that. Please tag me because I would love to see them I'll repost. Your pictures on my story and all that I'll leave my Instagram right here on the screen and they'll also be linked down below in the description box. If you guys wan na, go check it out and let's get into it, alright, so starting off for hairstyle number one all you're gon na need is an elastic or rubber band. You can use a thicker one like this or you can use a smaller one, which is what I'm gon na use. You can get these at any like drugstore. I just get mine at Target to start off just make sure that your hair is brushed out before I started filming this video. I brushed out my hair so start by finding the arch of your eyebrows and just gather a section of hair at the top of your head, just like so, and I'm gon na do it so that it's all nice and smooth is just use. My comb comb. It all out and get rid of the tangles start by taking the section at the top of your head and splitting it into three other sections. I'Ve zoomed out a little bit. So it's easier for you guys to see what I'm doing at the top of my head, but once you've split that section into three pieces take a piece from one of the sides: it doesn't matter which one and bring it underneath the one in the middle. So what I'm doing is called a Dutch braid, so it's a French braid, but inside out, which will make sense. Once you see the braid once you've done, one like stroke of braiding take the other side and again braid it underneath the middle piece instead of over. Once you have those two strokes of braiding grab a piece from the side of your head and add it to the nearest original piece. I hope this makes sense what I'm saying, but once you've done that braid, it underneath again grab a piece from the side of your head. Add it to the original piece and then braid it underneath just like I'm doing and then just continue this process of grabbing a piece from the side, adding it to the nearest one and braiding it underneath and as you're doing this you're gon na want to braid. It to the side a little bit so just kind of tug the pieces to the side as you braid and I'm actually going to turn around and just do a fast motion clip. So it's easier, if you guys to see what I'm doing all right now that I've gotten to this point. My hair does obviously look a little bit mantasy on the top and the side, but we're gon na fix that in a second, so bring the hair to the side and just continue on doing the braid until you get to the very bottom and then you're gon Na want to tie it up with your elastic, so once the initial braid is finished, what I like to do is make it look effortless in a way and kind of just pull out some pieces from the front of my hair loosen the top a little bit And then this is where the important part comes in so pull the bottom, where the excess hair is and start to pancake the braid it's a little bit like I'm doing. I love doing this because I feel like it makes your hair look, fuller and more voluminous and then just reach back to the back of the braid and pull out the pieces kind of like I did with the bottom part and voila. The first hairstyle is complete. All right there we go that is hairstyle number one and now and a hairstyle number two for this one, I'm just going to be doing two fishtail braids on the side of my head. So once you get the hang of doing fishtail braids, it's pretty simple! What you want to do is grab your hair at the back of your head is one into two sections and just do your best to make sure it's semi evenly parted and there's an equal amount of hair on each side. Sometimes, while you're braiding this side we'll get in to this one and just it's annoying trying to make sure all the sections are where they should be, so I just tie this one side up, while I'm braiding the opposite one, you can start with whatever side you Want I'm just going to start with this one you're gon na want to split whatever section you choose to start with in half and take one piece of hair from the side and add it to the other one. This process can get a little bit repetitive, but what you're gon na want to do again is just take a piece from one side and add it to the other, and just continue on with that until you get to the very bottom all right once I get To pretty much the bottom or a place where the hair gets too short to cross over to the other side, I'm going to take an elastic and just tie it up and then I'll repeat the exact same process on the other side. Okay, I'm gon na. Do the exact same thing where once I've reached pretty much the bottom I'll take an elastic and just tie up the braid to secure it? Okay, now I look like a little farmer girl, but this is the fun part I'm gon na make it look. Effortless kind of like I did with the braid before what I'm gon na do, is just pull out some pieces from the front and pull apart the fishtail braid. To give my hair that illusion of volume all right there we go, this hairstyle is complete. I think this one is super cute and the best part is that it's really easy, because it's not something super intricate, you kind of just crossing pieces over. So I love this one. I feel like it'd, look really cute on lots of different hair types. All right now for the final hairstyle, this one was probably the easiest and, I would say the most springy if you could make that a category. I have this really cute hair, scarf that I'm gon na incorporate and this one. So basically, what I'm gon na do for this hairstyle is just do a ponytail right at the back of my head, but to make it a little more fun. I'M gon na be braiding pieces back into the ponytail starting off. I'M just gon na make sure that my hair is parted in the middle and then I'm gon na grab a section of hair on one side of my head. I'M just gon na comb out the little section of hair so that it's smooth and then I will split it into three sections and then with those three sections, I'm just going to cross them over each other doing a normal braid. So if you don't know how to do one, all you have to do is just cross each piece over one another, just like so anyway. I'M going to continue that all the way down to the bottom of the braid. Once I bought in pretty much the end, or at least to the point where it will reach to a ponytail back here, I'm going to tie it up with an elastic. The elastic won't stay here permanently. It'Ll just be there to hold it in place before I attach it to the ponytail. I hope this all makes sense. I'M not using the right terminology. I don't think once the braid is fully complete and tighten it's a little elastic. I'M gon na do the exact same thing I did for the other braids, but a bit more dramatically. I'M trying to grab the bottom and it's harder to do when they're smaller, but I'm gon na pull out the pieces and pancake them to make the hair look. Thicker and fuller, okay, now once this braid is complete, I'm going to start on the ponytail. You can do this on both sides if you want, but I think it's more fun and unique if you just do it on one side plus, it saves a lot of time because braiding off a little tiny sections together can be time-consuming. So I'm just gon na do it on this one side, so I'm gon na grab a hair brush and just brush out all of my hair and then start to brush it back into a ponytail that will sit right at the back of my head. Okay, look! Crazy right now, cuz, the bridge is just out of the rest of my hair, but I'm going to loosely tie this into a ponytail. I'M just gon na pull out some random pieces from the front kind of loosen it up, make it look messy and effortless, and then this is the important part. So if you're, adding a hair scarf watch this part, but if you're not going to add a hair scarf or a scrunchie or something else like that, just go ahead and tie the braid in, but what I'm gon na do is remove my elastic. This is probably not the right way to do it at all amazing, once you have me lasting out just take the piece of hair, bring it to the back and then grab your hair scarf. Obviously you can just high up if you have one that looks like a scarf, but this one had a little scrunchie attached to it. So I'm gon na go in the bottom of the hair right here and wrap the hair scarf underneath my head and here's where it gets tricky. I'M just gon na hold that at the top and tie in the other side to tighten it and there we go. The hairstyle is complete. I love the way the hair scarf looks and this I feel like it just makes it look really pretty and elegant, and this would be super ideal if you're going to like Easter church service or you just want to look nice and you don't have that much Time I feel like the hair scarf just makes it look like you've spent hours doing your hair adds that pretty feminine touch. So I love it. This one's from Anthropologie I'll link it down below. If you guys want to get one okay, everyone that is hairstyle number three in that concludes today's video. It'S definitely different from some of the videos I've done it haven't done with a beauty, centers, video and a little bit. So I hope that you all enjoyed this video. Let me know down below in the comment section which hairstyle was your favorite and again, if you do any of these, please tag me on instagram or, let me know down below in the comment section. Thank you all. So much for watching, I hope you have an amazing day and I'll see you in my next video bye, guys

Comments
marie baron: all these hairstyles are so cool. im definitely going to try some of these ✨
Kari Beth: LOVE that last hair style! Cute idea with the scarf scrunchie
McKenna Marsden: You’re so pretty I love these hairstyles. Your channel is such an inspiration for mine thanks girly
tess: I’m going to do a binge of all the videos of yours I have missed! I forgot how good they are! Love all the hairstyles
unicorn magic: Love those hair styles...they are cute I can't wait to try them Thanks Katie... btw I love you hair
LifeofFallon: all three of them look so cute on you!
dreamerraquel: YOUR HAIR IS SO PRETTY!❤️
juliezeneth: such cute hairstyles girlie
emily watson: Gorgeous !!!
Ava r: Yayyy I’m so happy that there’s a new video!!!
Ella kroska: I love all these hairstyles
hi billieavocadoeillish: I was here when u had like 67 subscribers (I'm not lying I promise) AND UR NOW 3000 IM SO PROUD OF U
Macy Mae: Love the video!!
BiancaKelina: You have pretty hair❤️
Faye Gilbert: First! Your hair is gorgeous btw
Aliyah Xo: Love all of these hairstyles!!! Where is your top from?
cat lover: love these
Saleta P: Where did you get your top from