How I Made My Pixie Cut Wig | Outre 100% Human Hair| 27 Piece ? Quick Weave
Hey Guys!
Please subscribe to my channel. Its Free! Click the link below.
https://www.youtube.com/channel/UCKs2G...
Here’s a DIY Pixie Cut Wig tutorial! This tutorial was inspired by Tren LeStart Pixie Cut video and I decided to attempt to make my own. I love stepping out fo the box and trying something new.Enjoy!
Hair: https://amzn.to/37FUuKQ
Mesh Dome Cap: https://amzn.to/34lzDud
Razor: https://amzn.to/33qrPWN
Block Head: https://amzn.to/2XO35H0 (select your size)
Necklace: https://amzn.to/33t0lAd
LIKE - COMMENT - SUBSCRIBE
_____________________________________________________________________________________
Social Media:
Instagram https://www.instagram.com/gabbysqueend...
For business please use my email:
#pixiecutwig #shortwig #shortsyntheticwig
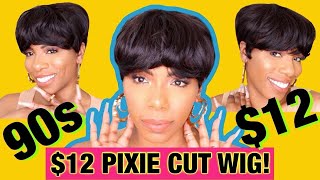
Hey guys got me welcome back to my channel, so basically today's video, I'm gon na, be showing you how I got this pixie cut now I do want to mention that I did not go to cosmetology school nor in my cosmetologist. So obviously, I'm just using all of my artistic abilities to go ahead and just recreate a look that I saw online and yeah. This is the finished result, so I hope you guys really like this cut. This is my good side and I think I messed up a little bit on this side, but I'm still going to rock it, because I put a lot of work and a lot of effort into trying to recreate this style. So let me know what you guys think, but let's go ahead and get into the video. So I started with my 22 inch blockhead, which I purchased on Amazon. If you're interested I'll have my direct link to this blockhead in the description box below and of course, I've got a few needles threaded as well. Alright, now here is the wig mesh cap that I'll be using, and I did purchase this off of Amazon as well, and this is it out of its packaging. Now I am gon na go ahead and just look this onto my blockhead now prior to slipping this onto my blockhead. I went ahead and traced out my ears, so here you can see where I traced out my left ear in my right ear and this is going to serve as a guideline and which I'm going to cut out my ears towards the end of this tutorial. So here I'm just going to create another guideline which I love to use in the middle, and this is going to allow me to build up the pixie cut. So, first of all any guidelines that you see in this tutorial, you want to stop at the guidelines. You don't want to go through them, and this is going to help. You basically know where to stop. Instead of having to you know just visually see where to stop and where to place the tracks so again, you're going to see how useful this guideline is towards the end of the video. When I start to build up the pixie cuts, are you so farther here I'll be using the ultra velvet or Remy it's Hara in the lens two? Four and six? This is a 100 percent human hair and I got it in the color 1b and then here is just a 360 of the packaging because it is so beautifully made, and this hair is bomb, it's very, very nice and silky, and this is all three lengths out Of the packaging, the two the 4 and the 6, and to start off this tutorial, I am gon na actually start off with the a 4 inch which you see here, and I got this idea from another youtuber which I'll have her information in the description box Below but again I'm going to go ahead and just start off with the 4 inch here and you want to stop at every guideline. So I'm not going through the ear section here. I'M just gon na stop at that guideline and I'm just gon na build it up, so I'm only putting the 4 inch and the 2 inch in the back and then when it comes to that you shape I'm gon na build it up with only the 6 Inch alright, so just go ahead and continue to watch the tutorial and I'll be back with some more information towards the end. Okay, so here is another guideline that I love to use for my track placement. So it's just going to serve as a guideline to help me build upon my tracks so that I'm not stacking them too close or too far apart. Alright - and this is the finished result of me - stacking both the four inch and a 2 inch. Alright next we've got this u-shaped that we've got to fill in with the six inch bundle. So here I'm just going ahead and adding in that six inch and again, I'm only using the six inch to close up this section here and then I'm going to go ahead and use the closure piece to finish off this right onto the cutting portion. Here is the a two-headed razor that I purchased on Amazon, which I'll have the link to in the description box below, but I'm just going to start to cut the back section at first now I didn't cut a boss spot in it. Because, again I didn't go to cosmetology school, so I had to fill that in, but I learned that you have to pull on the hair first and then start to cut. So again, I'm going to start to just cut this unit as best as I know how and just figure out a way to get through this pixie cut without creating any more ball spots and I'll show you the finished result so follow along as best as you Can I wish that I can describe the methods that I am using in a lot more detail, but honestly, I'm just kind of winging it so go ahead and continue to watch and I'll be back towards the end. All right so here is the finished result. After all of that cutting - and I think I did a really really good job - I did go ahead and do a little bit more cutting once I was able to fit the unit onto my actual head. But this is what I've got left foot so far, and I definitely think that I did a really really good job now. I did mess up on the left side a little bit or no was it the right side. I believe I had messed up on the right side, but the left left side came out perfectly, so I'm just going to slip this unit on and yeah I had to. I tried out this orange matte lipstick and I just I wasn't feeling it so. I had to you know slip on the unit on camera and then I exchanged it for just something simple. You know in pink, so this is how the unit is looking. I'M gon na play with it a little bit on camera, so you guys can see how it looks without layers and how it looks with layers, but so far so good, I'm definitely satisfied with it. So let's go ahead and just feather the bang out just a little bit yeah! That'S looking at really really cute, and here is a look at the back, alright, so yeah, I think for this being. I believe this is my second time attempting to construct a short unit and I'm definitely satisfied with the finished result. Let me know what you guys think in the description box below. Thank you all so much for watching and I'll see you in my next video bye, guys


Comments
Sharon Williamson: So far your the best one being an amateur like myself, you've put in so much details which makes it easy to follow
Shareefah Pasha: Thank you... You are the bomb and you did and amazing job... I followed your instructions step by step and it came out sooooo lovely. I cant wait to wear it...
blackqueenah: you did an amazing job, thanks for sharing
Shameka Williams: This is some amazing work. You did great
Cedes Benze: i went 2 school and you didnt but you still did good!! keep up the good work!! practice makes perfect!!
Zikera Bellmon: You didn't mess up at all it looks beautiful
Anita De La Cruz: Great job! I think I will cut it on my head. My forehead is bigggg. Thanks for the inspiration!
Audrey Ellis: It looks great
Symone Holmes: Do you make wigs for other people ? I’d love to buy one just like this ?
Alexe L.: How many packs of hair did you use ?
Beauty Is My Forte: How many inches did you use between each layer of tracks?
Smitty: How far apart are those lines up the middle? Did you have the cap on when you traced out the ears?
Tenisha Humphrey: Beautiful
brittany wiilliams: How does the cap fit on your head does it feel loose or not so flat ??