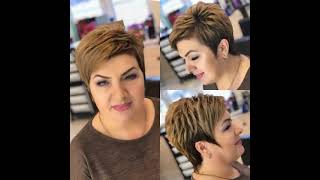
Short Haircut, Pixie Cut Tutorial
Short ‘n’ Chic Tutorial 28:35
Short haircut video tutorial, razor cut.
‘60s icons – actresses, models, singers – bravely cropped their hair, creating a chic new-wave look. Cut to the present and this short cut technique hasn’t lost any of its headline-creating appeal.
▶Visit Atelier Nicolas Jurnjack.
Attend a Masterclass in Paris hands on training mentored and led by Nicolas Jurnjack
https://www.formationscoiffure.com/
English and French
Your tools for this tutorial
Hair cutting razor, hairspray, medium round brush, Styling comb, tail comb, makeup brush, hair clips
DETAILED STEP BY STEP
0:11 Intro
0:24 Tools for this tutorial
0:41 STEP 1: Prepare your base. Dampen the hair with a water spray and comb through to remove knots and tangles
1:38 STEP 2 : Dry the hair using a medium round brush
2:51 STEP 3 : The first separation. Starting at the nape of the neck. Advice and tips.
4:54 STEP 4 : The second separation. Tips and how to for best cutting technique
6:12 STEP 5 : The third separation.
8:06 STEP 6 : The fourth separation
10:33 STEP 7 : The fifth separation
12:58 STEP 8 : The sixth separation
14:18 STEP 9 : The top of the head
16:15 STEP 10 : Cutting the fringe / bangs.
18:13 STEP 11 : Polishing the outline and shape with scissors.
Finessing the style.
#haircut
#howtodomyhair
#shorthaircut
#razorcut
#pixiecut
#hairtutorial
For Theodora we're doing a headline, creating shortcut technique from the 60s and adding a modern touch step, one dampen your models, hair dampen your models, hair thoroughly and comb through to remove all knots and tangles step2 drying. Make sure that the temperature of the hairdryer is comfortable for your model and organize the hair using a medium sized brush to dry, follow the hairs natural flow. It'S important at this stage to take note of the unique qualities of your models hair. How does it flow and fall? The answers to this will guide you to the perfect cut for style, stylishness and ease of maintenance step. Three. The first separation make your first separation, we'll start with the nape of the neck and make a separation from ear to ear. The razor can be seen as a fine sculpting tool. Cutting and shaping the hair is felt much more keenly than with a pair of scissors. It'S subtle, yet extremely precise and with experience, will feel like an extension of your fingers. Gently pass the razor vertically through the mid length of the hair toward the tips staying close and parallel to the neck. Do not use force with a razor. The action should be one of a delicate caress continue to shape the contours, with your razor step, four. The second separation keep your razor parallel to the head, continue to cut in the same way, but work up to a more pronounced and stronger curve that plunges toward the nape of the neck Step. Five, the third separation again start by holding your razor parallel to the head. This time firmly guide your razor to shape your cutting line, feel through the razor to blend and soften the tips step. 6. The fourth separation run your fingers through the hair to feel it's natural fall and use this information to help you decide. The direction of cut that is best suited for the top and back of the head. Holding the razor and cutting parallel to the head will make the hair hang heavy so for this, separation hold the razor at a more elevated angle, to lighten the mid length of hair. Do not hurry take time to really imagine the razor as an extension of your fingers proceed step by step. Finally, chiseling away at the hair, always remembering to allow its natural movement and direction to guide you step. Seven, the fifth separation to cut the sides, make a separation at the mid eyebrows about three fingers above the ear hold the hair away from the head to allow for a cutting axis. That can be slightly forward of the face start at the top near the ear and little by little sculpt, the contour of the piece of hair. You are working on for the other side, we'll start at the edges and work upwards towards the ear step. 8. The six separation make your last separation more or less, in line with the top of the eyebrows and on up to the crown of the head again hold the hair away from the head and cut forward. Keep in mind, as you cut, that these pieces need to blend with those cut at the fifth separation step, 9, the top of the head remove all the clips except the ones near the bangs start at the highest point and hold your razor slightly forward. As you did previously for the sides begin to raise our contours that will allow for a smooth and blended transition to the rest of the hair, make sure to move slowly and leave a little extra length of hair. So you still have something to work with to create the finishing touches once the whole head is done, will now make a first pass on the sides and work with the transition areas between the different separations again make sure before cutting that the hair is held in The direction of the face step 10, cutting the banks, remove all the clips from the bangs and again run your fingers through the hair to get a feel of the flow and fall decide the style. For example, do you want a marked separation at the side or not for Theodora? A movement of hair from right to left is the natural flow cutting your hair to follow that flow will make it easy to care for and style. First, we'll address the top where the greatest mass of hair is. This is where we begin to create the identifying signature of the style for Theodora, I'm combing, the hair to the left and outlining a shape that suits her again, always remember: to keep the same elevation for each piece of hair that you are cutting cut the pieces. A little at a time always with an eye to how they will merge and blend together as a whole. Lastly, trim the bangs with a light hand, step 11 polishing the shape with scissors tidy up the little hairs around the nape of the neck and finesse, the shape of the tips to address the area around the ears comb, the hair forward and cut around the ears Shape do not cut the hair at the roots. Now. Are there any other areas that need a final touch, such as the elevation of the hair at the top of the head? Where the contours around the face, the bangs complete, you can begin to lighten up the style by snipping the hair at an angle start with the hair at the sides of the neck and work your way up to blend it with the area around the ear. Take one last look at the back front and sides and top and complete any final touches, so the style comes together as one there you go. You now have a haircut, that's practical to maintain and style, and a head of hair that can breathe again.


Comments
CheCheBong: This is so helpful!!
Lifeiswhatmovesme: best hair tutorial EVEEEEER
jack rosas: This is amazing
Sashokyo :v: Very useful guidence