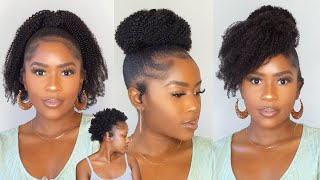
Curly Pixie Wig Install | All Wet Everything ||Young Africana Inspired||
Be sure to SUBSCRIBE & Turn ON Your Bells✨
➤H A I R I N F O R M A T I O N:
Direct Link: https://www.amazon.com/gp/product/B098...
Video wig details:
Hair Type: Human Hair
Hair Texture: Short Pixie Curly
Color: Ombre Honey Blonde Color
Length: same as image
Density: 180%
Cap Construction: Medium Cap, 13*4 Lace Front Wig with Combs and strap
CONTACT ME✨
Song: Culture Code - Fairytale (feat. Amanda Collis) [NCS Release]
Music provided by NoCopyrightSounds
Free Download/Stream: http://ncs.io/Fairytale
Watch: http://youtu.be/qVAFNx1WRWE
@WIGS
Guys welcome back to my channel before you watch this video. Please like subscribe, share and tell a friend, so today, i'm going to show you guys how i got this cute. Look alright! So first you already know i do my wig cap off camera and basically i use too much spray, so i'm using my hand towel and some rubbing alcohol to clean off all the sticky area of my face. So now the wig is a pixie cut right. It'S! I think yeah it's eight inches and it did come just like that. If they come, if they come with the blonde ends and the brown roof, i didn't do any type of bleaching. I didn't do any type of dyeing, so the lace is a 13 by 3. It comes with four combs two on the side, one in the middle one in the bottom, and then it comes with the extra strap okay. So right now, um like take parting out the part, so it's able to go like really snuck over my ears. So i won't have no problem with it and i did that for both side of the hair, so i'm basically cutting off the unnecessary lease that is then needed so now, it's time to add that glue. So basically, i add three quote yeah. You said three coats of the one the glue i use the three clothes because i actually kept this wig on for like a good week, i think a week and a half i kept the wig on four and now i'm using my rattata comb. The end part to like smudge out the glue, so it could dry smoothly with no lumps or anything and it would dry and it would dry clear - and this was the last um coat of um glue that i had placed and i'm using the blow dryer to Dry so now i'll be placing the lace on the glue. So, as you can see, i started from the middle because i always realize when i start from the side, it would either be like one of the side is too far out, or one of it is too far in so that's why i started from the middle. The middle and i pulled up the wig, so it gave me more pulling room so after that piece place it on the glue. I start using my hand to press it down and know my hand is not oily at all. So i use the comb to brush it back, so i'm able to see it clearly, as you can see, able to see the hairline properly. So now i'm about to use that melt belt around the lace, so it will be able to dry, and i let that stay on my um lace for about like 10 to 15 minutes, because i tie it down and then i end up using the blow dryer On the almond milk puzzle as well, so now we're removing the melt belt because you got ta remove your best friend like it did it worked. It did its job, so we're gon na remove the best friend right now for a little bit so right now i i'm cutting off the like the extra lace, because i really needed to see - and i wasn't really seeing that much - i just cut it off. It was too much lace in the front to be honest, and then you know the funny thing is i remembered that i did not put on any type of tent spray, no makeup to tint the lace at all, but i'm like you know that could get fixed. We ain't got to worry about it at all. We knew how to lay your lace. You know how to fix a little mistake so right now i cut the lace in three sections and now i'm using my um eyebrow pen, my eyebrows eyebrow pencil. Look at that. My eyebrow razor to cut the lace off and guys be very, very careful with this eyebrow eraser, because i tell you i cut myself before and when i was rubbing that when i was putting that spray on in the rubbing alcohol it burned like it burned. Like a mouth, it burned so be very careful with it. Like take your time, you don't have to rush while cutting the lace so right now, what i'm doing is what i call detail. I'M about to use the end part of the rattletail comb to add some glue to the part of the lace. That'S basically lifting up, and what i do is i add three layers of the glue to the lace to make sure it's secure and it won't move when i um when i'm finished. So what you need to do is just pull that lace back and put some glue there using the rattata pole, the end part and, let's add the glue there baby and you basically just keep doing the same thing until you finish: cutting off all the excess lace Of the wig make sure no lace is lifted and nothing is moving, so you always go back in and fix any little mistake or any little arrows that you have with your lace. So now i'm using my concealer brush that i used to like um blend out. My concealer on my eyelids i'm using that with some concealer. That'S basically close to my skin tone. As you can see, i was actually basically putting too much, but when i'm finished with this baby, you're going to be like yo where's, that lace like you could have seen that white lace. But when i finish, you're gon na be like what lace baby. What lace are you talking about so after i finish putting the concealer and stuff like that, i would like you to realize that i put too much it was showing, so i went back in with the alcohol and take off the extra concealer and stuff that was Fun see, as you see, i'm getting somewhere with it getting somewhere and i'm going with the got to be spray, so i could put back the milk belt, so you can melt that lace, baby! That'S what we're about to do is melt that lace. Okay. So now, if camera did my makeup whatsoever, i apologize my i did. I touched something on my phone and i messed up the lighting for this. So it's really really bright right now, but i think i end up fixing it. I don't know yeah. I think i end up fixing it, i'm not sure, but i do apologize about that because me watching it right now is actually bothering me, but i'm like i have to get this video out. So, yes, i did fix it so now, as you see i'm using my hot comb, because i decided that i wanted a cute little side, part which basically never works out for me. It'S like i try to do something. It never works out, and i end up doing something completely different. Now, i'm using my wax stick to, basically, you know fix them. Little fly, aways mission fly away is not going nowhere and this wax deck. I got it from my local beauty. Supply store is basically travel size, like you know, you're going out on a little vacation. You ain't got to worry about the big wax. Stick, you don't get them like travel size items now, i'm using my shave shade. I think a shea butter mousse i'm using to make to define the pearl yep, make them curl star pop, and you guys you don't have to use the mousse or the foam. You can just use water, but i felt like the mousse, because i think i use both. I use the mousse and the foam because but like it works better for me, like i feel like the curls stay. As you can see, i was kind of struggling with it because it was finishing but yeah like if you use water it will work as well too, as you can see, i'm putting like like what i what i told y'all what lace like come on come on, Like come on, man, cha cha yeah like at this point, i was okay at this point i was just fed up like i don't know what to do with my hair, like i did not know if i wanted this. That type of side part. If i wanted to side part on the other side, but at the end of the video i actually came to some type of agreement with myself on where i wanted that part, and i got it the right place that i wanted. It came out really nice, oh guys, don't worry i'll, be leaving the link from where i got this nice pixie wig from i'll, be leaving the link in the description and yeah check it out. It'S really good, like the quality, is actually good. To be honest, like there was no shut-in at all, when it comes you

Comments
Mental Acoustics: OMG Your So Beautiful ❤️
Tiffany Rainford:
Parker Simth: Gett emmmm