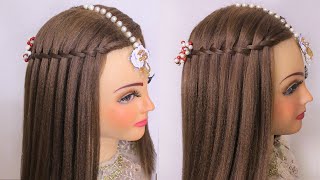
Soft Ponytail Hair Up Style, Bridal Hairstyle For Long Hair. Perfect Ponytail Wedding Hairstyle
- Posted on 03 April, 2020
- Ponytail Hairstyles
- By Anonymous
Learn how to style a beautiful ponytail wedding hairstyle for long hair with our new tutorial for long hair. Learn how to prep the hair, curl the hair with tongs and create a quick, easy ponytail bridal hairstyle. A great bridal or bridesmaid style for long hair - learn how to prep the hair using curling tongs and straighteners and create a beautiful ponytail style for long hair. Great for wedding and party. A great bridal hairstyle tutorial for long and medium length hair, fine hair, thick hair, straight or naturally curly hair.
Links to products/equipment used by Pam (where available)
USA
L'Oreal Techni art salt spray: https://amzn.to/3aANxvC
Denman medium hairbrush: https://amzn.to/3e1rqRs
L'Oreal TechniArt Glue: https://amzn.to/2yrdBLz
Puff Me Volumising Powder Mist (Texturising dust): https://amzn.to/2R5DDe4
Loreal Infinium Extra Strong Hair Spray: https://amzn.to/3dPnrap
UK
DIVA 25mm Tongs: https://amzn.to/38WHMac
Silhouette Flexible Hold Style and Care Lotion: https://amzn.to/33vRsas
L'Oreal Techni art salt spray: https://amzn.to/3bxCa84
Denman medium hairbrush: https://amzn.to/34izCZb
L'Oreal TechniArt Glue: https://amzn.to/2X2NYet
Puff Me Volumising Powder Mist (Texturising dust): https://amzn.to/39EoEy5
Loreal Infinium Extra Strong Hair Spray: https://amzn.to/2wQ5b08
Get tips on hair prep, working with long hair and create a beautiful bridal, party, prom, wedding ponytail/low bun hairstyle.
Want to master the art of bridal/wedding hair and learn with Create Beautiful Hair? There are many ways to learn with Pam:
1. Join our Habia approved award-winning online bridal hair course, learn from home and submit work directly to Pam for assessment and feedback as you work through the models; receive as much support as you need! Complete the assessments and receive a Habia approved CPD certificate upon completion of your bridal hair training. We have a 50% off offer on the full subscription over March-April 2020 (use code HOMESTUDY at checkout), or join from 9.99 per month on a view-only basis. Click for more information: https://www.createbeautifulhair.co.uk...
2. If you are in London or nearby, enquire into private Bridal Hair 121 tuition for yourself or for a salon! DM for more information on private courses!
3. Check out more of our YouTube channel for a selection of our freely available tutorial...like and subscribe for more information and updates, YouTube link: https://www.youtube.com/channel/UCDKU...
4. Join us on Facebook for more tutorials and all things bridal and wedding hair!! https://www.facebook.com/createbeautif...
Whichever option you choose, please do get in touch and share your fabulous creations and suggestions on what you want to see next!
We've got it covered . . . we even have tutorials covering the curly girl technique!
Great for fans of natural unintentional ASMR!
We've got it covered . . . we even have tutorials covering the curly girl technique!
Hairstyle tutorials include: hair prep, hairstyling and hair up, braids, blow drying, curly girl techniques, working with different hair types, hair textures and hair lengths.
Create hair up & bridal hairstyles and become a bridal hairstylist, with Pam Wrigley, UK Wedding Hair styles of the Year
Just SUBSCRIBE & LIKE!
I'M going to show you how to create a fabulous ponytail on Olga. So, let's start by sectioning the hair, now I've already prepped Olga's hair with a little bit of mousse and some salt spray and a blow-dried for hair. I'M going to section the hair, the front section and our side sections, that's what you can do if you want to get quite a bit of bounce to your ponytail is curl all the hair, using whichever technique you prefer to get the curl that you, the kind Of look that you're going for so if you want Olga's hair, it's got a little bit of a beachy wave in it here, but you could equally do a traditional wine or the vintage curl technique. But what you could do it depends how much curl you want in the hair I'll just curl a couple of the sections just to show you, but I'm actually happy with the amount of curl that we've got here. But if you want a little bit more curl, then you can always use one of the different techniques that you've learnt. By now so say you want to do the the vintage curl technique to get a little bit more curl warm up the hair and I'm just getting kind of chunks of hair. Here it doesn't need to be too perfect. The sectioning once you've got your main section in position with your top section here, your two side sections and that section at the front. Then this kind of back section here you see it's kind of like a Halfmoon shape at the back of the head and you can just curl these sections of hair. Let the heat come through just a little bit so once you've got the salt spray in there. It usually is better and the mousse and you've blow-dried the hair, it's better to get some sort of heat on the hair with the tongs, because then it gives up the hair a little bit of shine and a bit of curve a bit of movement to the Hair, I already have heat protector on August hair, so just make sure before you start using the tongs. All the straighteners just make sure that you put some heat protector in there. You could do this technique using the heated rollers. You could curl the hair with the heated rollers and then just take the hair out, create these sections and then just go straight for your style. So you know if you're doing maybe a trial run for somebody. You know. Maybe you want to pop the heated rollers in first they're, not sure what style they want to have. You can do this style without the texture without the mousse and the salt spray in the hair. You can just get some volume in there from using the heated rollers or just the tongs or just the straightness, so it's all flexible, they're, all just different ideas and different options, all these different hair, prep techniques. So that's that prep we've got our side sections curled. Our top section here and as we come around to the back, we've got this section in the middle, which is the area where our ponytail is going to sit and at the bottom just that little bit of extra hair. That'S going to give us that extra little bit of oomph at the bottom. So once that's all cooled down, you can start to take that out and then I'm going to leave the front and the side sections in so now we could brush through the curls. But I think I might just leave them like that for now and let's get some little bit of backcombing, we'll leave the front sections and the side sections in and let's just get a little bit of backcombing in here fingers through. So here we're just back. Combing section just on the crown and at the back of the head, you'll find it does. Certainly back comes really easily if you've got the mousse and the salt spray in there smooth the hair. So I've got a nice little bit of height there. Let'S just get that section, that's smooth that down don't be going to be pushing that up just a little bit and using one of my little snag free bands, I'm going to get a tire ponytail just here. I want the hair to be kind of quite flat to the head. Now we could use those kind of wraparound ties here to secure the hair. You want this to be quite low down, not too high, then we're going to pull these little bits of hair up to help with our little bit of texture that we want get. This hair now is loose and as full as you want it to be on there we're going to start bringing in the rest of the hair. So now we've got our section here and I'm just going to clip that up and out of the way and I'm going to create another ponytail here, a little bit of backcombing just at the root and let's create another ponytail quite close to this one here. So I want these ponytails to be close together, but I don't want to be catching any of the hair from the top ponytail in the bottom ponytail. So I've got two ponytails. Now, that's lovely! Thank you all you can let go. Then we can bring this back to here so now this is a little bit loose here, so I'm just going to grip this, so it stays to the back of the head just by putting a grip across the back of that part of the band. That'S in there that's better just so it stays in position. I'M just going to put a little bit of extra strong hairspray on these sections here, just to get that nice kind of textured look and I'm just using my L net Infinium extra strong hold, that's lovely! Just to get that little bit of extra lift there and then our side sections. So now it's up to you whether you'd go kind of super tight. Let'S see if it suits Olga to come back, would you like it quite tight or a little bit of softness? All go at sides: do you think softer so kind of softly back with a little bit of width yeah, let's get a little bit of that coming heat. It then, I think as well. So you could, if you wanted to do, do a few little braids at the sides like a douche a little twist and pull so we're going to bring the hair back and I'm just going to loop. It just over the ponytail. Just for now and we'll come back and do the other side a little bit of backcombing, so we've got a little bit of softness and we'll bring this back and let's check the mirror. I think maybe that bit back, so I don't don't. We don't do very many clean styles, but I think it might be nice to have everything back, maybe for a change. We might have some of this hair down. So we'll come back in a minute and get rid of get rid of that bit of hair there. But let's just bring this bit back, that's it! Okay! So I'm happy with that now! So now what I'm going to do so we know we're going to bring both those bits back and have them quite soft, and the next is the top bit bring this around the hair there making sure I've got it as soft as we wanted at the sides Wrap it around and pop a little grit in the back pick up some hair that's gone into the pony term and do our up and over so here's the section of hair. We want to secure and go into that hair. That'S gone into the ponytail Devourer up and over and back in a little bit away and the same with this one. So I think I'm just going to, rather than wrapping this around, I'm going to add it with a band to the rest of the ponytail, because I don't want to make it too fat have a little play with these front. Sections might get a little bit of extra height here. That'S it so have a little play at the front and work out exactly how much height you want, and I think a little bit of extra height here would look great for olga, not too much, but just a little bit, you could put a bit of texturizing Product in here, let's just smooth that down bring that down towards the ponytail. That'S it so we can get really a bit of height, but without having lots of back combing, let's put a bit of texture in there with the texturizing dust and then and smooth out these sections of hair with a little bit of product on there. So we can get some lovely kind of sexually bits and finish to the hair, so it's not going to be totally smooth and bring that back and down to the bun. So now, if you want to keep these sections looking a little bit separate, you can all stop a little bit of the using a little bit of the l'oreal tetany art blue here to hold them in position. You can also put a little pin on the hair. Just to help keep that textured look and shape and keep everything a little bit kind of sexually. It'S got to be kind of a bit uneven. You don't want it all to look to perfect smoothness here we can just give it a little bit of extra texture and that's the one then we're going to bring that down to the ponytail fasten that together with another band, and now, let's have a little play Before we take our sections out and finish our burn, let's have a little look. What we're going to do with this front section and actually know it kind of if it's found its own way. I think a little bit, let's just check in the mirror, then you can just play with bringing that bit in over the ear, just tweak the style a little bit make sure you're happy with it, and it's all looking very soft and gorgeous okay. It'S the hair parted. You prefer it to be parted a little bit more over here, it's a little bit too far over with that bit better. I have a little play and it's these little finishing sections little finishing touches. I should say that make all the difference. I'M using one of the fine pins because we need to see we need to secure this bit of hair in place. So using one of the fine pins put a little tick in the end and then you're going to go with a straight side of the pin. Go into this lovely textured hair make sure you go into secure hair, pick up a little bit of hair and come out again and then you're going to take the straight section of the pin up and over and then push the hair. The pin up and in sort of that little bit of stray hair has found a home, my daughter, a little up and over to hold that in invisibly. That'S the one lovely we're going to do get some of these little shorter bits of hair that we've got left because you don't need a lot of hair to do this next a little bit and what we can do is get those short bits of hair and I'M going to spray really well you're, almost drenching the hair, with a strong hold hairspray we're going to wrap that around the ponytail. You might need to wet it again if it's not quite wet enough, then you're going to get your hair dryer section of hair. That'S wrapping around the band and set it in place, so I can finish off. We can take our little pins out of the hair. They should have set nicely in kept touch. Those are off sexually bits in position and if we want to, then you could always go in and backcomb the hair just a little bit to make. It look a little bit kind of fuller and thicker. It'S up to you if you brush through the curls or whether you leave the curls, just as they are if you've enjoyed this tutorial. Just click like and subscribe and join me on my next video
Comments
surf1ncybersis: Perfect! Love all of your hair pinning tips!
Omg Kk: It’s so beautiful ♥️♥️ and your voice is so smooth & relaxing
Eleteeme: You are definitely the best! Love your technique and your voice.
Hair by Chris Beck's: Simple and clean.
Mia W.: The color is amazing!
Carlo Ricciardi: Great!!
Create Beautiful Hair: Links to products/equipment used (where available) USA L'Oreal Techni art salt spray: https://amzn.to/3aANxvC Denman medium hairbrush: https://amzn.to/3e1rqRs L'Oreal TechniArt Glue: https://amzn.to/2yrdBLz Puff Me Volumising Powder Mist (Texturising dust): https://amzn.to/2R5DDe4 Loreal Infinium Extra Strong Hair Spray: https://amzn.to/3dPnrap UK DIVA 25mm Tongs: https://amzn.to/38WHMac Silhouette Flexible Hold Style and Care Lotion: https://amzn.to/33vRsas L'Oreal Techni art salt spray: https://amzn.to/3bxCa84 Denman medium hairbrush: https://amzn.to/34izCZb L'Oreal TechniArt Glue: https://amzn.to/2X2NYet Puff Me Volumising Powder Mist (Texturising dust): https://amzn.to/39EoEy5 Loreal Infinium Extra Strong Hair Spray: https://amzn.to/2wQ5b08
Ana Martins: Amazing