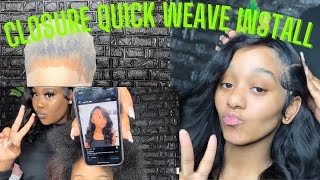
How To: Versatile Quick Weave Install With 4X4 Closure | Alipearl Hair
- Posted on 13 December, 2021
- Ponytail Hairstyles
- By Anonymous
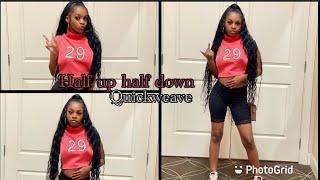
Hey Dolls In this video I'm showing you step by step how to install a quick weave using a 4X4 Closure. What makes this style versatile is the ability to put it into a ponytail and also pull the front up into a half up/half down style. I love this method because I can still have a versatile quick weave without having to leave out my hair in the front.
Supplies Needed:
Hair (information below)
Hair glue
weave cap/ stocking cap (nude color)
hair protectant and Got 2b glued hair spray
blowdryer
scissors
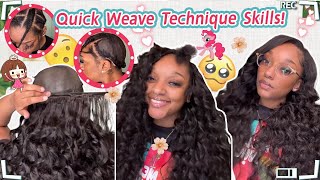
Steps to install quick weave:
PREP:
1. Braid down your hair (optional, can pull into ponytail/slick down), and make sure to leave out enough hair at the back to cover your tracks.
2. Put on the wig cap (nude color)
3. Apply hair protectant to cap avoiding areas of left out, can use gorilla hair spray or morning glory hair protectant
4. Blow dry hair protectant making sure it is COMPLETELY dry
APPLYING THE CLOSURE:
1. pull the front of the closure to align with the front of your hairline (as you would normally wear a closure)
2. Measure to make sure the closure is laying in the desired position
3. Apply glue to the thick outer perimeter of the closure
4. Apply closure to the wig cap back in the desired position
INSTALL
1. Measure the track hair against your head from ear to ear
2. Cut the weft that you measured
3. Apply hair glue to track and allow to dry for no longer than 30 seconds
4. Lay the track onto your cap beginning at the bottom working your way up
5. Repeat the above steps until you reach your closure
6. cut off the remaining cap that's exposed (be careful!!)
7. Style as desired
Watch my other videos!!
How to Takedown your quick weave:
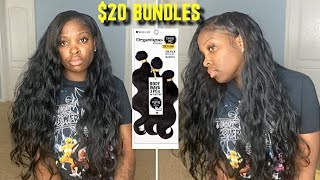
❤️❤️❤️❤️❤️❤️❤️❤️❤️❤️Hair I’m wearing❤️❤️❤️❤️❤️❤️❤️❤️❤️
body wave 16,18,20 inches bundles+14inch lace closure
Shop Now➤https://bit.ly/3F9Euky
Lace Front Wigs for Sale!➤https://bit.ly/3kmXALZ
❤#AlipearlHair Official Store:➤https://bit.ly/3HeORoG
❤Invisible HD Swiss Lace Wigs:➤https://bit.ly/3Ha58eF
Use code “alipearlyoutb” to save $10!
#alipearlhairwig #alipearlbodywavehair #alipearlhdlacewig
Instagram @alipearl_hair: https://bit.ly/34I3Oyd
Youtube @Ali Pearl Hair: http://bit.ly/2H0Gmmc
Facebook @Ali Pearl Hair: https://bit.ly/3aKwxX3
WhatsApp: +86 15890076489 E-mail: [email protected]
Psalm 27: The Lord is my light and my salvation— whom shall I fear?
The Lord is the stronghold of my life— of whom shall I be afraid?
All right, you guys so this time, i'm starting off with my hair, completely freshly washed and blow-dried, and i'm going to go ahead and braid my hair going straight to the back, but in the back i'm leaving out a little bit of hair just so that um. When i go to put my hair into a ponytail, um it'll blend and you won't see any tracks - and now i'm just going through and treating my scalp with this, i think it's tea tree oil that i use just to promote hair growth. Since my hair broke off a little bit in the front and just to help my hair grow and keep it moisturized underneath this style, so i just went ahead and bobby pinned the ends of my hair to my scalp separated my leave out and i'm going to Go ahead and slide on my wig cap, i'm only using one wig cap because that's all i need because i'm gon na go ahead and put on this bond protector and protect my hair. So i just i don't need to i'm just gon na use one now. I'M just going through and sewing my cap to the braids that i braided this is going to prevent the cap from sliding and it's going to make your style extra secure. This is actually my second time trying it and i actually love this method like if you want to keep your hair in for a little bit longer. Definitely try sewing down your wig cap and i'm sewing the cap all the way around the perimeter of my head. I'M not making the stitches too close like they can be spaced apart. It'S fine as long as it's so down it's going to make a difference. Now, i'm just going through with the morning glory uh hair protector. I'M gon na put this on like apply it all. The way to my head and i'm gon na go through blow dry it and also apply some got to be free spray on top and just kind of layer. The two maybe like two layers just to make my cap hard, and this is what helps your track stay on flat and it also protects your hair. The hair that i'm using for this install is from allie pearl, i'm going to be putting in a 16 18 and 20 inch bundles with a 14 inch closure. All of their information will be in the description box below, so i'm starting off with the closure. First, i'm just going through and measuring out where i wanted to lay on my head. This is why i'm glad that i only used one cap, so i can see through it to make sure it's landing in the right place and i'm going to go ahead and pin it up and glue it down. So i'm starting off with the 20 inch bundle. First and as you guys can see, there's literally a ton of hair on this track. It'S a lot um! So i'm just going to go ahead and take one corner of the hair and measure it out from end to end in the back of my head and then i'm going to cut it and then measure again just to make sure it fits properly and then glue. It down so literally i'm just going to be repeating these steps until i get towards the top. If you ever feel like you, can't see where you're placing the track use your fingers to feel where the last track was that you placed it and then place your new track right above it, because sometimes you can accidentally like double up tracks. So that's a good way to help preventing that from happening and then always use a handheld mirror to see what you're doing in the back. As i get closer towards the top, i'm making sure that my tracks kind of curve around in a u-shape so that it can curve around that closure that i have going on in the back after i've glued all the tracks down. I'M just going through and cutting off the excess cap around my whole entire head, pretty much. Why did i not realize until i complete the install that i use a black cap underneath a closure? I mean literally never crossed my mind one time until i'm done and i look at my closure. I'M like i use a black clap, so look um yeah, i mean don't use a black cap. Clearly you know all right. So black cap mishaps, aside, i'm going through and plucking this closure in the front um just to you know, make it look a little more natural, and so i'm just going through also applying makeup to the bottom of the closure to try and cover up my mistakes. Um, which it actually kind of worked a little bit, so i was happy about that now, i'm just going through with my got to be free spray, and i also used a layer of got to be glued gel before this to lay down my closure and then, After laying my lace, i'm just going to go through and part my hair and lay the closure flat because, as you can see, it's a little humpy at the top. So i'm just going to go through with my hot comb and flatten it out and now i'm just going to go through and fix my edges up and then i'm just going to give my hair some curls to add extra volume. And now i'm just going through and layering my hair section by section only thing i do is just take like a thin pair of like scissors or hair shears, and i just cut the hair going away from my face to create a layered look in the front. So this hair is like a very silky textured hair um. So i'm really glad that i got a closure with it because i don't think it will blend really well with like natural hair, with at least my natural hair. Even when i like flat iron it. I just don't think it would have blended well um, because it's really silky. It'S really really. Pretty, though, like i really love this hair, it's bouncy. I did wind up going back and adding more tracks to the back, because it was kind of thin towards the bottom to me so, like i wound up using two full bundles and a closure, but it was still kind of thin. So i went through and added like some more of the last bundle to the back, even though it wasn't as long i just i needed it thicker, because i really wanted that full look, but, as you can see, it's like really bouncy hair, it's really nice. I had no issues with shedding. Unfortunately, i only wore this hair for like a week, but this hairstyle could have lasted way longer than that, probably near three weeks. The way i've like installed it. This is probably one of the best installs that i've done. It was so sturdy and secure um yeah, but, like i said, all the information for this hair will be in the description box below and if you have any questions feel free to leave them in the comment section, and i will answer them but anyways you guys. Thank you so much for watching this video adios until next time.
Comments
Ali Pearl Hair: Love the video~ Thanks for choosing Alipearl hair~
Kendra Productions: Very pretty, you did good! Can’t even tell you used a black cap, you got skills
Dee Luther: Good Video As Always Kute thumbnail Tho Your Pretty Self Nice Cheeks Structure GmorninG Have A Bless Week Too Be safe always