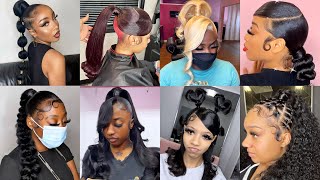
Sleek High Ponytail W/ Rubberbands | Ponytails On Natural Hair Series
- Posted on 23 September, 2020
- Ponytail Hairstyles
- By Anonymous
Thank you for watching! More ponytail videos are coming soon, next up will be a low sleek ponytail coming this weekend!
Follow My Social Media:
Instagram → @ KinkyCurlyDes
Twitter → @ KinkyCurlyDes
Snapchat → @ Rainexdes
Products Used:
small black rubberbands
eco styler clear gel
got2b freeze spray
small tooth comb
boar bristle brush
cantu leave in conditioner
model model color 530 bundle
black santex strips
hair bonding glue
Music: You Know by: Jeff Kaale **found on InShot video app**
About Me:
Name: Destiny
Age: 20
Camera: iPhone XR
Editing: iMovie app, InShot App
*IF YOURE READING THIS COMMENT WHAT YOU WANT TO SEE AFTER THE PONYTAIL SERIES?*
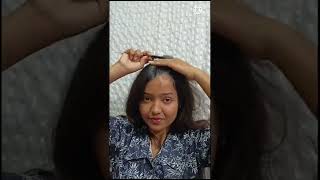
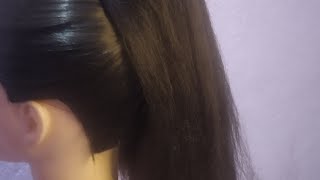
Hey youtube: welcome to my channel if you're new welcome back. If you're not. I know i've been taking forever to start the ponytail series, but we are getting started so i'm gon na start off with my freshly washed hair and i'm gon na. Take my comb and i'm gon na start doing my parts and yeah we're just gon na get into all the goods in this first video of the series so stay tuned. You guys boom. So, to start off this high rubber band ponytail, i'm going to super, define my middle part and i'm going to make sure it's crisp and i'm going to part both halves of the front of my hair and start off making the parts after i defined that part. I just took a hair tie to get one half of the hair out of my way so that i didn't comb it or get it stuck to the other side so yeah. I just got it out my way and i focused on the other side and i parted the back of where the rubber band parts would stop and i'm quite the perfectionist so yeah. It took me a little minute to get this part together and to actually map out how i wanted my parts to be so after i get both sections parted out and get a straight line across i'm going to put the back of my hair. That'S going to make the base of the ponytail all out of my way. Well, at least that was my goal. I ended up having to go back in and make the rubber band back line a little further back, because i didn't like how small the parts were when i like mapped them out the first time, but yeah now we're really getting into the rubber band part. So here we go simply i'm gon na. Let you guys watch this section of the video um. I do braid videos and a lot of videos where you guys see me do rubber band parts all the time. So you know my general routine make sure my parts are correct and i take my gel comb through it brush through it, pull my baby hairs out and the front ones and yeah put those bad boys on so yeah, i'm just gon na. Let you guys watch just i'm really trying to record this video, but i'm going to a money. Bag concert y'all, like i'm sorry, y'all! Listen! I got ta rush so, like i said, here's just a detailed clip of me pulling out my baby hairs combing through the part and defining it, and just you know, putting the rubber band on for all my new people that haven't seen the old videos which you Should check out go watch those so once i'm finished with all of my rubber band parts, i'm going to start working on the back of the beast, and yes, i do all of these styles. On my natural curly hair, i never blow dry it. I never straighten it and yeah so natural all the way. So right now we're gon na start off by doing the criss crosses of the rubber band parts, and that's gon na create the little hairs that you have at the top that are all together that go into your ponytail, which you're gon na need to even start. Thinking about slicking the back of it up, oh to rush through my head, so i can get the money back dead like so. By the end, you should have three x's across like where your middle and side parts would be, and these sideburn pieces like right above your sideburns. If you have them, because i do, they should go to that back one from the one above it so yeah. That'S the rubber band design i decided on today, because i didn't like the two rubber bands on the side that i posted on instagram. I didn't like it my head's tiny and it wasn't working for me so yeah. I went with one part and, like i said i attached it to that back part, not the front one where my edges are the back one after i apply my leave-in conditioner, i'm going to start detangling the back of my hair and smoothing it all out. So i can get ready to gel it up to go into this ponytail, and i also comb out the front pieces that are attached to the ends of the rubber bands. Here is my hair finally fully detangled and i'm just gon na make a fake pony with a black rubber band, a tiny one so that i can actually start gelling it to make the real ponytail. I make sure to actually pull the rubber band parts out of their tiny rubber band to gel them individually, so that they are super slick down when i put them up again and now that i have gel in the back of my hair, i'm gon na go Through with my brush again - and this is why the detangling portion is so important - you have to make sure you can brush your hair up now that you have a map, you're gon na, take your bristle brush and you're going to brush that hair up slick. It up slick it down brush it all around okay, i brush and brush and brush until it looks as straight as it can be, and when i say map, that means you're not done as in this is another step. This is where you want the base of your ponytail to be that's what i mean like you're, brushing it towards that direction. You want your hairs to go up in that direction. So when i said you mapped it out like take the brush and brush your hairs up in the direction that they need to go so that they stay in that direction. Now this step may not be possible for everyone with their curly hair, and sometimes it's very hard for me, but i do like to take a comb and try to sleek it up even more, but it is definitely easier to do only kind of tutorials where girls Do it off of their straight hair? But my point is, you know curls. If you've ever watched my most popular video on my channel, you know it's about to get real with these strips just saying you guys know, i'm a psychopath. I wrap the entire entire base of my ponytail from the back to the front, to the front, to the back to the side, all of it and i cut away all the extra pieces so that i can breathe. So i couldn't find my scissors and i couldn't rip it off so here we are boom, i'm making the ponytail. So i'm doing like the banding method, where you stretch your hair out, because my hair is not too long to wrap more of this paper around it. So that i can glue only the end where i start off the ponytail to this paper, so my hair doesn't get damaged. It should look like this when you're finished, i folded it over and added another rubber band. So now it's ponytail time, i'm going to take regular hair glue a little bonding glue. I'M only going to do a small portion like only the end, and i wrap that around the bottom of the paper. That is the only part of the entire bundle that is glued to the paper. It was a little difficult for me to see in my camera and my mirror was to the side of me so excuse the fact that i did do some of this off camera, but yeah i'm just going to wrap and wrap and wrap. None of this is glued until i get to the base and once i'm at the base like i just keep wrapping it around and wrapping it around and yeah. Once you get to that last little portion of track, you take it the skinniest bit and you wrap it around the ponytail and it keeps it secured for a really long time. Usually i recommend leaving your strips overnight, but i was rushing to go out so i took mine off. Oh, oh, but i ain't done that. I know you guys have been looking out for an edge tutorial. It'S coming. I promise i did not do the wrap around my hair when i went out so i did it the next day. So here we are and here's the wrap. So i'm going to take a back portion of my ponytail and i'm going to pull it to the side. I'M going to get a fine rat tail skinny, whatever just make sure it is tiny, a tiny comb and i'm going to take some more of the yellow got to be spray. You guys saw me use earlier for the back to slick it up to make sure it is completely sleek and laid down when it gets wrapped. So yeah, it's really self-explanatory. I keep calming it and spraying it and i hold the ponytail out the way and i wrap it around to my liking, and i don't know why. I play myself at the end of it and thought i could like just spray it and it would be glued down but make sure you tuck the end underneath the base of the ponytail. It will come out if you just leave it like that. So this is the final result of the ponytail and yeah. I hope you guys like it last time i did a ponytail. It lasted me for like a good week um, i tried styles, where i wrapped it up in a bun which i'm pretty sure i show you here, um yeah, oh here we go. Here'S the bun! So yes like, i will keep this in. I would make messy top knot buns if i'm tired of the ponytail. All of that, so i hope you guys, like. I hope you comment subscribe, share this thanks for watching you guys bye youtube. I begin you

Comments
A Human: Thank you hunny!!! It’s 2:57 AM here in Jamaica and I’m looking for a quick style to do when I wake up and this helped!!!!!!!!
Gorgi Zee: Tried this and followed every step! Love the result s ima baddie now thanks boo
JusShy: Natural hair loveeeee ☺️ I’m bouta go try this sis. Thank you!
Life of Eizzie: This was the best tutorial I saw thank you
Loraine Huggins: Love it's really nice
Deandra Fox: Your tattoos are fireee hair style is to.. def trying this today
Love Free: Very cool
KingNmommy: ❤️❤️
Black Furious Music: A Nice one I like it
arina arina:
Resa Dior Tv: Yes I like ❤️