Pony O Cheerleading Hair Tie Hair Bow Tutorial With Artemis In Love
- Posted on 02 March, 2015
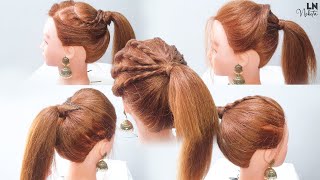
- Ponytail Hairstyles
- By Anonymous
I'm back! I have a brand new tutorial on how to make a Pony O Hair Bow. This tutorial is simple and easy only using a needle and thread, a hair tie and a glue gun - No sewing machine necessary!
Please leave a like and subscribe! Thank you!
Credits:
Link: https://www.youtube.com/watch?v=aPPbFc...
Different Heaven feat. ReesaLunn - Pentakill [NCS Release]
Different Heaven
➞ Facebook https://www.facebook.com/DifferentHeav...
➞ SoundCloud https://soundcloud.com/different-heave...
➞ Twitter https://twitter.com/DifferentHeaven
Hey everybody: this is Diana from harvest love. I haven't done a video for quite some time, so I thought I'd get back in there and do something so today, what we're gon na do is make Pony au pair bows and what I'm using here and you can use any pattern that you want. But I found a whole bunch of ribbon that I wanted to use with the color combinations here. I'M doing this at 15 inch 15 inches for each strip. I use 2 inch and a half, let's see here. What is this 6 7 8 inch and 2 3. 8 inch ribbon the ponytail holder, your need thread and a needle and then at the end, we're gon na add something to wrap around in the middle of it. So I'm not quite sure what I'm going to use yet. But it's gon na be some kind of ribbon. It may be this 7 8, I'm not quite sure, and so what you want to do is cut these at an angle. Here, 15 inches each free strip and you can use you can do less or more. If you want to depending on how long do you want it, and when I hit what I went ahead, it did was already cut these at an angle and then lit the ends so that that parts already finished and now what I want to do is start Putting it together so if you need to go ahead and pause, the video and and get yours cuts do put in mind that the different textures are good and different patterns and everything it's gon na make it look ten times better. So how we're gon na get started here is I want to put these at the bottom, so I'm gon na just fold this in half now I seen people do this with sewing, so they actually sew it with the sewing machine, but that's not what I do. What I'm gon na do here is just go like this and I'm kind of seeing where the half the middle is and if you want to so that's fine, that's all up to you if you want to sew it, but I'm gon na make this as simple As possible for you, so we're just gon na use a needle and thread instead of a sewing machine. Okay, if you want to use the sewing machine, go right ahead, mm-hmm, so I'm just put layering these together and it's not gon na make a huge, huge difference which way you go with it, and you can't cut these tails any way that you want to. It'S all up to you, so I'm just putting one by one and I'm mixing the zebra with the Chevron with the polka dot, and I just love those patterns. I just really really do and I absolutely love these colors together. I'M gon na do this one. It'S almost like a funky funky bow with um. Let me let me think here more MORE, I'm thinking more like a punk bow, maybe pump colors. Alright! So - and I really like this ruffle ribbon here - pretty will do this black one here and this pink one. This is like a glittery ribbon and I got all my ribbon from tons different places if I have a tutorial or not tutorial like a little review, video that I did about where I get my ribbon from and stuff. So if you need to you can go look at that and it should cover most of this ribbon here, except I think maybe this glitter ribbon, which I did get from Hobby Lobby. So now we got this last one through movie. So we want to make sure this is nice and strong, so we're just gon na go back through it again a few times? Okay, so I'm gleich this and then like this, we're just going to keep doing this over and over for a little bit. Okay, just because we want to be absolutely sure that it is gon na stay the way it is so I say my friends up your deeds. You look dad to me: okay, favorite champions and if okay, so I'm just gon na, go like this, and not it off back here, just with a simple knot like this a few times and then I'm also gon na go back through it and take this. So I went ahead and went back through it and I'm just gon na nod it two more times there we go. Okay, someone cut this off right. There move this around, so this is what ended up looking like it is so cute. So far right. We want to fold this in right here. This is, I mean it's pretty simple process, I'm folding it in, but I'm also folding the the one-eighth inch ribbon back. Do you see that so I'm gon na take my needle again, and I see people just glue it. Sometimes, and that's fine too, if you want to just glue it together like that, but I'm going to sew it, and I kind of you want to make it in the middle as close as possible to where you were just sewing. So I'm just gon na fold. It just like that, and it doesn't have to be exact, so don't don't worry about it and then I'm gon na come back again through here a couple more times just like this, and then what I do is I come back through here. Pull this little way through and then go through this night without this riveted here and then I'm gon na do that again, so you put that over there and then here this part, since it didn't go all the way. I am gon na. Take my glue gun like this and I'm gon na scrunch it down just go, run che just like that, and if you want to you, can you know, put a little bit glue in there for the layers. Now I have my ponytail holder this moment just so. It stays nice and tight. Then I'm gon na take the end. That is right. There. I'M gon na go just like this and bring it down just gon na glue it right there, okay hold it for a little bit. If you don't want to use hot glue, you can always use a different kind of glue, and then I want to tie some string around here. Some thread. I really probably don't need the needle, but it might make things easier. Doo, doo, doo, doo, see. If I can yeah right there - okay, so I just put it put it through, so it just keeps it nice and secure just I just put it through once and then I'm just gon na wrap this thread and if you have a stronger thread, I've seen people Use some ties for this part, some like zip ties, which, to be honest, I don't want mine super bulky and hard. So this is all I'm doing is coming through. Sorry, if you can't see it very well, but I'm just gon na keep going through and try not to poke myself and then I'm gon na go through here or at least try to tune on it off and I'm gon na do this twice. This video is to make it as simple as possible for you to use the stuff that you have at home. So if you want something a little bit more advanced you're, probably gon na have to watch. Somebody else does being perfectly honest with you. Okay, so I have it like this, as you can see it's very cute so far, and I'm gon na choose something to put right here, and I kind of want this, because it's so and so what you could do is do it just like that, or else You cannot it we're just a simple knot and put it right there, which I think it looks better like that, and I like this material. So I just put a little knot in there and I probably didn't need to go so far because there's look like this I'll show you cuz, we don't need much left over there we go and you don't want to tie it too tight, because you will kind Of want to have a nice big knot in there or, if you wanted to you, could just go like this. You see that okay, but I'm gon na use a little knot right there, and so what I want to do is glue. I have so much stuff on my glue gun right now, um right there glue put this here just like that, and then you're gon na bring this around and you're just gon na glue it to the back, like you normally would on a hair bow all on Cert hair bows that idea so and you want to make this as secure as possible, so I went ahead and just glued that flap down and then I'm gon na come back around and do the other flap there's so much glue. I think I put too much color on there. There we go and then we have just the spot and I'm gon na hold it down for a couple seconds. Take some of this off and voila. Look what we have isn't that beautiful? I hope you guys, like this tutorial um leave a like. If you did and subscribe, if you're new to my channel, I um I'll, be doing some more tutorials and continuing getting back into it. I guess because it's been a while, I'm gon na be doing a lot more here soon. I kind of want to get into the fabric hair bows, because I love doing those you can be so creative with it. So please stay tuned thanks for watching bye,

Comments
Veronica Oohlala: love it
maria lucia soares da silva silva: Ola amo os seus videos as fitas que você usa vende na internete min indica onde comprar se possível.
Lisa Quiñones: II need to make these for my customers!!
O. Snipe: You should make more videos widen the verietybof things you make like step up to cute decotations for around a house or maybe foods just an idea to help ya channel grow.