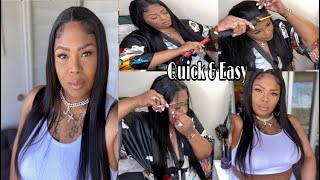
Easy Quick Weave For Beginners 2021
Everyone's NOT a Hair Guru! Enjoy this Easy Quick Weave Tutorial especially made for girls who don't do Quick Weaves!
See you in the Next Video...
Okay, guys, so to start with, you are going to need some hair of your choice. I'M going to be using this premium purple pack. This is the brazilian boutique, and this is 100 human hair premium blend. Now i got mine in the color jet black and, as you can see, it comes with a 18 a 20 a 22 plus a closure um. I probably will not be using the closure. However, it is there if i need it, and you can see this hair. Definitely has some length to it, i'm about five foot one, so this is going to be pretty long on me. You'Re, also going to need whatever glue of your choice that you're choosing to use i'm going to use the salon pro 30. Second, super hair bond glue. Just because my beauty supply store carries it pretty regularly, so i have a few of these bottles at home. Okay guys. So i'm about to wash my hair and go ahead and braid it up probably won't show that part, i'm not a great braider. To be honest, i just kind of do what i got ta do to get it together. I still have to decide if i want a middle part or a side part, but let me go ahead, get my foundation laid. I will show you that once i'm done and we can get started, i didn't really bring anything with me, so i'm just going to co-wash it right now and i went to the beauty supply store last night and i picked up this cantu strengthening conditioner with grapeseed Oil and shea butter - i love the fact that it's silicone free all right. You guys so just got out the shower. Unfortunately, i don't even have any like good stuff to like really just put on my hair. I mean, when i tell you, i'm just i'm so unprepared says so unprepared decide, like kind of where i want my part to be, because i'm going to um leave a little bit of leave out there and you guys can see. I put some like cream and stuff in here where i knew my part was gon na, be so i'll. Let that sit until i get ready to really just like do it or whatever so i'll. Let that cream and stuff just sit on there. It'S just like a little little hand cream. I basically had in my purse, so i'm just gon na, let that sit on there until i get ready to straighten this part. Where do i want my part and how far back do i want it? Okay, guys! So i'm going to start by going ahead and sectioning out my leave out. I like to do a side part, but wherever you want your part, you can just go ahead and put your leave out. So i have it right there and i position it about two inches deep in my scalp, so that way i can part and get a nice looking part. I also do leave out right there, like on my edges and on this side. So that way i can glue the hair in, and i still have a few of my like natural hairline, that's showing to me. It just looks a lot more natural. I am going to braid that up, so it does not get in the way. I already put some like cream and moisturizer on my hair, so i'm just going to braid it up the best way. I can. We all know i'm not a braider, but it is what it is. I put just a little bit of conditioner in there and i'm gon na go ahead and braid this foundation up. Okay guys, so i just got done braiding up my hair and i told you i mean first off. I can't braid so there's that. But this is what i'm leaving out this right here, this big piece for the part and then a little down here. Just so, none of the tracks are showing that's it. Everything else is braided up, so i'm about to go ahead. This is the only cap i have on me, and i just had this one because i was wearing it with the wig i was wearing, so i'm going to tuck this okay guys so, like i stated we were in kansas city for the weekend, so i did Not have a ton of things with me. I did, however, have an eyebrow pen, so what i'm going to do is trace the outline of my little leave out section because i don't want to put any tracks there. So i go ahead and trace um all three sections: i'm gon na be using this brazilian beauty supply store hair, it's not real brazilian, but you know what i mean so, of course, i'm gon na start with the longest bundle. This was 22 inches, which was super long on me just going to straighten it out and get to gluing. I like to measure, cut glue, uh blow dry a little bit and then affix it and to me it stays on my head a little bit longer and a little bit more secure. If i go through and spray with some got to be glue, i'm sorry they got to bleed to be spray, that's what i meant and guys. Basically, this is the whole process. If you have that whole little um idea down, you can do this and it's so easy. You'Re, just gon na measure cut glue, um blow dry and then a fix on your wig cap, and you are good to go so once you are laying the tracks in the back. I basically go ear to ear and just do that around now. Keep in mind your back like the hair, that's in the back is going to be of course covered, so you don't have to do it super thick, i'm putting about a one to two finger widths space between each track, but it all depends on how dense you Want your hair, how full you want your hair to look? I don't like the super thick wiggy look, so i was really trying to get some space back there. I basically use the hair, that's in the back for length and the hair. That'S in the top four like that volume and, of course, i'm just going to press it down blow dry it and we're just going to do this all the way up every once in a while. I do like to stop just to see how it's looking, how thick it's looking, i kind of like this. I like this length to basically like stop right here as far as at this point of my head, so i'm gon na go in with the next bundle. Keep in mind the bundle, that's in my hair right now is a 22 inch. The bundle that i'm about to put in is a 20 inch. I'M just going to go through that same process, we're going to brush it out, unwrap it and go ahead and start laying it in my hair. Now, on this side, you see where that line is where my leave out is i'm just going to stop the track right there and i'm going to give it a slight curve up. So that way, it's going to fall naturally and it's going to fall in a way to where it's covering any other tracks that are there. So i zoomed in so you could see it. You see how i actually i'm partially laying it on that line and then i'm curving it around. From my experience once i curve the tracks, actually they fall a little more naturally and i don't have any unsightly tracks showing so hmm so after curving it slightly on both sides. I'M getting to the point now where my leave out section is there in the front, as you can see so at this point i am going to start laying the tracks vertically or horizontally, depending on which side you're looking at it from. But you see how i'm measuring i'm going ahead and gluing blow drying and then i'm just going to lay it right there horizontally and that is going to cover any of the remaining tracks there at the bottom. It'S also going to give me a very natural, like the hair is going to fall naturally, so i love doing this now. If i could do this over, i would have definitely done a black cap because good lord y'all with this tan cap, it was a struggle. However, this is what i had so i just had to basically work with what i had at the time. I'M just going to continue um laying these tracks, and you see where that line is where my leave out line is that we drew right there. That'S where i'm going to end the tracks, because everything between that line is going to be my natural hair and that's why we braided it up to make sure that um that did not have like weaver glue or anything on it. So i'm just going to lay a track right there and then we are going to you see right there. How my tracks are in that semi circle, where my leave out was now we're just going to cut that cap. I didn't have very sharp scissors with me. Um, i actually just brought scissors to like cut tags off of new stuff that i bought while in kansas city. However, if you are doing this at home, you can use good scissors, sharp scissors or hair scissors to give you a really close cut, because you can actually still see some of the cap right there just because i couldn't get close enough to cut it. Be sure. Also at this point be very, very careful how you're cutting, because you don't want to cut your hair, so i've cut my cap off, but i like to go one step further. I like to put one more track down on my natural scalp right here, just to make sure that once my leave out is out, you can't see the gap between my hair and where the weave starts so just a little tip. You know if you want to be secure, and i am just so excited right now - y'all, because i'm finally done now. I did not film the straightening out the leave out i'll do that in a different video. But thank you for watching. Welcome back to the channel. Don'T forget to give this video a like, and we will see you in the next video bye guys you


Comments
S J: Thank you for doing this because that made it much easier for me. Also I feel you on using a black cap but I'm kind of glad you didn't for the tutorial because it was easier to watch what you were doing
AdjustingMyCrown👑: Your natural hair is GORGEOUS I WISH I had curls like yours I'd never wear weave!! I know you hear that all the time I apologize for saying it again I know it's annoying!