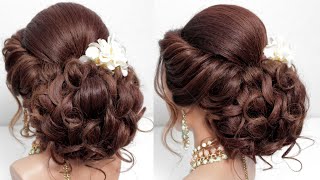
Twisted Updo For Fine Hair Hairstyle – Get Long Lasting Volume!
Twisted Updo for Fine Hair – Get Long Lasting Volume.
Welcome back to another tutorial.
This twisted updo hairstyle is great for fine hair and creating long lasting volume so it stays in place for hours. Its another hair up tutorial from my playlist this time for thin hair.
A messy updo, that gives the illusion of more hair, so fine thin hair looks thicker, which is perfect for an event or wedding hairstyle.
GET YOUR FREE GUIDE:
https://mailchi.mp/4f0e95900f4e/comple...
OTHER USEFUL VIDEOS
CREATING LONG LASTING CURLS
If you found this tutorial useful please SUBSCRIBE AND HIT THE BELL to be notified for the next videos.
______________________________________________________________
|| PRODUCTS ||
WELLA SUPER SET HAIRSPRAY
BABYLISS PRO DIAL A HEAT 32MM
___________________________________________________________________
|| FACEBOOK GROUP ||
If you are looking to connect with others, exchange tips and techniques and support the HJ community, then join us here:
https://www.facebook.com/groups/225486...
________________________________________________________
|| SOCIAL ||
Facebook: @HarryJonMakeupArtist
Twitter: @HarryJonMUA
Instagram: https://www.instagrm.com/HarryJonHMU
#FineHair #TwistedUpdo #HarryJonHmua
DISCLAIMER:
This video is not sponsored but may have some affiliate links that allow you to find the items mentioned in this video.
This is at no cost to you and does not affect your buyer experience. I’ll receive a minimal sum when the viewer uses the link but you are not obligated to use these links. Anything I promote, I like to use and am excited to share with you, the affiliate links help support my channel to share more valuable content and training.
Thank you for your support!
If you're looking for more tips and advice on working with fine hair - and you will love today's video, this video is creating this hairstyle model today and she has extremely fine. It'S like the Finan around the hairline. As you can see in this video, I work with tons of clients exactly the same. You struggle with making more volume in the hair, making curls last and are always mesmerized by how their hair looks after they've had the hair done. Also this Wednesday, if you are looking for DIY hairstyles, I'm showing you how to create this on yourself, also a download on a complete guide to starting out some a capacity. If you are excited about this, video then hit subscribe and you will be more videos just like it coming along. It is anything specific that you would like to see drop me in the comments, and, let me know at the end of video how you found this done. This set all back off the face. It'S all going up and it's going to come back into a little bit of a nuts at the back into bubbles. This is going to be structure underneath will leave some pieces around the hairline when I go for one of these soft whimsical, on-trend styles. At the moment, I'm gon na make sure this is tight, but not too tight. So if it's obviously got a stayed quite a long time that comfortable yeah, you should cut a little piece, half a piece of a small donut. I'M just going to put this underneath the head, I'm taking hair, pin so we're going into the donut as before and then pushing down, so you get always against which area. So, if you're going across this way, you go across or down. So it's always gon na walk into that bubble at the back, probably need about four six of these pins and just make sure they're, nice and comfortable. So again you don't want these too tight. You just want them to hold that in its place. The sides are going to come in on the round, so we want to make sure that the size blend into this section we put in the brush and about two inches away from the root pushing down keeping the brush in and coming back going back. We only need a delicate amount. We want to make sure that this is going to last for 12 hours tickling. This is going to be a bride. Then there so you're, literally getting all your hair into place where it's going to be pulled in, but somebody into this section taking forward put a little bit of a lead in there and then taking that back. Then I'm just going to use fingers to tease this into place where we want it to go. So I'm really breaking up the back Copeman, but we're not taking any back combing out we're not smoothing up believing the texture through, so it being fine hair. We want to create a little bit more wrap, so we've tried to do it. The way that would normally be done on something that you would see. Quite often our tutorials are online at the moment and I'm fine hair it just will not. Today, you could have tried crimping into grit, but personally I think that even crimp and can drop because crimping can settle just like a curl. So we're going to put a volume in we're, taking it babysit one side and put a half in on this side, and you take a little piece from the other side. So we're almost going to do the braid or by pin in it so we're keeping the shape and the crisscross. We could manipulate the blend to make sure that this stays nice on the shape, but now that is going to be much stronger in shape this. If it's not too fine, you could put a little piece of dough. Personally, I don't like those bump ones. I think they can give you a bit of an artificial shape, but if you take a piece of dough knot - and you cut this into small sections, you can place that at different intervals and Hanna you don't get too close to where your hair is here, because If you can see scalp, you need to go further back and then you'll know if that's going to be hidden, but it'll just help create some structure and stiffness and give a bit of more evolution of the thickness there. So that's another option to try and now we're going to stay with where we're going. Take this over this side. I'M gon na take this and this way and then just repeat that all the way down so take these from here. Keeping that drape nice sides split the section into two into smooth out around the edges. So just look for, say: let's go to any race or anything like that, but we're still keeping the texture in it. Man this side is gon na go over this way. Hey tails wasn't a pin together and they're gon na walk into that doughnut, so the dome not being quite gritty will help keep that happiness. It'S not going to slip. Oh that's! To get there. We'Ve got this softness around the bottom of the neck. It'S just the tails there no loose missed a bit, so you wan na make sure all those nice secure, but it been elusive style. If a little bits fall out, it will actually look quite pretty, so it doesn't necessarily matter. But one thing I'd like to do is with the loosest eyelets make sure it's all in place, because if she's gon na be going for 12 hours, we want to make sure all this gon na last and we don't want too many pieces falling out too soon. Yes, would you start starting later and things like that, then, if pieces fall down, it was still like part of style, but what you don't want is all those pieces to be fall down before she's even gone anywhere, and then it needed took channels or she said, Worried about her phone that the rest of the day don't forget has finalized. So then we work in a small area and I come to these side. Parts meant a little bit more --, because these are lipid rates into back of the hair. So gently go in to grab piece for hat and just pull them around, so I'm going to start manipulating it right once keep as much volume as possible. So we've put a little bit of back combing through that. Take a pen into this short section, pushing up against where we've just come from, leaving those tails that'll be fine that and then we're just gon na lift that little section out. So we've got this illusion thickness from the from leaving this bit fringe free. Take some this here is that a little bit softer so we're just gon na take a sliver of hair close to the hairline and pull a little bit of backcombing in it's nice and closer to how I do it. Guess they swish and lift straight out and then that will sit much better. So you don't want to take you back home and brush you're, just flicking it on the edges just to get rid of any wispy hair. Then you spray that against it. So more spray and do the same again twist in this back and then we relate that into the hairline. So it sits out a little bit thicker. It'S not going to come up too far at the sides of the head, so she feels uncomfortable. You want it to stay nice and modern, so it will sit nicely from the front back. It'S going to drape nicely into what was already done through the back thanks for watching guys. Don'T forget, there is a link below for you free download on the complete guide, starting as makeup artist, and there is also a link to this video for how to create the curls that we did in here. Thanks for watching. I hope you enjoyed this video and I will see you on the next one.


Comments
Harry Jon Hair & Makeup: What is your hair type AND Do you prefer a smoother or messier look?? Let me know below.
Ro & Adam Clausen: This is beautiful. My hair is as fine as hers with lots of texture that thankfully helps give the illusion of volume. I have a wedding in March. Going to try this updo. Thank you for showing one for us fine-haired-ladies !!!
Social Confidence Mastery: My friend needs to watch this!
Jay Jay: This is just sloppy.