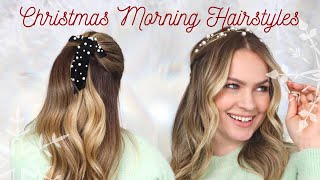
Wedding Hairstyles You Can Do By Yourself!! - Kayley Melissa
Today I’m showing you guys wedding hairstyles you can do completely by yourself! It has been a while since I’ve given you guys some wedding hairstyles and today I’m making up for it with all the wedding ideas! I have some half up half down hairstyles, how to do wedding hairstyles for long hair and short hair, and even a messy bun updo option! I hope this gives you so much inspo for whatever occasion you need to do your hair for!
Keep your hair game strong, subscribe! → http://bit.ly/2p3RSRk
---⟣Products I Mentioned:⟢---
Formal Curls
Mouse: https://amzn.to/2FH3DtB
Primer: https://amzn.to/3hGjl57
Heat protectant: https://shopstyle.it/l/bmAt7
Light Hold protectant: https://shopstyle.it/l/bmAt9
Curling Iron with clip: https://amzn.to/3cekcc0
Curling wand: https://loveamika.com/products/the-cha...
Pearl pins: https://etsy.me/3iPBbnS
Pear star barret: https://etsy.me/33Hkq7W
Easy Twist
Bobby pins: https://amzn.to/3cekcc0
Frenchies: https://amzn.to/35NBZWt
Pearl pins: https://amzn.to/35U9Vkt
Braided Half updo
Brush: https://amzn.to/306AoYn
Star pins: https://amzn.to/35NBj3n
---⟣Follow and Chat with me at:⟢---
❈ Instagram: KayleyMelissa @annalaura_erickson
❈ Twitter: @kayleymelissa
❈ For business inquiries: [email protected]
---⟣Mailing Address:⟢---
Kayley Melissa
4441-106 Six Forks Rd #165
Raleigh, NC 27609
FTC: This Video is not sponsored. The links above are affiliate links, which means I make a small commission if you purchase through the link.
Hey everyone kaley your friendly neighborhood, hair stylist here and today we're gon na. Do some diy wedding hairstyles. I wanted to take it back today and really focus on hairstyles that you can do on your own, but specifically this time i wanted some great formal hairstyles that are actually diy-able. You don't need to be a super braidaholic for this one. You just need to be able to do a few basic things and i'm going to show it to you on my length of hair, but also on my sister's, really long hair. That way, no matter what length, hopefully you'll be able to replicate this at home, and i hope that you guys really enjoy it for whatever formal event you guys have coming up. So that being said, let's get into it. So first things: first as somebody who does actually style wedding hair, i think one of the most important things is having the texture be perfect, because if you don't have lift volume polish, whatever you're going for before you do, the updo you're not gon na, have it. After so, i think the very first thing we should talk about is prepping and curling the hair, so my hair is naturally fine and flat and shiny, and so for an updo or for a formal hairstyle. I actually need some more volume. Some more texture hold and i can sacrifice a little bit of shine so today i've used a volumizing mousse and a volumizing primer in my hair, and i feel like she is big and then i'm going to be using a heat protectant with some hold on my Hair now, if you had more frizz prone hair or your hair, has a lot of volume, naturally i would say you would do almost the opposite. You would focus on smoothing on getting your hair, really nice and deep frizz when you're doing your blow dry, routine and with the products that you're using that way, you still have really pretty curls. Your hair is going to give you the texture, naturally, and that way, you're just taking it back to a more styled place, whereas i have to add texture to get to the style place so whether you're taking texture away or adding it in we're going to meet Here, i'm going to be using a one inch curling iron, because my hair does not hold a curl as well. Also, if you're going to be putting your hair in an updo, the curl is going to stretch out. So you always want to go a little smaller than you think you need to so for a more relaxed wave, curl look. I'Ve got a one inch curling iron, then i'm gon na be going in sections gon na go ahead and apply my heat protectant, i'm using the one. Eight hundred hold me. You guys know. I love this. This is gon na, be the move for anyone whose hair does not like to hold a curl. Now, if your hair is okay with holding a curl, but it likes to frizz out or get extra texturey, i really like the bumble and bumble bb glow heat protection. Mist alrighty and then we brush it in and we're ready to curl, so the curl method i'm going to be using is really easy. You can do it with or without a clip on your iron. If you have a clip, hold it open, take your section wrap it around and if you have the clip, let it close then just let everything heat up. It usually takes about five seconds and then you're gon na take it off, give it a little tiny tug. That'S it and then you're, just gon na keep doing that all throughout your hair and anna laura's gon na be doing exactly the same thing on her long hair. If you want to get fancier with the curls, i have so many videos on how to curl your hair. It'S insane! If you know you don't end up loving this one. I have a whole playlist for you and then for these really short pieces that i cannot physically wrap around. I'M just gon na do a normal little curl with those if you're gon na do a half, updo or wear your hair down. Some way, i think doing the little tug at the end of the curl is really good. If you think you're gon na put it up, i would not, because you just want the curls to be as tight as they can for that updo like i said they get stretched out, i'm gon na. Let the cast sit gon na. Let them just keep cooling. We'Re almost done. I took this last section in two, so i can make sure to get every single little curl and girl. I did i mean this is the difference between like a normal hairstyle and a wedding hairstyle is that you do need that longevity? So you want the curls to sit and cool. You want them to have a little more hold than usual. Now, when i say that, like these are still touchable very they're, not crunchy they're, not crispy, put the firm hold hairspray down. I'M just saying you do want to make sure you're taking small pieces of hair and that you are adding in products that add hold, if you need it alrighty and then to break these up, i'm literally just gon na like shake at the roots. If you're gon na be styling it you know, you can give it a little shake. I wouldn't do too much because, as you take your pieces to do the hairstyle all of that, it's gon na break up on its own, but you know you can give it a nice little shake just to break the cast up all right. So that's the curls and you can wear obviously just down in curls. Adding the extra little elements makes it more than your everyday, like i wear my hair down and curled almost every day, but this is still new, but also adding in a little accessory. That makes you feel super bridal can be nice too. So i just pulled a little piece of my hair back and i clipped it here and then for anna. I did a little like sweep and pin with these three bobby pins. You can get pearl bobby pins everywhere, it's just like a little like little saw and that way, if all you can do, is curl your hair, you can make it bridal and still really enjoy it, and the extra little steps of adding in mousse and like curl, Holding hairspray or heat protectant go a long way. They do, and also this shape is not something i typically wear. So this already feels more formal, like just having literally one side, tucked back behind my ear and a little sparkle like this feels very fancy to me, because i always when i curl it. I just wear it all in the front and i wear it down so yeah. The volume feels fancy for me and all the definition in these little curls. Okay, now for the easiest half up half down this one is good for somebody: who's not used to doing their hair practice. This a couple times and you'll be good to go. It'S so easy, if you add in your hair accessories, it's gon na look like you hired someone you're gon na start by grabbing a large section of hair from the front and for the short hair version, we're gon na kind of pick up hair as we go. I'M also gon na leave out anything that i want to frame my face. So here's what we're starting with you're, going to twist a couple times then you're going to pick up some new hair next to that twist, just a little and then you're going to twist you're going to pick up a little bit more hair. Put it with it and twist, and you should just about be able to reach the back by now, but if you want, you can pick up one more piece of hair. The key here is that you don't want to pick up big chunks of hair. You want to leave a lot of hair down, so your hair looks nice and full and it takes less hair than you think. So maybe like half a drinking straw thick with these sections that you're bringing in unless you have a ton of hair, then you can adjust accordingly. Also, what's that like the most important thing here, is that you want to take that twist to the piece of hair. So i twisted, i picked up a new piece of hair. I took the twist to that hair, not the other way around you're, basically just continuing to take the twist and let it like travel around your head and you're just giving it like little road stops along the way so from here we're gon na pull apart and Depending on your comfort level, you might want some bobby pin first or you can just hold on to it. Whichever way i'm gon na hold on to it, if you were gon na bobby pin it, you would just put a bobby pin right here to hold your place well, what i'm going to do is take my thumb and my index finger and pull the tiniest pieces Of hair that i can to fluff up the twist just a little bit and once you have it where you want it, you're going to take your bobby pins and you're, going to pin up into the twist like they're going through a tunnel. And the twist is the tunnel you want to do at least two or three bobby pins to make sure it's held really securely and now we're just gon na. Do that exact same thing over here, so i'm gon na grab some and i have less hair on this side, because my hair is parted this way. So it's okay! If this section's a little smaller than the one over here twist pick up our little piece. Take the twist to the piece and twist, some more once you've got that twist to where it meets the last one. We just did you're gon na go ahead and stop pull it apart and then pin it in place all right. So that's the half updo and now, if you want to make it a little bit more something you can add in some accessories, i'm gon na keep going with these pearl bobby pins and just dot them around. Where the two twists come together, which could be a good tip for covering up any little bobby pins or anything, that's sticking out at this point, okay, so the long hair version is basically the same, but you don't have to pick up more hair as you go. Oh nice, so you just get to pick up a big old piece of hair twist it loosen it up, pin it in place, wow yeah honestly. As long as your hair is long enough to reach the back without picking up more hair, you can do it. Wow! Okay, yeah all right sounds good, get to it. I'M just gon na leave down some pieces in the front because kaylee just cut me some face framing tendrils yeah, yeah, okay, executive decision, because kaylee's in the other room, i'm going to take this little piece right here and go ahead and pin that in place. Because my cowlick is crazy and if i take the section from the front - and i don't add it into the back - it's just not laying right. So this is my little hack for this. I approve this hack, i'm just literally gon na section out the part of my hair. That gives me the most trouble gon na smooth it out. I'M gon na lay it down, go ahead and pin a little basin. Now i'm going to repeat the same thing on the other side, what i am going to say about the little piece you pulled back is that you can see like where that little piece is, and then the rest of the hair falling, and it might not be Showing up as much on camera, but that's going to look, you can pull apart the hair that you pulled into the bobby, pin and kind of fan it around, and it should hide the stuff pretty well, ideally, you know you want to do that before you. Do the twist, but it is something you can fix after the fact. If you end up here, we have like a nice straight line going on this side and so over here, if you, you know, take a little look in the mirror, this one's kind of drooping, you can just pick it up and we're gon na pull back a Little so there's no slack and then pin it right there and between those two maneuvers we have made this look a lot more professionally done, a lot more symmetrical more secure all the things. Another thing i love about like a simple half updo like this, is that if you are wearing a veil, this is something that's really nice to be able to pin into because your veil comb does need something to go into, and it helps to have just something Simple like this, and it also frames it so if it's sitting here, you have hair, that's cascading back into the veil and i think that's a prettier. Look in my humble opinion - and you are welcome to disagree with me - to have something that's going back into the veil than to just have the veil sitting and i am going to say, if you're going to do your own hair for your wedding or whatever. Just go ahead and buy some frenchies, it's going to make your life a lot easier. They are like velvet hair pins and they stick in really really well. They reposition easily, if you need to, but they won't fall out during your day and next we got ta. Do something braided, obviously - and i thought let's just keep it as easy as possible - all right first thing: we're gon na do is take our large section from one side in the front: let's do a little evaluation. First, let's take down any tendrils that we want. Next, let's see if it gets close to the back of your head, close check, you're good to go all right. I'M gon na drop this out. You want basically this like two to three inches right here and then you're just gon na go ahead and hold it back in the direction that it's gon na go and do your braid of choice. Whatever braid, you know, you can do do that three strand braid fishtail braid, maybe a rope braid. I don't know whatever, whatever feels good comfortable and easy boom alrighty. Now we got to pull this thing apart and there is an art to the pull apart. So first thing you got to do is get some slack in it. Pretend like you're, loosening shoe laces start from the bottom work. It up, get some air in there and i'm gon na do one more time. Just for some extra slack, all right, you feel warmed up. We just got warmed up and now we're gon na go through and pull each individual link trying to pull the middle of it and the outside of it. You don't want to just pull on the outside, because if you do that you're going to end up with like a skeleton bubble, the whole thing's not going to come out. So you want to position your fingers on kind of the inside of it and pull out, and you might find as you go up, that the volume you built at the bottom is coming out and that's okay, you can always go back and re-establish that start from The bottom work all the way up once the top is as bubbly as you want. You'Re just gon na go ahead and leave the top. There then go back, look at the bottom and be like oh there's a little skinny spot there there's a skinny spot there. Let'S pull apart, it's okay! If, at the end you need to take the bobby pin off, sometimes that makes it easier hauls it with a bobby pin. Braid number one is then again going to get as much as we can on this side, even though it's a little shallower, you can do whatever part with this you want, you could do a center part. If that's your thing now, here's another trick you can use. If you want to get your braids super fluffy is to stop every couple inches and fluff it out that way. You can go ahead and get some of the slack out and loosen it up a little bit all that now we're basically going to kind of pull the top half to the back and then we're going to bring the braids into the side, because your braids might Not reach to the middle and the back mine almost do so. This is a good way for you to cheat. If they don't i'm just going to take a hairbrush, you could take a teasing comb and get fancy if you want, but you know not necessary. So i'm just going to take the hair up here. I'M just going to do a quick little tease, just like tiny backcomb. That'S all we're just trying to knit the hair together. So if you have a cowlick or anything it'll all be chilling back. Okay! So now we're going to collect all the hair from braid to braid watch. These sides make sure that they drape nicely next to the braid. So when we pull this back, she looks good. So you want them to kind of make these little swoops on the side. If they're going straight back like this, that's not the move, you're revealing your seams, not the goal! What seams we don't know her! We'Ve draped the hair nicely now you're going to do just one twist, just one little 180 and pin that in place got your hair. All together, it's looking nice 180, just like that, and now pin it like a pincushion and if it's a little messy, that's okay. This is our more like effortless beachy moment anyway. So now, i'm gon na take one side with my braid. I have this little piece that decided to not go with the twist, so i'm gon na pull that back, pull the braid back and i'm just gon na give the end of the braid like the tiniest twist. Just like that, and then i'm going to hold it and pin straight in to everything we have going on here and now you do the same thing with the other side, taking that little twisty twist, all right tucking. Her, in only thing i want to fix, is that i have some bubbling up here in the front and that's just because i didn't hold the hair back at the angle really well, when i started, you always want to hold your braid and the angle that it's Going to be sitting so all i'm going to do to fix that is, take the little bubble. That is sticking up, and this actually looks like it's kind of rogue right like i have this nice piece and then this guy is just doing its own thing. It'S just going to push them underneath just kind of like hide them down a little bit and then use a hair, pin kind of give them a little break. You know just let them chill. I see this like little guy. This can always go underneath the braid. Always just hide them away, say what we don't know about that: what bubbles the bubbles here! No, the braid is perfect. What come on, if you have a hard time, hiding pins and stuff uh accessories cover a world of sense and or bobby pin mistakes, and that is basically the same thing for the long hair version as well. I just need to flatten this one against my head a little bit more there's a little bit of gapping here, because the slack i left in it to make it big, no problem just going to weave this back and forth in the braid. I learned that from one of haley's other videos - okay, lee, oh i did it. Oh wow says you look: okay, yeah! It looks good yes, so i'm gon na take some of this hair and pin it forward over your ear underneath the braid. Now we don't have it you're peeking through yay. Look at you! Oh, my goodness. This is really why, like i even walked away like i was just chilling. She was like peace out trying to decide if you need some essential wreath. I think my golden rule, when you're doing hair accessories, especially when they're bobby pin ones, is like hold it in place and see if you like it there before you stick it in because taking it back out is not easy, i will say you can put accessories In on your own, but if they're going in on the back of your head, maybe just like ask a trusted friend: oh he i made these sorry forgot guys. I try to only put stuff in here that you can buy i'll try to find something similar. I made these for staff's wedding, but the pearls weren't the move, so we didn't end up using them. You love a celestial moment. I really do and there's your braided option. I love it because you do get all the bohemian feels, but it's not that difficult. Of course, if you want even more brady formal options, i have videos on videos for you, but i do love this particular one. Okay, to finish this out, let's turn anna's hair into a quick updo. This is like a little bit of an ode to her wedding, because you did your first look and all those pictures and then you were like. I think i want to update you for the ceremony and i was like it was literally in that moment. I had five minutes and i was like okay, you want enough due for the ceremony you're going to have an updo for the ceremony and inside i was dying, but this is what i did and it took just a few minutes and it looked so good. So this you could do with either one of the half updos that we already did or any other half updo that you find in love easy peasy do you have have to first meet me here, i'm just gon na say frenchies. There were so many of those in my wedding get frenched what and laura actually has a heart out. She needs to go so we're just gon na. You can do this on your own, though promise yeah you're gon na split the hair in half just go ahead and chuck one half out of the way, and then this half, whichever one you want to start with you, can pull back or leave down whatever pieces. You want and then you're just gon na wrap them around each other, really loosely clear elastic to hold your spot. We'Re gon na make a c shape right here with this side and then, when we do this side, we're gon na. Do the other half so you're gon na go around here and the biggest thing is that you don't wanna, put it over the braid, so use your hands, feel where the braid is or the twist or whatever you can even lift it up and stick it underneath. If you want, but you want it under that then you're going to grab your pins and just go to town, and you want to go ahead and nestle these ends inside all right and then you're going to be able to mess with this a little bit more Later so, we've got the shape. Take this side back basically same thing: i'm gon na do this number twisting away from the face on both of these, so you can pull it down like this. If you want - or you can kind of look over to the side and do this number real, quick and just pin a little piece up, if that looks good to you and then you're just going to finish out the shape of the bun, so i'm going to Nestle this inside of here pulling the pieces on the sides back as well, just because i like to have that little swoop into it, and because you already have the pretty curls in the hair, like the curls, do most of the work for you. You just have to get the pin in all right, and i do remember that i left some of anna's. Little ends like this one out, because i liked how it looked that one's all up to your personal preference and then now that everything's kind of in the only thing i have left to do is fix this little hole right here. I'M just going to pick up this section, i'm going to just fan these little guys out because i like them, oh bye, i love it. Yes, oh my gosh. I feel so ready to get married again. It'S the same person just again, but that's a similar way to do it. If you do have a lot of hair. Another thing you could do is put the hair into two pigtails in the back before you twist it, and that would give you more to pin in too and a little bit more security that way it doesn't end up feeling loose at all. You just want to make sure that everything going back into it in that case stays loose and not like a tight little ponytail right here, all righty, so we went through several different hairstyles. I hope that you guys enjoyed it. You can customize these as much as you want. You can make them more shiny and princessy and blingy with just tighter curls and more accessories, or you can make them a lot more chill with looser, curls and just generally messier texture. So whatever you're feeling you can make happen and you can do it, i think it's fully possible. Yes - and i really hope you guys give it a try tag me if you do best of luck, congratulations on whatever's, going on give it a little practice shot before you. Try it on the real thing yeah, you totally got it as a procrastinator. I understand that you might want to wait until the day of just don't practice it a couple of times, you'll feel so much better, but that being said, i think that is it for today. Don'T forget to comment down below and tell us which hairstyle was your favorite. Let me know if you have any more hairstyles or videos you want to see from me. I think that is it for today. So if you did like the video, don't forget to hit that like button to help support the channel and if you're new here, click that subscribe button to join the braidaholic family here on haley melissa and all of y'all can hit that bell icon to be notified. Every time i post a new video, that's it for today, whether you're, old or new, or a casual lurker. You stole that from me. Thank you for spending time with us and i'll see you the next video bye. Our outfits today are brought to you by my engagement session of my life. I have like so many white things from when i was engaged and then you will never wear it again. Cosigned retweeted, this part of my hair, wants to be wavy, so bad but the rest of it. Doesn'T i don't know what to do.

Comments
Robin Ruane: Word of advice : if you're going away for your wedding and doing your own hair, do one more practice run there! I totally forgot how curly my hair gets in sea air and my planned style wasn't even possible to attempt. It all worked out great but I never thought of that!
Legally Caroline: Now that I know how to do these, all I have to do is find a husband
Noel Montgomery: This is such perfect timing because I have a wedding in three weeks! You’re the best Kayley!
shesaysdisco: These are all so pretty! I did my own hair for my senior prom (8 years ago, what?!) and this is making me wish for another formal event!
Hannah Dare: This video is soooo beautiful thank you Kayley. Also, thank you so much for introducing me to Brené Browns work. I think you first mentioned one of her books in a sit down and chat type video many months ago and then of course again in your recent self care video. I have already listened to the power of vulnerability on audible like 3 times! It’s life changing and all of the things my soul has been saying but not knowing how to express all of my life. Thank you for being such an inspiration to me. I don’t even know how long I’ve been watching you... like 10 years? You inspire me in so many areas of my life. Thank you for being so open with us and letting your growth and wisdom in life trickle down into the lives of so many others. I love you, Kayley!
fksongbird28: Kayley...can you show sometime how to hide layers in braids so they don't pop out everywhere? I just got some long layers and it pops out all over the place.
amy: I love how you do hairstyles we can do by ourselves, its so fun watching your videos and trying them out at home
Nidhi Vaidya: I'm not going to any weddings or getting married but you best believe I watch every single KM vid to support my girl (and AL ofc!)
Colinda Schutte: My brother’s getting married this Monday, so this is seriously at the right moment, thank you both! <3 Something I would like to ask if you have tips/tricks on; I have a LOT of hair and it’s getting fuller due to me greying out. And my problem with any form of braid/updo is that I always have like one small spot on my head that my updo/braid seems to pull on. Any tips on how to fix that? I am quite sensitive so I’m not sure if it is fixable, but any tips/tricks would be very welcome. Either way, thanks for all your very clearly explained tutorials and can’t wait to see the next one <3
Raquel U: So funny, I literally wore the braided half-updo on my wedding day (but with fishtails) and my bridesmaids wore the twisted half-updo! They are so classic! I got a hairstylist friend to do all the hair so we didn't have to stress, but totally agree that you could do them yourself.
Sara DePasquale: Thanks for this video! I am not someone who "does" my hair very often and needed to for a recent wedding. I ended up using option 2 here and love the pulled braid look. Will definitely use it again. I'm also excited to finally know how to curl my hair with a curler for a more polished look. After I blew it out it wasn't super excited about holding a curl so will have to play around with that in the future.
thesorry girl: Thank you! My husband and I are going to be getting married (by ourselves at the signing place.....cannot remember the name) so this is awesome for me.
shir35303: The second style was my favorite! I also want to keep my natural curl texture (2b-3b) and I always just wear my hair down. This looks do-able! Hopefully, I'll be able to rock this and do it on our wedding day. If you can show something similar on natural waves/curls it'll be awesome! than you so much!
Elise Drouillard: This might be your best tutorial to date. I love love love how well you explained everything. This was amazing! You both look so incredibly beautiful, too!!!
Christina Faglier: I would LOVE to see a video doing wedding hairstyles with AL’s natural hair! I feel like I always see wedding hairstyles of straightened and curled hair but barely ever any with natural curls or waves!
lubna s: I needs to know what you are wearing throughout the video kayley...that top/dress is GORGEOUS Edit: did I tell you that you both are ridiculously pretty? I feel like I say that in all your videos. Okay I'll go now.
Nika Mrak: This is the perfect video!! Tomorrow I'm doing my cousin's hair and makeup for a wedding, so wish me luck
Lilly Walling: Because of Kayley I was able to do my own up do for my cousins wedding. I was asked last minute to be in the bridal party, and I needed a hairstyle. My cousins were so shocked that I did it by myself
Eva Sobenes: I love these hairstyles, can’t wait to use them! Y’all have helped me so much, thank you!
Thread Well: I’m getting married this week and am doing my own hair - going to do the twists style!! Thanks for the helpful video
Elodie Grenier: The outro you did together was so adorable ! And I’m definitely trying one of these at my next event
Amberle Fullmer: I'm starting cosmetology school next month and my welcome event is next week!! I love the boho braid look and I think that it will be so cute for that special day!
Bailey Alexandria: I’m so glad to have this. I’m doing the hair for my brother’s wedding so I love this
Jessica Hofmann: THANK YOU This ist exactly what I needed for my wedding next week!
Shannon Morken: Thank you for this! It was really easy to follow and worked well, even doing it myself.
Kayla Furst: It's so damn hard, just to do a braid sometimes. And, then trying to style them. I feel like I mess it up after I do something with it haha Then I get discouraged, and don't go back to it until I see another of your videos haha and I keep trying but it's so frustrating sometimes!!! Thanks for all of the inspo and encouragement
Rachel Mellema: You posted this 3 hours ago and I just started getting ready for a wedding & this was the first video that popped up, thank you
Alyssa L.: my original wedding date is tmro so this came just in time for our little at-home celebration!! ✨
Ditzi1000: Thank you very much for showing all these hairstyles possible for shorter hair. I'm getting married next week, so this is a perfect tutorial
Sierra Zamora: these are all so beautiful!! Thank you for the tutorial and advice! So excited to try these
Mandi Sadler: I love this!! I'd also love to see a super advanced braidaholic version of wedding hair. Half up with braids on braids, a really complex looking updo, you name it!
Marinette Roux: I'm getting married in December. I can't decide whether I want to keep my hair long (a bit shorter than Anna-Laura's) and do a very relaxed updo... or if I want to cut it similarly to Kayley's and do a loose curl vibe. I'm not very big on updos, but I also don't want to regret the cut.
Katie Suing: Thank you SO MUCH!! I'm getting married in two weeks and I've been stressing so much about how I'm going to do my hair
SnowClover: This is exactly the sort of hair style I want to do.. I'm really good at curling my hair so why spend $100 I don't need to for someone else to do it.. thanks so much for this!
Danielle Stark: Yesss! Thank you so much I am not good at doing my own hair and I have a formal banquet very soon so i'm so excited to try out one of these hairstyless
Nicole Segerstrom: THANK YOU SO MUCH!!! this is the first video I’ve found of wedding hairstyles to do by yourself.
Thao N: I'm getting married next week, this was perfect timing!
Angela Spenley: This was amazing!! Thank you so much Now time to try on myself!
Bee Elle: Thank u Kayley! My brother is getting married this coming 2021 and I am so happy that you made this video for references and ideas
BCCCFweirdo: Thx this is really helpful! Looooove your work! ever since we have gotten wifi ive subscribed and turned on notifications and enjoyed feeling beautiful with your hairstyles
Kodi Hackenberg: Omg! These hairdos are so pretty! I have a wedding to go to and I don’t have anyone to do it for me so I have to do it and it looks so easy and pretty!
Caroline Parks: I’m going to one of my cousins weddings in 14 days and I need three different hairstyles for the bridal lunch, rehearsal dinner, and wedding!
Pauline Stier: Thanks for the awsome work! Always inspiring Could you show us how to incorporate flowers or 'green' inside this type of hairstyle?
Kaisa: Perfect, I'll attend a wedding tomorrow and was just searching for new ideas!
Love Everyone: My maternity shoot is October 11th so thank you soooo much for this video !! I'll be 30 weeks
abby yates: Kayley, we don’t procrastinate, we wait until the last minute to do things because we will be older, and therefore wiser❤️ also I was literally just binge watching your other formal hairstyles last night so I was soooo happy when you posted this!
Anna-May Moon: YAS JUST IN TIME FOR DATE NIGHT I've accidentally found a really good hack for bouncy Hollywood waves if anyone's interested: 1) curl your hair so it looks like Taylor swift OG curls (I do 1 inch sections/2 - 3 drinking straws on a 1 inch wand) 2) hairspray the crap out of it for hold (I suppose this probably isn't an issue for people with shorter hair, mines v long and thiccc) 3) brush it out gently until you get what you want - the hair should kinda clump together nicely, watch some vintage brush out curls before you try this tho! Personally I vibe with both full on ringlets/tighter curls and bouncy waves and my hair can go 3 - 4 days without washing so: Friday - Saturday = ringlets Sunday - Monday = waves Idk might be fun to try, thought I'd share :)
katienowaitee93: Yay thank you. I find so many formal styles so hard to do xxx
Carla Bosch: Kayley your makeup in this is soooo beautiful!!! You look gorgeous!
Brittany R: Now I just need a tutorial on this makeup look
Wadiah Chaudhary: I love you Kayley you never leave us confused and uhh about any hairstyle you are the best for me literally
J B: Please do wedding updo styles for girls with natural curly hair, I always struggle dealing with my curls for a more formal style.
JudyLovesNaps: I really liked the half updos! Love both of your outfits during this video!
Kim Null: Thank you for another amazing video Kayley and Anna Laura. It always makes my Friday.
Perfectly Pinned: how you put the hair up so fast. Can’t wait for more videos
Malika Trotter: Y’all are so freaking cute and gorgeous!!!! Loved this video so informative!
Geneie Esqueda: I'm going to a military event in October so this came at the perfect time! I was thinking a hairstyle like the first one ❤️❤️❤️❤️
Kacie Skarpetowski: I'm not attending any weddings any time soon, but I am the braidaholic that will wear every single one of these to school.
Cassidy Taylor: I’m getting married in October! The most helpful video!
Tish: Kayley, you always look so cute in your videos, but you look absolutely dream-like with your hair and makeup like this
🔪🔪🔪🔪: Love this! Really helped for Christmas ideas so it’s not as boring! xx
Amelia George: Recently got engaged and watched your videos for years! Absolutely love your videos Kayleg. I am from the UK where stocks frenchies bobby pins?! Please help!!
esloveday: So glam ladies. Love these looks; makeup, outfits, all of it.
Lydia Pueschel: Have you ever done a tutorial on AnnaLaura's wedding hair? if not, I'd love to see it!
evychic: Great tip in 9 min 20 sec i also strugle with that section of my hair I DEF will practice this Im going to get married but i want to Do All by myself hair and make up If you have a brides makeup tutorial ill love it Greetings from Perú ♥️
Rocio Madrid: thank you, I did this and I look amazing.
daisy chain: Please make a video on how you made the pins for Saf’s wedding!!
Brigitte Turner: My hairstylist cancelled on me for my wedding in 3 months , this video came at the perfect timing!!
Heather Edwards: Hi Kayley! For the Easy Twist, would you recommend using hair spray after you pin your twists?
Helo Lange: Ok I'm doing two of these for my graduation and the formal after too I'm in lovee ❤️❤️❤️
Jamie Kirkland: More wedding hairstyles please
Lilly Walling: I literally watch every single video of Kayley and Anna Laura even if it doesn’t relate to me because SUPPORT
The Bookworms Nook: Lovely ideas I've bookmarked your video for when I get married. I'm engaged but no plans as yet. It doesn't hurt to have plenty of ideas though.
Amanda Cox: I’m getting married in October and I suck at doing my hair. This is a life saver!!
Selnau G: Is there anyway to make beautiful formal hairstyles without the face framing hair? I don't have them because when I'm wearing my natural curls open and had face framing layers, I would look like a boxwood sphere - which is not the look I want to go with (not judging others who like the extra volume!). On the other hand I think it looks a little weird when I do (half) updos and use all of my front hair, because my forehead gets too much attention. I would really appreciate some helpful ideas!
Grace Andrews: These are all so pretty!!!
Annamariexo: Y’all are so adorable ❤️
Pooja Bhalode: Do you recommend anything for preping the hair - smoothing to remove frizz and get them more under control ? Thank you
Savvy: 4:17 Kayley: "PUT THE FIRM HOLD HAIRSPRAY DOWN!" Me: But... but...
Monu Mathew: My marriage is within 17 hours and im watching this now lol
Every Haircolor: Love the natural styles!
Stephanie Scott: This video is so handy! Thanks :)
rainbowching: Love how clear you were in the video. Can you share how to pin hair yourself ?
Andthatsthestory: I wish I could have seen this before I got married (9.9.20). At least o can reference this for my best friends upcoming wedding (10.10.20). Can’t wait! Thanks Kayley!
Brianna Morgan: Eloping on Tuesday so this is perfect! Thank you!
Suhani Ranganathan: Can you do more hairstyles for brunettes? Like if you would like that to
Tina: I'm getting married in December so this could not have come at a better time
Kendall Sutton: Please write a book! I would love to see you write a how-to hairstyle book, because sometimes I need hairstyle ideas, and I don't always have access to YouTube!
Alizeh Babur: Kayley your makeup is amazing i love it
Framar: LOVE this Kayley!!!!
A2A: Stop it!?! You're adorable, cute & personality to match!?! Precious overload,
mariana martinez jimenez: Do you recommend Back coming every individual strand to give the curls volume?
Susan Allman: Kayley, can you do a French Roll? I need a guide for a cosplay I'm doing. Please and thank you!
Ethel Tan: Wow love the hairstyles and love the tops! ^^
brittini craig: Hey just wondering if you have done any looks with hair vines or (side of the head) flowers? I'm getting married this summer and it's in a remote location so I'm doing it myself. I love a good twist and/or braid moment and since your the queen of that style I thought I would come to you!
Tegan Vincent: If you girls could find a model with prominent ears and do some updo's for us prominent eared gals, that would be aaaaawesome! It's a struggle y'all!
Nichole D: Your hair looked so cute curled!
Paige Harper: Literally getting married in a few months and I’m practicing
Rebecca Jaycox: Does anyone know with Frenchies if you just use those the same as regular Bobby pins? Two of my friends asked me to do their wedding hair next summer& I just wanna make sure I’m giving them the best experience& result.
Amelia Zidek: I love you kayley and Anna Laura I’m a huge fan of you. I love these hairstyles:)