Upside Down Vs. Upright Styling Routine Review | Wavy Curly Hair Journey
Upside Down Styling Routine Review | Wavy Curly Hair Journey
~ Reviewing my "old" styling routine versus my "new" styling routine
("Old" Routine) Simple Wash Day Styling Routine for Wavy Curly Hair https://youtu.be/rQX9Usto49g
I still love this routine! It makes for very juicy curls with lots of volume too. Just don't over-scrunch...
- Bioterra Gel https://amzn.to/3HeTHkZ
("New" Routine) Wavy Curly Hair Routine https://youtu.be/B-I8LaFeRaU
I love this routine too! It creates more definition and control over styling the top of your hair.
Do you have a favorite?
⭐SUBSCRIBE
This channel is dedicated to helping you build your curl confidence with Curly Hair Styling Routines, Techniques & Signature Hairstyles ~ www.theCurlStory.com
Recommended Videos:
- Wavy Curly Hair Routine https://youtu.be/B-I8LaFeRaU
- 5 Ways to Diffuse Curly Hair https://youtu.be/FC2oRZkvDF
- 5 Tips to Revive Your Curls | Curly Hair Morning Routine
- Curly Refresh Playlist https://bit.ly/curlyrefresh
- Curly Hair Morning Routine + Refresh *When it's Not a Wash Day* | THE CURL STORY
- Curly Hair Night Routine // How to Protect Curls Overnight | The Curl Story
FOLLOW
Instagram: @thecurlstory https://www.instagram.com/thecurlstory...
Pinterest: @easycurlyhairstyles https://www.pinterest.com/easycurlyhai...
LTK: @thecurlstory https://www.shopltk.com/explore/thecur...
Amazon Shop: https://www.amazon.com/shop/thecurlsto...
DISCLAIMER: Links are affiliate links. When purchases are made through affiliate links, they do not affect the price you pay. This channel may receive a commission which supports the creation of more content like this. Thank you.
Music Credit: Avanti - VELDA / courtesy of www.epidemicsound.com
Promo Link: 30-day free trial of Royalty-Free Music https://bit.ly/3q0H3Qu
#theCurlStory #EasyCurlyHairstyles #curlyhairroutine
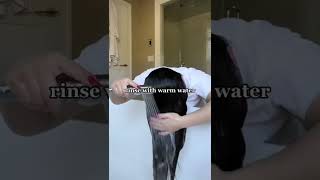
This is with upside down styling, so i did my old routine today to see the difference and to see if it would make my hair look any different, and i think it does. I still love it. I still love it hello. This is april with the curl story. Today is all about my old routine versus my new routine. A couple years ago, i started posting videos on my styling routine and i shared an upside down styling routine. That'S how many of us learned when we were first starting. Our curly hair journey, but i've mostly been doing upright styling lately, so i've had a lot of comments about that, and so i wanted to share why i changed and what we can do to make both of these styling routines work great for us. So, with upside down styling, i used to do this over the bathtub with dripping wet hair, of course, because it was just easier to clean up the mess that way, but i would start with my hydration process so after shampooing upright of course, then i would apply My conditioner and really work it through so rather than just letting the conditioner just sit on my hair for a few minutes and then rinsing it out. I was really working it through until i can feel my hair soften get slippery was able to tangle my hair. Then i would rinse it out and begin adding my gel, so my hair is thick hair. I have thick strands of hair, so if i just took out one strand of hair and laid it on the counter, you would clearly see it. It'S a thick strand of hair, not only dark color, but it's visible, so fine hair, for example, would be that you could hardly see the hair. You know a single hair on the table or on the floor. It would just be so so fine that you would need multiple strands of hair together to be able to see it from far away, and you can feel the difference too fine hair. You might not be able to feel it in your fingers, whereas the care you can, you can definitely feel it, and some of my hair is smooth. Some of it's coarse of course, means a little bit bumpy, so we all have different textures and different thicknesses and different amount of hair, which means the density of here. How much hair you have per square inch on your head. So i have thick strands of hair medium density, so when i was flipped over and trying to rake in gel, it was really hard for me to disperse gel all throughout my hair. That way, of course, i tried it just with all of my hair and trying to rake it through, and but the problem was is, i was really only applying gel. You know on that bottom part and i couldn't get it here, couldn't get it through the bottom of my hair into the top of my hair. So then i learned how to at least section my hair in half, so i would flip over and then this bottom half i would apply my gel and then the top half and i would rake it through and then i would scrunch with water and scrunch really Depending on that scrunching to help me disperse the gel throughout my hair, but all of that scrunching would create a lot of frizz. Unfortunately, so it was too much movement too much friction that would disturb those curl families separate them so and i would keep trying to smooth them out, but i was so nervous that the gel wouldn't be evenly dispersed throughout my hair that i just over scrunched, so That is a thing you can overscrunch. So be careful. My main problems with upside down styling. Not only did my back hurt, i was fighting with frizz. I was fighting with not being able to disperse my product evenly and the part of my hair that had the least amount of product was the top part. The top part that you see so the bottom part of my hair had the most gel because that's the top when i'm flipped over, but then, when i flip everything back. This is the part that got less love and the curls were scrunched in all weird positions, because i'm just you know scrunching and not seeing what i'm doing so. I had you know different curls. The parting was never quite right, so upside down, styling was always a bit of a challenge. It was fairly quick to apply my product, but when i thought i was done with that process and ready to start drying my hair, i had to do so much touching up that the touching up took me almost just as much time as it did applying the Product upside down, so that's when i started experimenting with upright styling, so as you've seen with my latest videos, where i use sectioning clips and i just go section by section from the bottom all the way up to the top. I have a lot more control on how i want the top of my hair to be styled. My curls are smooth. I don't have any fixes to do after i apply my products, it's just dry and go, but it does seem like it might be more complicated to do it that way. So i did want to share with you a little tip for the upright styling and you've. Seen that i use this sectioning clip and it's got this grip on the thumb pad, so it's easy to use on wet hair. But let's say, for example, that if i've already completed this bottom section then so you know that i use that to hold up the area that i haven't done. But you can also use this to clip down the sections that you've already styled. So then, when you're applying your product on this top section, it doesn't get mixed up with what you've already completed and then you can just keep adding to that and keep working on other sections. So you might need maybe two or three of these to hold down the bottom sections of your hair that you've already done and then one to hold up the rest of your hair. On top that, you still need to take down little by little to keep going. So you can use these in multiple ways and it seems like it might take longer, but i actually believe that upright styling is faster, but yes, you're right. I do need to time it for you. My upright styling only takes me about 10 minutes to apply all of my product, then i can begin my drying process after that. The upside down styling process may have taken the same amount of time, but then i did have a lot of touch-ups to do after that which made it take longer in the end. So i wanted to show you this as well. My curls are less defined. I have a lot more volume and my old routine. I did also use a volumizing spray at the roots, which why did i stop it's so amazing. I was trying to simplify my products and use less products to find out what i actually needed for my hair and i don't need a volumizing product, but i love a volumizing product so especially with longer hair. It'S heavier and gets more weight down, and these volumizing products just give my roots some more structure and grit to stay up all day long. I did have a lot of touch-ups to do because i did the exact same routines. I had a lot of messiness all over the top of my hair. The curls were going every, which way i had to wet and redo these front pieces. I had to add hairspray at the crown to tame down the flyaways. There were quite a bit of stringy bits that i had to re-wet and try to smooth them back into a neighboring curl family, but i am in love with the volume. So i wanted to share these two techniques with you and let you know that i'm gon na go and try to perfect my upside down styling technique a little bit more, because i want to try to find a way to improve the product application so that there Aren'T so many fixes that have to be done so it seems like initially that would be a faster process, but it creates a lot more issues, especially for the top of your hair, because that's the hair that you can't see when you're styling upside down - and you Really can't control what's going on up there. You can't do your parting very well, so i'm gon na work on that. I'M also gon na explore some more volumizing products, and - and yes, i i love volume for my hair, but volume is not for everyone. Not everybody needs volume. Some of you already have amazing volume to your hair, so you can definitely skip those upcoming videos, but for those of you who are interested in volumizing products, i'm going to do a little bit more exploration on those because they're fun. I love the results that come out from that, and i just wanted to show you that products and technique both make a big difference in your ultimate results, and there is no one way to style your curls. It'S really up to how you want your hair, to look how you want your finished curls to be presented and with different techniques and different products. You can explore how to style your own curls that reflect you, whether you want more volume. More definition, all of the above i enjoy sharing these different techniques and inspirational styling videos with you. So, no matter what you do, you can know that you can wear your curls for absolutely any occasion, whether it's your own wedding, a job interview every day at the office or on vacation, that there are so many beautiful ways to be able to style your hair From quick styling methods to more glam styling methods and everything in between, i hope to help you build your curly hair styling toolbox to enjoy your curls and celebrate them every day. So let me know what your preferences are for upside down, styling or upright styling. Why does one way work better for you than another and do include your hair type, whether you have loose wavy, curls, tight, curls, long, hair, short hair to help us understand your hair and your hair styling process as well, see what's worked best for you and you Might be able to help someone else in our community, i can't wait to hear about it and i'll keep working on more videos to improve, simplify and speed up these processes for us as well. Thank you. So much for watching i'll see you next time you

Comments
Kathy Harris: Great review April!! I love going back over your videos, because I feel our hair is similar. I am a loose wavy curl. More curlier in the back, more looser on the sides and top. I am also lower in density on the top of my head with various thicknesses of strands. I'm just about 2 years into my journey. My hair is also around the same length as yours, maybe a bit longer. I have been upright styling for most of my journey. However, as it gets longer, the upright is just not giving me what I want. It gets hard for me to unstick the top of my head and keep it that way. So I recently started experimenting with upside down styling. I also drifted away from squish to condish my conditioner. But since getting back into it, I have seen a huge improvement. After shampooing, I will condition and then comb through it and pin it up on my head while showering. Then I will take it down and do the squishing. I will also use less than a pea size of leave in after that, just because my hair gets tangly and matted on top so easily. My choice of stylers as of late have been Giovanni foam for the volume, followed by Kinky curly curl custard. I use a tangle teaser brush and brush the leave in upside down, really brushing it taught and straight out to lift the hair off my scalp, because it lays flat as a pancake there and sticks to the top of my head. I will pick up sections and really pull it away, nothing being sectioned. After I see the clumping, I will start to scrunch. Once I feel it's scrunched all the way to the root, which I could never get while upright styling, I will add the foam, scrunch and then the custard and scrunch. I don't brush through these products. I also started wet plopping for a good 10 minutes after that, and it's really soaking it all in nicely before I microplop and then diffuse. I'm working on my stubborn parting still, but doing it upside down, it's definitely trickier. Loved the volume in this video on you. I work on that since the top of my head is lower density. Will be looking forward to seeing your volume products video! Sorry this was so long lol..
Lavina Menon: Hey April! Just found your channel and I’ve been really loving watching each and every one your videos. Your tips and tricks are easy to follow and very effective. Thank you for giving us such great content!
Naturally Natalie: Hello April. The sectioning method is so helpful. It helps me stay organized with my thick head of hair. I like upright styling. I don’t think my back would do well in that position for all the time it takes to get the job done. :) My hair is medium length. I get a trim in a week. I am so excited. I hope it will help my curls improve even more. I am almost at my 6 month a mark of being fully natural. Take care.
Vijayta Kalyani: Hi April, have been following you since a few days now. Just a question, my bottom hair remains well defined after every wash, but the top part becomes frizzy instantly after drying. It would be great of you could suggest something.
Kathy Renger: Thank you so much for this video! I have fine wavy/curly hair that is below my shoulders and upright brush styling just doesn’t work for me. I have a Denman and have tried it the traditional way with tension and using the handle to form ringlets, and neither way really forms or holds a curl. Finger coiling and finger rolling also don’t do much for my hair (sometimes finger rolling an individual curl and diffusing immediately works). What seems to work right now is applying something like AG Recoil upright and just brushing it through with a Wet brush, go upside down and brush through to form clumps, scrunch, add gel and scrunch some more, then micro plop and diffuse. So I’d LOVE to see you perfect your upside down method and your favorite volumizing products.
Minna Uyeda: Hi April, I agree upside down styling is fast, but doesn’t give great results. I have medium density fine hair. But if I want fast using a brush helps me fly through my routine. I also plop a little so it soaks up some water and diffusing or air drying goes faster. I’d love to see some hot summer styles and humidity proof routine and products!
Ashley Moon: I never thought of trying a volumizing spray! Which do you like?