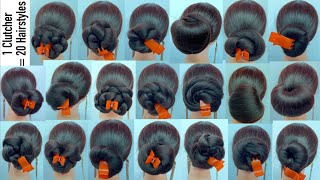
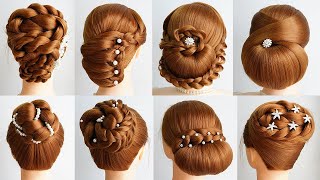
Bohemian Hairstyle | Hairstyles For Wedding | Boho Half Up Half Down Hairstyles
Bohemian hairstyle | Hairstyles for wedding | Boho Half up Half down hairstyles
Tong curls link: (from 1:00 to 7:00minutes)
Hey everyone, this is Lavanya bagga ,hair trainer, stylist and educator based in New Delhi,India.A very warm welcome to the channel where you can learn professional hairstyling step by step.I put more of slightly soft hairstyles which are in high demand by the high ticket brides and clients.
In this tutorial, I have shared an open hairstyling tutorial for party,mehedi,sangeet,haldi.This is a step by step tutorial of boho hairstyle with half up half down hairstyle.This open hairstyle with curls is a perfect fit for almost all wedding occasion hairstyle.
I have also shared on how to make reverse fishtail braid and how to pull the braid to make it fuller.So, inside is a Fuller braid tutorial and reverse fishtail braid tutorial as well.
Subscribe for more step by step hairstyling tutorials! :)
If you have any doubts feel free to connect with me in the comments.
Wishing you all a happy learning!
Follow me on Instagram:
https://www.instagram.com/p/CT7b6A9FwB...
Pinterest:
Hey there welcome back to another tutorial of shining your sisters. This is the anima and you are most welcome here where you can learn soft and trendy hairstyle. Today we are going to be learning an open, hairstyle tutorial with boho touch to it. So yeah don't forget to hit the subscribe button. If you are new here, because i keep on coming with the detailed trendy, hairstyling tutorials now without further ado, let's jump to the video so for this hairstyle make sure you do a middle partition, because that looks more good for this hairstyle. Now i'm taking out a small section from the left side, and so this will be a half triangle. If you can see, i have taken out a diagonal section. You can take eyebrows end as a guide, so you have to take a diagonal section from there and now i am using oc shine spray to give the strand some shine. The section some shine and now i am taking this shine gel wax by shootscope and i am going to take it on my hand, so i will be using this gel in between of the process. So basically, i will be making a fishtail braid - reverse fishtail braid over to this side over to both of the sides. So i will be using this in between just like i'm using here wherever i feel, there's some sort of frizz. So i'm going to use this gel to get rid of the frizz, and obviously it would help me to make the braid more neat. So we will start with the braid now make sure you hold this section backwards now divide this into two: take a strand from the left small strand from the left and dig it under and over to the right side again, the right from the under and taking It over to the left side the same i'm going to do from the left strand and taking it under from under over to the other side. So i feel here i'm coming in front of the camera, so i will skip to the other side so that you can know understand how to make this braid more better without any disturbance. So i will skip to the other side so again, the same way. Take eyebrows end as a guide and from there you have to take a diagonal section out, just like a half triangle and then just take this section backwards, make sure of the position of the strand you have to take this hold this backwards now divide the section Into two and take a small strand from the left and take it over to the right side from the under see the right strand, small strand, from the right taking it from the under and over to the left side. The same from the left, taking a small strand from the left, taking it from the under to the right side, but also adding on some of the hair to the braid, i'm going to be doing the same. So this is how you make a reverse fishtail. Braid. Now i am going to take this strand from right, taking it from the undersea adding on some hair also - and i have taken it over to the left left side from the under. So now the left side, you have to do the same process. Do the same. Till you reach the end of the section, just take a small strand and you have to take it to the other side from the under. So don't uh take the strand or from over, just like you do in fishtail braids, but you have to take the strands from the under to the other side. I will show you again taking the small strand from the right adding on some hair, but i'm taking the strand from the under to the other side again a strand for on the left, taking it from the under adding on some hair, taking it from the under Over to the other side, it's just that now you have to take care of the direction as well. I am holding the braid backwards and i am taking this braid diagonally. If you can see it is going diagonal, so you have to make sure of the direction. While you are making this braid, you have to start from the middle. Just like i started from taking a diagonal section from the front, and then i started making the fishtail braid. Then you have to be careful of the direction. The second point to be taken care of is the direction of this braid. The direction has to be downwards, not too downwards, diagonally downwards, so make sure you have to give the direction to the braid with your hand, wherever you take your hand, that is the direction the braid will take so make sure of the direction of your hand, while Making the braid, if you want it diagonal, move the hand diagonal. If you want it straight, move your hand straight, keep your hand in a straight line. Move your hand in a straight line. That'S it so make sure of this. One thing the this one thing: while making the braid that is of direction and also add the sections to the braid till you reach the highest point of the head. So just like you can see, i have stopped adding the sections to the braid till a certain point and once you're done with the braid just secure it temporarily with a steel clip or a section clip now, i'm going to backcomb this particular section. Oh sorry, for the disturbance, my ring light went off, so it stopped working and this is the lightning i got after that. So yeah we were talking about the backcombing, so you have to backcombing this way. First, take a section, and then you have to just take the tail comb. Take the strand high up and start using your comb in a swing motion, see from the middle start from the middle and start easing towards the downwards. Just like that and don't forget to push the backbone towards the root, because that is where the most volume should be. You have to vacuum three to four sections for the puff. Now we are going to clean the uppermost layer where there is some sort of frizziness because of the backcombing. So for that you are just going to be using the tip of the teal comb. See very softly. Just use the comb like this and if you feel you don't want volume at a certain point, just use the comb at that point very nicely. Once done, we are going to secure the puffing. You have to secure it with bobbin, so just grab the section just like you're, going to make a pony of it and just push your thumb towards the root towards the scalp and then take a bobbin and secure it from one side and the same way secure. It from the other side secure the puff from both sides and if needed, you can put two pins on each side but make sure that it is a grip nicely. And after that we will come to the breathe. We will start pulling out the braid. So, for the pulling i have mentioned so many times for using the pulling technique for pulling the braid, you have to hold the braid for, on the end nicely nicely, as in softly, you don't have to grip the braid tightly. Otherwise, you won't be able to pull out the braid right so always be sure. I have mentioned this point so many times in so many of my videos so make sure. While you are pulling out that you're holding the braid from the end softly and i'm also pulling out the added on hair, you just see i'm pulling out the hair sections that i added to the braid from the left and the right. I am pulling them out as well and for the pulling technique always start from the end and walk towards the upside, so just pull out pull out and pull out pull out. The all of the sections of the braid once then come back to the end and start pulling out once again, so you have to pull the braid out two to three times. That'S where you get full volume, so what pulling technique is actually going to do? Is it will make the braid look more fuller and obviously it would add more grease to the hairstyle you can see for yourself one side you can see it is all flat and the other side is all fluffy and voluminized and dense so pulling technique. Actually does wonder i really love pulling technique. I really love pulling braids out because that actually adds grease to the hairstyle grease to any braid. Any hair so make sure you pull out very nicely always start from the end, always make sure that you hold the plate from the end softly and just pull out the blade from the end and walk towards the upside. Also, don't forget to pull out the sections that we added to the braid from the left and right. I have pulled that sections as a well and just like that. You have to pull out the brake now take both of the braids together at the center and just secure it with a rubber band together. Now we are going to hide this rubber band, so just take a: u pin and hold it with the rubber band. Take a strand and a bobbin and just roll the ends of the strand into the bobbin once done push the rolled section deeper into the bobbin so that it gets stuck into the bobbin. Take two to three rounds of this strand around the rubber band and near the rubber band and pass the bobbin in between of the? U pin after that, the strand that we rolled over will come in between of the? U pin after that, push the! U pin downwards and that's it, that is how you're going to secure. That is how you're going to hide the rubber band c. Now you cannot see the rubber band, but a strand that is rolled over. It now take two strand from the right and left of the rubber band, and we are going to again make a reverse fishtail braid here, so just take two strands out. These strands can be a little thick, so just do the same. Make a reverse. Fishtail braid, take a small strand from the left, take it from the under to the right side and this right strand from the under to the left side. Just like that - and we are not going to add any section to this braid, but the braid is just going to be off these two sections only so make a fishtail braid make a reverse fishtail braid. You have to make a very uh small reverse to still braid her once done again, pull it out, pull it out nicely and don't forget to keep all the points in mind that i've already mentioned for the pulling technique for pulling out the braid. So just pull out nicely because that is going to add beauty to the hairstyle once done, secure it with a rubber band and again we are going to hide this rubber band so see just take the rubber band and place the u pin in between and then Take a small strand out and just roll it over the pin or the rubber band just roll it over take two to three rounds as much as possible for the strand to roll and then take a bobbin and roll the ends of this strand into the bobbin And once you have take at least four to five rounds of this into the bobbin you're, going to push it deeper into the bobbin and then just pass it through the you can pass the pop pin through the? U pin, and eventually the strand will also get in between of the? U pin that we rolled over the rubber band right and then just take the: u pin and push it downwards, so the strand will also come downwards. Just like this now see this. Is it this is how you're going to hide the rubber band? After that we are going to start curling, the hair, so for curling i'm using 19 mm tong, you can use any tong any mm size you want. So i'm going to make alternative curls here, but also for the alternative curls make sure that the extreme right of section has to be an out turn and the extreme left has to be an intel. And after that you can continue with the alternative pattern of curls. So what alternative pattern, of course is it is that you do one curl inside one section inside and the other strand next to it would be outside would go outside. So this is alternative pattern, of course, uh. This makes the curls and hair more dense. Look more dense because they don't roll with each other, because usually it happens, the curls roll with each other. So it looks a little more thin towards the thin side. So alternative coats actually help in making the hair look more dense to learn how i am curling. The hair you can go to my video. I will link down the tutorial for this in my description box and the timing from which you can learn this particular curling part. You can get an idea of both in inward and outward curls from there, so you can watch that tutorial to get an idea of how i'm curling these strands, so that is all it for the hairstyle. Just make sure you pull the braids nicely because see. That is also helping in making the hair look more dense right and make sure that you curl them nicely. Alternatively, and don't forget the end of the braid as well see, i am curling the remaining part of the braid as well and after that, i'm using a serum just rubbing the serum into my hands and i'm going to separate these curls divide these cores for more Dense look again so to make the hair look more fuller, so i'm just separating the curls wherever i'm feeling the section is broad. If it is even not broad, you can just separate, because that is just going to make the head look more dense, so just go on. That looks really good, separate the curls tone, the curls use serum before it before separating don't forget to apply serum to your hand after that. Just separate the curls and separate it from all of the sections separate the curls from all the sections into two or maybe into three parts, just like that, it's as simple - and this is it for the hairstyle, i'm really loving it loving the boho touch to it. So yeah, i hope you enjoyed this tutorial thanks for watching, so that was our open, boho hairstyle. I hope you enjoyed this tutorial. Don'T forget to give this video a thumbs up if you really enjoyed the video and don't forget to subscribe me for more step-by-step, in-depth, detailed hair, styling tutorials, i will be coming back soon with another hairstyling tutorial till then.


Comments
Himani Jain: Ahhhmazing!