Easy 3 Steps Center Parting Hairstyle Tutorial For Men (Korean Hairstyle)
In this tutorial I will be going through the 3 steps process of achieving the korean middle / center parting hairstyle. Information on how to cut the hair, habits to follow, waxing process will be showed.
SUBSCRIBE and FOLLOW
------------------------------------------------------------------------
YOUTUBE https://www.youtube.com/channel/UCrby...
INSTAGRAM https://www.instagram.com/panda_ate_ya...
TIKTOK https://vt.tiktok.com/hPWKCD/
❤ Dont forget to Like and Subscribe to my Channel! Thanks!
Hello, everyone welcome back lately. Some of you guys has been asking me: how do i style my hair? So I'm here to do a quick and short tutorial for you guys. There are three main steps to this whole tutorial and I would not be using any fancy equipment like the hair, straightener or any fancy hair dryer. So let's get started so step one. The haircut haircut is one of the most important thing in this whole hair style. It is the foundation of the whole hairstyle, so you must do it right in order to be able to pull the hairstyle off. So you might be wondering what do you tell your hairdresser when you enter the salon? First of all, you would like to ask them for a slope normal slope. What a slope does is that it essentially shades the side of your hair over here. I would recommend a normal slope which cuts your hair to about over here, and you have to just cut short for this parts here. The reason I do not want to shave higher than this is because then this part of the hair will help you to give a bit of volume when your hair is overlapping the side of your head. I would request number 3 for my slope, which is 3/8 of an inch anything above. That is fine, too, because it is important to keep your hair on the side a bit more dense, because you do not want to see your skin, because if your skin is showing the side of your hair, it will be lighter and the top part, which is Very dense, you have a weird contrast between the top and the side, so I would recommend you guys to slope at least a number 3. So next part will be the top part of your hair. What you will tell your hairdresser is that you want an overlap. What and over that means is that they will keep this part of your hair here without again so overlap over the side of a hill. If you do not have this part of your hair grown out start growing them. So how long do you need your hair to be cut? I would recommend it cut a mushroom bang around your head, which is something like this much room banging around hit and cut it to the length in between from your eye to your eyebrow anywhere in between here will do if your banks is above the eyebrow when You'Re styling, your hair, you might not be able to form the shape or it might look a bit too short and weird for the whole hairstyle itself. So I would recommend your hair should be at least at your eyebrows before you start doing this hairstyle. So, to sum up, step by on the haircut process, first, you need a normal slope with at least number 3. You will like the top part of your hair to be overlap, and you like to cut bangs around your head, at least to your eyebrow, and the recommended wage is from the eyebrow to your eye so step 2 step 2, o beauty habits. So what habits essentially does is that this will be the things that you'll be doing from your day to day lifestyle consciously or subconsciously. Firstly, I would like you to find your natural parting line for me. It'S right over here right above my eyebrows, and you could find a natural parting line by just messing around with your hair, and your hair would naturally cut to this angle next, once you find this natural parting hair itself, whenever you're washing of hair, whenever you're touching A hair always do this motion when you're washing your hair, to train your hair to be comfortable and to allow your hair to be flexible in the direction that you are trying to make them go to. When our sixteen. I once had my hair parted to the left side, so when I was transit into this hairstyle, the center parting, some of my hair would sometimes stay on the left side and since I started doing this motion to my hair when I'm bathing, when I'm touching my Hair, my hair soon started to get comfortable and started to move to the shape that I want naturally. So this is step two habits that you like to do daily. So, for the last step the waxing pad, I would show you the whole process from start to finish after washing hair, so I'm going to get my hair, wet and I'll be back okay, so right now I have this hair dryer and what you can do first, Is to get your parting line, there then start using this hair dryer to blow in the direction of each putt. As you are hair drying. It use your hand as like a comb to comb the hair in the direction that you are parting to. Okay, right now my hair is dry and there is some sort of shape has taken place and now I'll move on to using the wax. So the wax that I use is this Gatsby styling clay. It is, I think, the strongest clay that they have and they look like this inside so normally when I use any wax and clay. I would use about this one finger once so. You don't need too much for the hair about this. Much is needed, so you would to put on the palm and rub it the more. You rub the more heat this and he keeps your hair in place. So once your hand has all the wax and played just bring it in when you are putting wax into your hair, try combing it in this direction, like the direction that you want to put your hair too and remember to have some wax in every single part Of your hair, so don't be shy to just go in so just keep going just keep going for like 30 seconds. Yes, okay! So right now the wax is in your head. So this next step is one of the most mind-blowing steps to me. So what you're going to do here is to have your hand in this shape, like in butter. Elves put them above your head here and then pull up twists and then come down. Look at that just keep doing it, pull up twist, pull up twist and then touch up the sites by just touching them a little bit. This twisting motion is the one that is creating this frame, the the window framing your hand as far the sight of the hair. Usually, I don't do anything to it, but if you would want to touch up on it out, just give it a bit of like a coal, but not only it's the front part that I'm concerned about that's about it. You will form some frame like this. This is just a base frame you if you want to adjust how big, how small you want the window to be. You can just do that. I am bringing it closer or further putt yeah and that's about it. You get this window shape to your hair. You'Ll be used to combing this hair without even looking at the mirror. After I would say, a man or so you'll be very comfortable with the hair yeah. Okay. So, to sum up step one, your haircut, slow, number, three or higher overlap your hair cut, mushroom bangs or on your head to it, which is to at least your eyebrow step, two habits that what you want to do is to find your patting and constantly move. Your head in that direction, when you're bathing, when you're touching your hair, to train your hair and to allow yourself to be comfortable with the hairstyle and that the waxing process I have shown you use the hairdryer blow it in the direction that you want. To put your hair that when you use your wax, just use one so put on your pump and get your whole palm covered in the wax and just go into your hair. Just allow the wax to be in every single part of your head. And then this twisting motion up twist twist. This is the game changer. This motion will allow you to have that patting style and if you want to make it even neater, you could use a hair straightener to make the calls and stuff, but I'm too lazy for that. So this is the hairstyle tutorial. Hope you guys enjoyed it. If you want to see what I use for my skin or any other daily routine, you want to see, you could be a me comment down below and I'll try. My best to respond. Remember to my video subscribe to me, hit the notification now. So you know when I will post another video, ok, bye, bye, bye, bye,

Comments
Yoonki: This is probably the best tutorial for this hairstyle, brilliant Edit: I've had my hair like this for a year approaching two and honestly you can skip the wax if you want and still look good, this tutorial holds up really well and my hair is probably at its best (I get asked where I get my hair done or what I tell my hair dresser!) Be careful about asking for the mushroom cut because they MIGHT make your cut look like a bowl on your head; always mention layering and even show a picture of what you want
Muhammad Budiana Eka Faruqi: I love how you detailed everything. Thanks, keep it up.
SxGifs: For real I have similar type of hair as you and is about as long as yours. I even had the same type of style you did having to put my hair always to the side but this really helped me out so thank you for doing this. Helps a lot since I was tired of doing that same style for years lol so I wanna go back to school with a new better style
Kyle Nguyen: This video is absolutely amazing. All of the details I need. Thank you. I usually don’t leave comments but this video was amazing
Mike Pho: Love the technique with the twisting motion! Thank you, will try this soon. Keep up with your videos
Claire Chung: even though i’m a girl i just cut my hair short for the summer and the tips here are very good! great video
shanicestephanie: I buzzed off all my hair and it is growing back now. I want it long and also this helped me to get an idea of how to style it while it's growing out ❤️
alfie bart: The exact video i need in my life! thank you! very helpful and informative! you are gorgeous btw!
Topsy Kretts: Thanks for the tutorial. Exactly what I was looking for.
PAT CAL: Will probably do this tomorrow! Thanks for the tutorial!
Karl Zarate: Make a haircut vlog :)
d luckygirl: Ive been wanting to try this hair for so many years but dunno how to start so I settle with parting to the right hairstyle. But i think i can finally try this. Thanks for this!
Justin Sprout: Thanks for the tutorial bro! Very simple and makes a lot of sense. Now I just gotta wait for my bad haircut to grow out
Wacky Valdez: Thank you for this!! Really helpful
Adieshaun Yagy: Thank you!!this really helped me out For my middle part style
Diddi: I used to go with a short haircut and hated my hair, but because of you I started to grow my hair out. Im starting to like my asian hair lmao. Thx g
WhoEverTheFuckIwantToBe: No music montage no bs cuts just straight good explaination great video man
ちむちむ直樹: This is really helpful and very informative. Thank you I didn't skip the adds
Sarah Franzi: Actually I'm female, but I love the hairstyle of Asian guys! When the covid lock down is over, I want to do your hairstyle so badly!
Russ Araya: The best tutorial for me. no need to use flat iron to do the shape of the hair you showed us
Chrismatorium Grill: My hair is straight and black and I always had it faded high and short because I hated it. After watching this guy, I decided to grow out my hair. Turns out I only lack the skills in fixing it. This guy just went straight to the point and taught us how to do it right.
Finnest: Bro I’ve been wanting to do this hairstyle for like ever now and i didn’t know how i needed to get my hair cut. Thank you so much
BALAKAJAN: Thank you for this. I am really having a hard time with my hair since it's too straight and dark. Maybe I need to do a mushroom haircut but my slope is already 4 since I don't like it thin either since it helps my hair to have an extra volume to it.
Zaki: I can still do the 3rd step without wax.. Thank You! Dude❤
q _: My hair is now has a good length for this hairstyle. I can't wait to try this. Thanks to this tutorial dude! Great content.
Alcher Joseph Gulloy: This Tutorial is very Helpful Cause I always want a Hairstyle like that love this Video❤️✊
Adam Charles: my fringe is until my nose so this tutorial made my hair look amazing thank you bro !!
LOUIE ANGELO SUAREZ: I just cut my hair in faded style just tell the salon you want a faded cut, it's easier and tell them you don't want the top of your hair to be cut. and I just follow the other steps I love your tutorial it's really easy❤❤ THANK YOU
Jm De Mesa: Thank you very much... You have a detailed explanation, these are the best tutorial I've ever seen
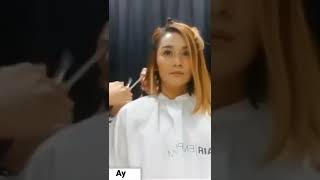
PandaAteYan: Sorry for the bad lighting! I've only realized it after recording the video, as always love y'all <3 !
Chunhyang rjnvmcntsvn: This tutorial is great I understand it all but when I had my haircut and I told the hairdresser what to do I even showed to him your picture and I thought he understood it and when he began cutting my hair I knew that he was doing wrong but I can't say anything because I'm shy and now my hair is like a mess and I don't want to go to that hairdresser anymore
Marvel Ku: Hi, i have two questions here: 1. Can i use hair spray instead of wax? 2. Do you have to layer the hairtip a little bit or no need? Thank you.
lemur918: Thank you! My barber didn't knew what to do at all. This was super helpful to me.
Ali Ridwan: I might starting to try this tutorial, thank you for your explanation!
Caiza: Thank you so much it was exactly the type of video that I was searching for
Israel Chi Dzib: Need to do this! Always wanted a Korean haircut :)
Fai Ánnuel: This is amazing!! It would help most singaporeans around cause barbers/hairdressers are less outdated with the terms used in the western countries!
DELFIN JOHN LLOYD C.: Thanks for this hairstyle tutorial❤️
Tanny Kun: This is so awesome! It would be nice if my hair texture will be as awesome as yours
Aldy Immanuel: honestly the best hairstyle tutorial i ever found.. good job
Steve Solomon: Thanks !! Finally found a good tutorial !!
Park Dionysus_: This is so good! Thank u!
Robin Lagansua: Good Job! I am thinking to change my hairstyle to something like this one. But I need to grow my hair first. PS— im too lazy to use hair iron as well XD
Andy Ye: The problem is that it’s difficult to find a salon that actually do these kind of stuff, salons near me are boring as af
Kiltzu: Wow i been looking for this style thank you for this
The Baka Lord: I always just wash my hair, brush it back then let it dry naturally, when it’s in the semi wet stage I split the hair in the middle, then wait for my hair to dry again. Then I just brush it with my hands to give my hair it’s shape after a while I use an actual brush so there’ll be no knots in my hair.
Ziv Tadmor Ticangen: well-explained! big thanks.
Jean Leonardo Bernadez: Best tutorial I've found. Thank you!
Bondarev Branco: Never seen anyone with this kind of tips! I love your vid!
Aina Humaira: your videos are very interesting u should make a lot more!!
Sovak: I thought these kind of hair tutorial never existed dammmm so far the best / amazing hair tutorial ive ever seen
Red isSus: Omg this is so helpful. Ive been keeping my hair because i want to do the middle part thingy. Now my back hair is too thick imma do slope
Bryan C.: Love this video. Thank you!
Aggyzander: Do you have to use your natural parting line or can you train it to part more in the middle
Louis Manguil: So nice. I love it!
Hehehehe Hehehehhe: How long does my hair need to be? For the cut? And what about the back?
YourAsianComrade 27: After trying this hair out, I would recommend leaving your bang to your eye level not eyebrows if you have high hairline like me, it took around 2-3 weeks to make the hair fit
Kacchan loves Blackpink: Thank you! I'm actually trying to change my hair, I'm 18 years old and I still can't style my hair
Sasuke_12: Thanks this really helped me
uiheng: How do you keep this hairstyle up for going for the entire day though? Love your videos btw!!
Mac Abello: Best men hair tutorial I've watched so far, keep it up!
Luis Felipe Revelo: Broo I have this hairstyle and this is gonna be so useful to me.. thanks!!
Kim Medilla 김 야서: Love it❤
James Cube: STEP 1: You need to be Cute first.
EDW3RD: Hey can I ask how long does it take to grow that kind of hair?
Ligma Balls: Thank you for tutorial
JJ CC: Are there any other alternatives to the gatsby styling clay? I don’t have that in my country
Parthi: Can understand easily and so straightforward. Thanks. I would like to ask is it possible to the same way for Curly hair??? I always use hair straightener
MUHAMMAD DANISH AZIB BIN MOHD ROSLI: Thank u so much..this was really helpful when i have biggest event ..thanks for your idea
muhd ghzli: i mean, this is a very good explanation, thank you!!!!
Eric Yai: yo I tried this today and wow, thank you!
Kimberley: It’s a nice video, even if it is especially for men haha and your English is very good to listen and fluent !!! Take care ☺️
Shikato Awomi: That's a great n simple idea...I think I should try too...thnx mate
386. Connor: Thank you so much bro I have all most the same hair style and I needed this thank you!!!
Lili: I have my bangs above my eyebrows and it still works, just in case anyone wanted it a little shorter.
Ralph Palermo: I have a question does the slope and overlap be in both sides of your hair?
Shaira Jamila: suddenly watch this. I want to try this one before entering college. So fresh.
Cleo: HAHAHAH I really wanted to have this korean hairstyle but the only problem is I don't know how to say this to the barber and ending up messing my hair HAHHA then I saw this and thanks g I already know what to do next time I will do my hair cut HAHHAH thanks you got a new subscriber
Andrew Lee: Btw parting your hair increases the chance of balding in that area. Try to change the direction of your parting every couple weeks
TooTworld: Hey man nice video! Just wanna ask you what is the difference if my sides I cut it undercut instead of slope?
Chastiefol Stance: I have a very short hair right now. Is it a good idea to start with the habits first(step 2) to train my hair as it grows longer?
Yeet: Am I the only one thinking about how the fuck I'm gonna present my hair presentation to my hairdresser?
Luís Sorte: THANK YOU THANK YOU THANK YOU THIS IS THE BEST TUTORIAL FOR THIS HAIRSTYLE
ᜃ᜔ᜌᜓᜆᜒ ᜊᜓᜌ᜔: I want to do this but I'm too shy to tell that I want a hairstyle like this.
J: How often do you cut it/maintain it?
limmy lime: great vid! my only problem is that my hair on the side side is a bit spiky (thanks British barber for always use shaver so high). do u have any tips or do I need to like perm it?
Tan James: This guy looks 100% better when he lift his hair up on one side. Give him that wow factor!
Bachtiar Hogi: Thanks for this tutorial
lllaurenceeeee: Thanks for the hair tutorial my guy. Some of the western hair styles aren't working for me since I'm asian, so I turned to the east. Time to start growing my hair out
THE DELAYER: Very nice tips the "pull and twist" its help me alot thnx :D
MrBosGamingts: Thanks this is what I am looking for no special equipment
Miguel Dos pipoko dos trovão: Thanks for the video, was looking for a way to change the look of the hair!
Mic's Depository: Step 1: Be born handsome with thick, straight hair. Step 2: Find a barber that knows what he/she is doing. Step 3: You may now follow this tutorial. But jokes aside, at least this is a hassle free method of achieving that "parted hair" look without the use of any equipment. I do wish I can pass the step 1 and 2 that I mentioned though so that I can follow this tutorial xD
Core Intinity Vlogs: Best tutorial ever!
Miguel: I will watch this again when my hair is longer. Thanks
ryanm: I can see this guy becoming super famous.
Shahmi Hisham: Ik this is quite late to ask but about the haircut process, do you have to cut it then grow out your hair or the other way around?
Yozep Micla ( PianoBoy Wonder ): i like your hairstyle...wanna try for myself...thanks for sharing this
Khoi Nguyen: How many layers should your bangs have ? And also how short each layer should be??
Deazy: Told the hairdresser how i wanted him to cut it and he asked if I have a picture. When its done boom.... the side i’ve been saving was cut... luckily the front part is still at eyebrow level. At least i can still pull and twist for the frame but from the sides it looks weird