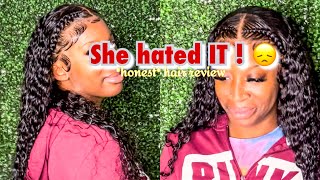
Medium Brown Lace Closure Wig Install Ft. Mslynn Hair
Hey Guys!!! Make sure you check below for links to this hair
●▬▬▬▬▬ஜ۩Mslynn HAIR۩ஜ▬▬▬▬▬●
Hair Details:
High Quality Transparent Lace Wigs 180% Density 4X4 Lace Closure Wig Water Wave Pre Plucked Wigs Real Hair
Lace closure wig, 24 inch water wave hair, 250% density, Brazilian Hair
Same hair in the video: https://bit.ly/3xd2G0Q
More Transparent Lace Closure Wig Series: https://bit.ly/3rViSTy
The biggest coupon code YTB7 for any item 7% off unlimited
●▬▬▬▬▬ஜ۩Mslynn HAIR۩ஜ▬▬▬▬▬●
Mslynn Headband Wig Series: https://bit.ly/3liYBpt
Mslynn Transparent 13*4 Lace Front Wig Series: https://bit.ly/3A3rSZl
Mslynn 360 Transparent Lace Wig Series: https://bit.ly/3C55a4W
Mslynn Transparent Lace Closure Wig Series: https://bit.ly/3rViSTy
Mslynn Transparent T Part Wig Series: https://bit.ly/3flvjCQ
Mslynn Transparent Lace Wig Series: https://bit.ly/2WMtGI3
Mslynn Hot Bob Wig Series: https://bit.ly/3lk19ng
Mslynn Colorful Hair Series: https://bit.ly/3fhRbPp
Mslynn PU Silk Base Wig Series: https://bit.ly/3C5Y1By
Mslynn U Part Wig Series: https://bit.ly/3jd6DxB
Mslynn Wear and Go Wig Series: https://bit.ly/3foccYO
Mslynn Bundles & Closure Series: https://bit.ly/3zRBab0
●▬▬▬▬▬ஜ۩Mslynn HAIR۩ஜ▬▬▬▬▬●
Subscribe MsLynn Hair now: https://bit.ly/3lzM65W
Follow Mslynn Instagram now: https://bit.ly/3nD62GS
Join Mslynn Facebook team: https://bit.ly/30WpaGc
●▬▬▬▬▬ஜ۩Mslynn HAIR۩ஜ▬▬▬▬▬●
Want to Promote or wholesale Mslynn hair?
Contact: [email protected]
Whatsapp: +86 18039917601
So today's video i have this unit um, it is a 4x4 lace, closure wig and it is a water wave texture and this was in 24 inches, and this is from miss lynn, hair. So in this video, i'm basically showing you guys um a different method for installing your wigs, i'm not using any glue. All i'm using is gel and um hairspray pretty much and it's a different method whenever you guys don't want to use the glue or, if you're a beginner. This is way better to start with. So, if you're on the go - and you just want something quick and but you still want it to look like a real real glue install this is a different method that you guys could use um. I had a lot of my clients. You know ask me about different ways to install their wigs, especially for the first time so i felt like it was a good idea to do this video. So this is also, i guess, a tutorial on how to fix any dark lace. And enough of me talking, if you guys, um, want to purchase this hair or anything, i do have miss lynn's, uh links down below and enough me talking. Let'S just get right into the video so for this install i'm not going gon na glue down um the wig cap, it's really not needed. I just did that the last 4x4 install, but it's not needed at all um. So the lace, the lace, looks a bit too dark like it looks like do you guys see that my hands are lighter than my face, though so we'll see, but you guys can see, there's a difference um. I don't think it's that bad on my head, but i'm just gon na go and put some foundation on here, not foundation. I'M gon na do like a shade lighter than my foundation, just so that it doesn't look dark. I'M gon na try and lighten it up. A bit, but i already did bleach the knots and when i did bleach the knots it bleached, but it's not like yellow like how it should be it's a bit red and that just tells you that the hair is the oh, my god i was gon na, Say: dullard because they dyed or colored but yeah the hair is dyed black or something it has color on it, because when i try bleaching it it's more of like a red tint, but the knots are not black, so whatever it works. I'M just going to put some of the shade right here. I don't know why i'm using a smaller brush but use something bigger to not waste time and let's hope that works a little. So it's not that bad on my head. I guess my what's. It called, let me see yeah, i guess my head, like my face, is darker than my hands, so it doesn't look too too bad, but you can still see the like distinction. I like using lighter laces on all my clients, even on myself, like i don't like using darker laces, because it's just harder to work with and you can see the separation, but i'm really gon na try and make this work. So i think the best option is to first glue it down and then, after that, i'm gon na play around with some lighter powders and cover up the lace to make it blend and also baby hairs. So i'm just gon na mark my spots. You don't have to do this, i just like doing it. You can see um, there's like a lot of foundation on there, so you do want to clean that off. If you want it to stick better and you can just use alcohol, i'm using hand sanitizer and just clean that up, i'm just going to be using um got to be gel and the free spray um. This isn't good for your hair. So i know like right here: i don't have any hair and none of my hair is going to be like touching any of these products. Um yeah, i don't recommend using these like if you have a lot of hair or anything just better on skin, they do have a lot of alcohol in them, so it can fit out your hair and all that if you continuously like wear it so so i'm Gon na first go with the gel and do a layer not too thick and not too thin, and then over that i'm gon na be using the freeze, spray and now blow dry it to get tacky. And once it's like sticky, you can put the lace on so now that it's tacky, i'm gon na put the lace on, and that should be good. So i'm gon na now cut the lace and i'm just gon na use scissors. Okay. So for the little pieces, they're lifting this is the method that i saw. I forget who it was. It was jonathan, i'm pretty sure jonathan, but they just use like hairspray and spray down the edges that were lifting. But you know what i'm also going to put some velcro to be just to be safe. It'S not too too bad. We can make it work, i'm just going to do the baby hairs first. Now i'm just going to let that sit for about five minutes and then i'll be back with the hot comp. So it's been about five seven minutes kind of lost track, okay settled in, but we can kind of see like where the separation is so. I have this palette here and i'm gon na play around with some powders and try and cover up that pretty much okay. So i'm pretty much getting a lighter shade. I'M using this one right here and i'm trying to cover up the dark lace and it's better to use a powder for this because it can stay put but like a foundation or concealer might move around just to work. And then, when i do my middle part also, okay, so that will do and this hair is really soft, so it doesn't really need like gel or anything or i mean wax to lay it down, but yeah, just a hot cone by itself. It does a job yeah. They want to do this side like a no part. Look i'm not gon na. Even do a part, all right that looks good and i'm just gon na use some mousse. So this is um the towel olive oil foam, wrap lotion. You guys can use any mousse and there we are, and the look is all done and i'm surprised that it actually worked out um. The lace was kind of scary to work with, but we made it work like always and yeah. Let me know what you guys. Think i do like the texture of the hair, it's really nice and soft. I did say that this was 24 inches, but kind of feels kind of like 22, but it could still pass, and i like how it's really really black. That is pretty much it for this install tutorial, slash review. I hope you guys enjoyed and if you did give it a thumbs up, comment below what you'd like to see next and don't forget to subscribe i'll, see you guys in my next video bye,


Comments
Miranda Woodard: It’s very pretty