*Must Have* 13X6 Deep Curly Unit | Easy Install | Beginner Friendly| Step By Step | Ft Dola Hair
Coupon: MARA for 16% off (The biggest code)
The same wig in the video : https://bit.ly/3HEaUob
Hair Length :26 inches
Hair Density: 180%
Frontal Lace Wig : https://bit.ly/3b0uZb4
U part Wig : https://bit.ly/3b2xARK
Fake Scalp Wig : https://bit.ly/37WieMI
HD Lace Wig : https://bit.ly/37W2MAm
Officialweb site : https://www.dolahair.com/
Instagram: https://www.instagram.com/dolahairmall...
----
#dolahair #deepcurlywig #lacefrontalwig
Also please watch in 1080p
Let’s connect ♀️
~~~~~~~~~~~~
INSTAGRAM : https://instagram.com/itznamara?igshid...
~~~~~~~~~~
For any business/ collaboration enquiries
-EMAIL| [email protected]
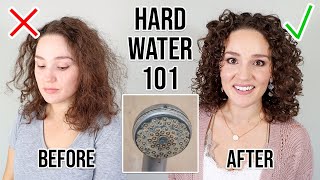
Hey son welcome man. Welcome to my channel. I am katie if you knew, if you're a returning subscriber welcome back what i do so today i am giving you curly side parts slick sleigh like can you all see this? Can you all see this unit? It is giving oh my gosh, i am absolutely obsessed. This gorgeous unit was sent to me by dola hair and if you would like to see how i installed this unit and style it and also hear my thoughts about it, keep on watching. So, as usual, i am just showing you the packaging and that's how it looks um and once you open the box, it says hello gorgeous and this time around, they give you a melt band which is quite new and a little cute teddy bear, which is so Thoughtful and you have a hair clip as well and then your usual edge brush and a wig cap, and also your thank you and note as well, so they did have some new bits in the packaging which is really nice and as usual, you get your um. A bag where the wig is placed - and this time around i am working with their deep curly unit, and this is 13 by 6.. So the construction you get three combs, so you've got two at the side and one in the middle and then you've got one at the bottom as well, and then you also have your elastic strap as well. So i have already gone ahead to cut these um. The tabs out um, i actually thought i was filming, but clearly i wasn't so i yeah so now, i'm just showing you basically yeah, so i just cut around just so to make the wig fit me snug. So that's always the first step you would like to do or you should do, and i also went ahead and parted out um a bit of hair that i will be cutting off as i find the frontal to be a bit too forward so yeah. So that's basically what i'm, showing you guys now to help me see what i i'm doing. I am just going ahead to cut off the excess lace and then i will further go in to section out the hair, so i cut it into about two or three sections, as i do love to install my units in sections, so i will be using my Trusty irs olive oil fix it spray. This is my go-to. I absolutely love this spray um. So yes, i just go ahead and spray that generously onto the lace and then use my rat tail comb to press it down. Once i feel like it's pressed down, i go in with my blow dryer in a medium to cool heat, so i do that all over the hairline and yes i'll, just let you guys watch so so once i feel like it's dried enough, i go in with My eyebrow razor to just cut off the excess lace and i make sure to um, cut it off in jagged lines. Just because you do not want your lace to be cut straight across, as it won't give it a natural look. So i just go in and add some of the spray on top of the lace again once more just to help it blend a bit more and then i go ahead and cut off the lace on the other sides. As i mentioned, i do love doing my installs in sections once i feel it's all melted. I go in and add my elastic band. I leave that on for about 20 to 30 minutes. So, whilst that's cooking, i go in with my cara care wax stick just to basically um help flatten out the top or the sides. So basically the hair really just to make it look flat, as i am going for a very sleek and neat hairstyle today. So yeah um, i'm just go um combing it through with the hot comb just to make sure, and can you see i literally just burnt myself? I always do this to myself. It'S so sad, but oh well, so this time around, i decided to do a side. Part - and as i mentioned, this is a 13 by 6. So, ah, this part in space is just amazing. I absolutely love how deep it goes, but yeah so i'll. Just let you guys enjoy the tutorial, and i will come back later on, and this is how the unit is looking, and this is without me, um, defining the curls and also it is also slightly brushed out so yeah. So i'm going in with my spritz bottle and that only contains water and i'm just spritzing that on just that one part of the hair and um just making sure it is saturated all over and then i start off by brushing the bottom of the hair. First, the ends, rather, i start brushing out the ends and then slowly work my way up to the roots, that's how i detangle, basically, all my units and especially curly units. So, as you can see, the curls are slowly coming back and yeah. So i'll do that for all over the unit these curls look so juicy can. Can you see that it looks so nice? I absolutely love this car pattern like it's definitely giving me a kinky curly vibe, but a bit of deep wave. So i'm not really sure it's basically in between, but it's really lovely. So i have basically gone ahead and just do one side as you can see. That'S the difference. Absolutely love how nice it looks when it's defined, so i'm just gon na go ahead and do the other side and yeah so to further help define these curls i'm using the cantu coconut curling cream. I absolutely love this stuff um. It smells absolutely amazing. So i'm just going to saturate that all over the hair - and this will definitely ensure your curls - will stay defined and basically not frizzy at all, so guys. This is the final look. This is how the install turned out, as you can see, everything's just giving everything is just making sense. I absolutely love the curl pattern on this wig. Let'S just take a quick second and acknowledge this beat like your your girl did that i sure did so. You all know the deal let's get into the specs of this unit. This gorgeous unit was sent to me by a dollar hair, and this is not my first time partnering with them or using their units. I absolutely love their units. This is the deep curly 13x6. As you can see, it goes all the way to the back. So you get that spacious parting, as you can see um, however um on the sides, it's not as deep, so you basically get the six inch in the middle and on the sides. I would probably say you get about from here to here, probably about two three inches, something like that, but yeah. That'S the only thing you should bear in mind that it it isn't 13 by 6, all throughout and um. This is 26 inches. This is also 180 density, so this is quite full and you know with curly hair. If you do anything above 200 density just know, it's gon na be a lot of hair. It'S going to be too much to handle um, so this is just right. It'S perfect! It'S really full really nice. The curls are very bouncy. As you can see, it looks so good, so yeah, those are the specs of this unit. So, let's get into the pros and cons first things: first, the unit took welter bleach um, which is always a plus and plucking. It was a dream, as it was indents um. It was actually pre-plucked. However, i did go in and did some additional plucking love. Love love the curl pattern like, as, as i mentioned before, it is a g. It is giving a bit of kinky curly, but i ain't mad at that at all like it's, so pretty it just goes overall, i'm absolutely happy with the hair the only con. I would say would probably be um the shedding um. It did shed a little bit um, as you know, with curly hair it does tend to shed. This was slightly a bit above what i'm normally used to um, but it isn't a bad like it isn't. Basically too too much shedding. If that's something you partic, you don't particularly like, then at least you know that's how the hairline is looking. This is so gorgeous. I really love this. I absolutely love this. I am, i am in it. So yeah, that's pretty much it. I will make sure to leave all the specs and details down below in the description box so make sure to check it out if you're interested in purchasing this unit. So if you did find this video helpful, please do not forget to hit that like button, and you know help us this out and also do not forget to subscribe and join the fam. I mean the more the merrier and yeah so thanks to dollar hair for sponsoring this video, and thank you for clicking on and hanging out with me today and that's all from me and i'll catch you, my next one bye, you


Comments
iamSimoneC: Gorgeous install! You look pretty
Djediane: Binge watching ❤️